Off-Grid AI Search
Ask anything about preparedness, survival, off-grid living, and self-reliance. Get expert field guidance in seconds.
Query
Choose Your Preparedness Path
Twelve categories, one mission. Start with the essentials or dive into specialized gear built for every scenario.


🛍️ On Sale
View all-
11% off
ReadyWise - 6 CT PRO Meal - Beef Stroganoff
Sale price $7999 Regular price $8987Unit price -
-
13% off
SOG - Throwing Hawks 3-Pack, Black, Nylon Sheath
Sale price $8249 Regular price $9499Unit price -
-
3% off
Magpul Industries - CTR Carbine Stock – Mil-Spec Modified Coyote Brown
Sale price $6295 Regular price $6495Unit price -
-
2% off
Viridian - X5L-RS Gen 3 Green Laser Sight Tactical Light
Sale price $43849 Regular price $44900Unit price -
-
34% off
Kershaw – Runoff Folding Knife, 3.1" Clip Point Blade
Sale price $4595 Regular price $6999Unit price -
-
12% off
Bluetti - PV350D 350W Foldable Solar Panel MC4
Sale price $74900 Regular price $84900Unit price -
-
34% off
Kershaw - Leek 1660KC Assisted Folder XK7 Camo USA
Sale price $8849 Regular price $13499Unit price -
-
17% off
ReadyWise - CP 6 CT Chicken Teriyaki & Rice
Sale price $4794 Regular price $5772Unit price -
-
15% off
Hogue - OverMolded Rubber Bantam Grip for S&W K/L-Frame
Sale price $2549 Regular price $2995Unit price -
-
25% off
Spyderco - Endela Lightweight CPM SPY27 Folding Knife Blue
Sale price $13095 Regular price $17400Unit price -
-
9% off
ReadyWise - Simple Kitchen FD Diced Chicken - 3 CT Case
Sale price $34497 Regular price $37797Unit price -
-
3% off
Magpul - Armorer's Wrench, AR15/M4
Sale price $7749 Regular price $7995Unit price -
-
5% off
ReadyWise - Simple Kitchen Freeze-Dried Sweet Apples - 6 Pouches
Sale price $2989 Regular price $3138Unit price -
-
9% off
ReadyWise - 6 CT Case Simple Kitchen Cosmic Berries - Freeze Dried
Sale price $4594 Regular price $5034Unit price -
-
 21% off
Streamlight - Stinger Replacement Battery Stick
Sale price $2595 Regular price $3291Unit price -
Up to 30% off
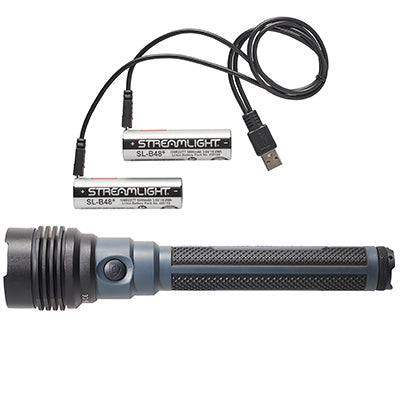
Streamlight - PROTAC HL® 6 Flashlight
Sale priceFrom $19949 Regular price $27751Unit price -
-
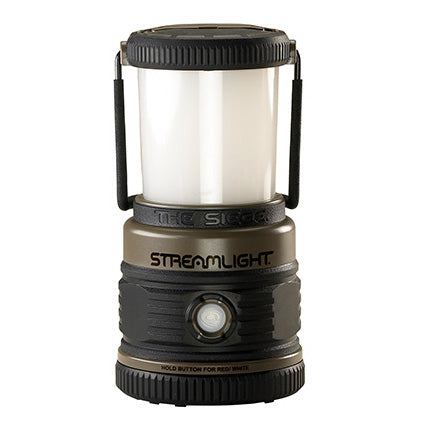
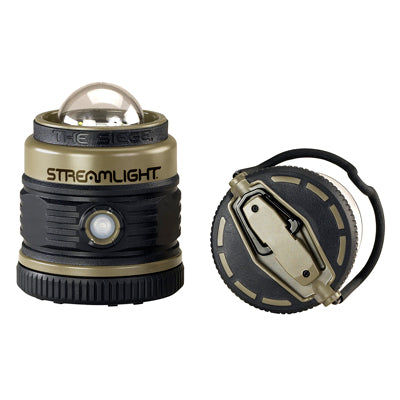
30% off
Streamlight - Siege Compact Waterproof Lantern, Coyote Tan
Sale price $6049 Regular price $8581Unit price -
-
Up to 5% off
Magpul - PC Backpacker Stock Polymer Ruger PC Carbine
Sale priceFrom $14249 Regular price $14995Unit price -
-
3% off
Stroup Knives - Mini 1 Fixed Blade, 1095 Steel, G10 Handle
Sale price $17495 Regular price $17999Unit price -
-
5% off
ReadyWise - 6-Pack Raspberries & Brownie Bites Snacks
Sale price $2989 Regular price $3138Unit price -
-
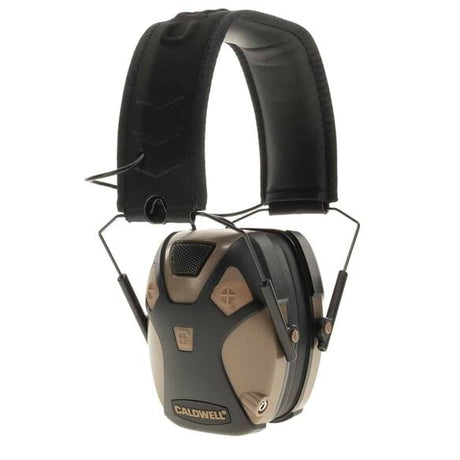
Up to 8% off
Caldwell - E-MAX Pro Electronic Hearing Protection 23dB
Sale price $3599 Regular price $3899Unit price -
-
11% off
Holosun - IRIS-GR2 Dual Green & IR Laser Aiming Device
Sale price $52149 Regular price $58822Unit price -
-
14% off
Hogue - OverMolded Rubber Full Size Grip for Ruger Redhawk - Black
Sale price $2995 Regular price $3495Unit price -
-
Up to 30% off
Streamlight - TLR-1 HL-X Tactical Gun Light, 1500 Lumens
Sale priceFrom $26295 Regular price $37520Unit price -


🌟 NEW ARRIVALS
View all-
 11% off
ReadyWise - Simple Kitchen Butter Powder 3 CT Case - 204 Servings
Sale price $11997 Regular price $13542Unit price -
43% off
ReadyWise - Simple Kitchen Instant Nonfat Dry Milk - Freeze Dried - 3
Sale price $6800 Regular price $11875Unit price -
-
14% off
ReadyWise - Simple Kitchen Powdered Eggs 3 CT Case - 72 Servings
Sale price $26997 Regular price $31497Unit price -
-
 12% off
ReadyWise - Simple Kitchen Orange Drink Mix - 86 Servings
Sale price $8307 Regular price $9447Unit price -
 11% off
ReadyWise - Simple Kitchen Pancake Mix 3 CT Case - 20 Servings
Sale price $8097 Regular price $9132Unit price -
9% off
ReadyWise - Simple Kitchen FD Diced Chicken - 3 CT Case
Sale price $34497 Regular price $37797Unit price -
-
12% off
ReadyWise - Simple Kitchen FD Beef Patty Crumbles - 22 Servings
Sale price $27747 Regular price $31497Unit price -
-
 12% off
ReadyWise - Simple Kitchen Dehydrated Chopped Onions - 250 Servings
Sale price $7797 Regular price $8817Unit price -
12% off
ReadyWise - Simple Kitchen FD Whole Blueberries 3 CT Case - 28
Sale price $19497 Regular price $22047Unit price -
-
12% off
ReadyWise - Simple Kitchen FD Sliced Strawberries 3 CT Case - 18
Sale price $11097 Regular price $12597Unit price -
-
44% off
ReadyWise - Simple Kitchen Instant Nonfat Dry Milk - #10 Can - 50
Sale price $2250 Regular price $3999Unit price -
-
8% off
ReadyWise - 6 CT Case Vegetable Beef Soup
Sale price $2899 Regular price $3144Unit price -
-
8% off
ReadyWise - 6 CT Case Creamy Potato Soup Mix
Sale price $2899 Regular price $3144Unit price -
-
8% off
ReadyWise - 6 CT Case Minestrone Soup
Sale price $2899 Regular price $3144Unit price -
-
8% off
ReadyWise - 6 CT Case Hearty Chili - Gluten-Free Soup Mix
Sale price $2899 Regular price $3144Unit price -
-
8% off
ReadyWise - 6 CT Case Tortilla Soup - Easy to Prepare
Sale price $2899 Regular price $3144Unit price -
-
8% off
ReadyWise - 6 CT Case Chicken Noodle Soup
Sale price $2899 Regular price $3144Unit price -
-
8% off
ReadyWise - 6 CT Case Cheddar Potato Soup
Sale price $2899 Regular price $3144Unit price -
-
8% off
ReadyWise - 6 CT Case Cheddar Broccoli Soup
Sale price $2899 Regular price $3144Unit price -
-
10% off
ReadyWise - Simple Kitchen Cosmic Asteroids Freeze Dried Candy Bites
Sale price $4294 Regular price $4794Unit price -
-
10% off
ReadyWise - 6 CT SK Cosmic Invaders Freeze Dried Candy Bites
Sale price $4294 Regular price $4794Unit price -
-
9% off
ReadyWise - 6 CT Case Simple Kitchen Cosmic Berries - Freeze Dried
Sale price $4594 Regular price $5034Unit price -
-
17% off
ReadyWise - 55 Gallon Water Drum for Water Storage
Sale price $12999 Regular price $15749Unit price -
-
21% off
ReadyWise - 64 Piece Survival Backpack - Camo
Sale price $7999 Regular price $10079Unit price -


SHOP OUR TOP BRANDS

🏆 BEST SELLERS
View all-
-
-
Up to 30% off
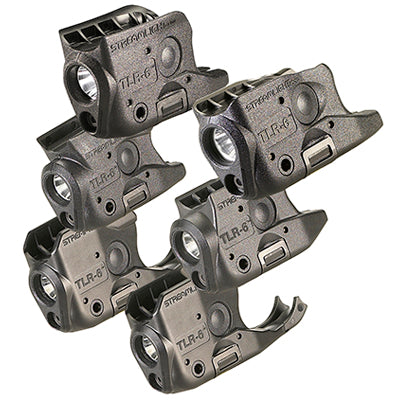
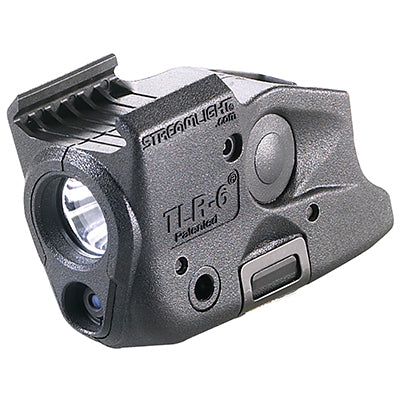
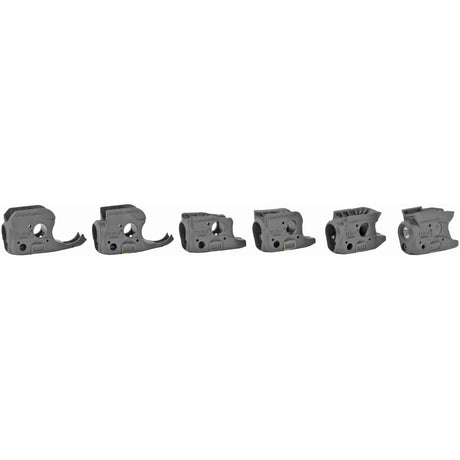
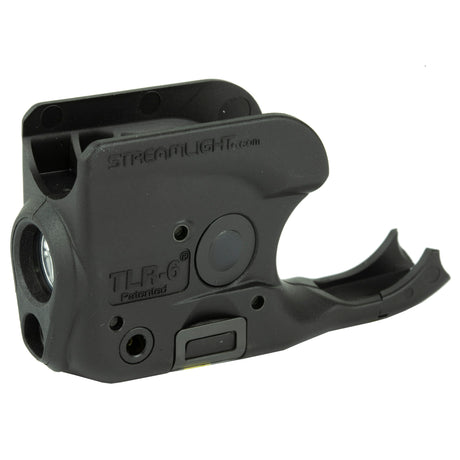
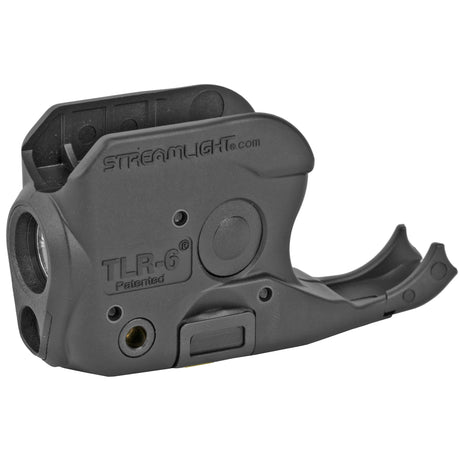
Streamlight - TLR-6® Subcompact Gun Light
Sale priceFrom $11595 Regular price $16523Unit price -
-
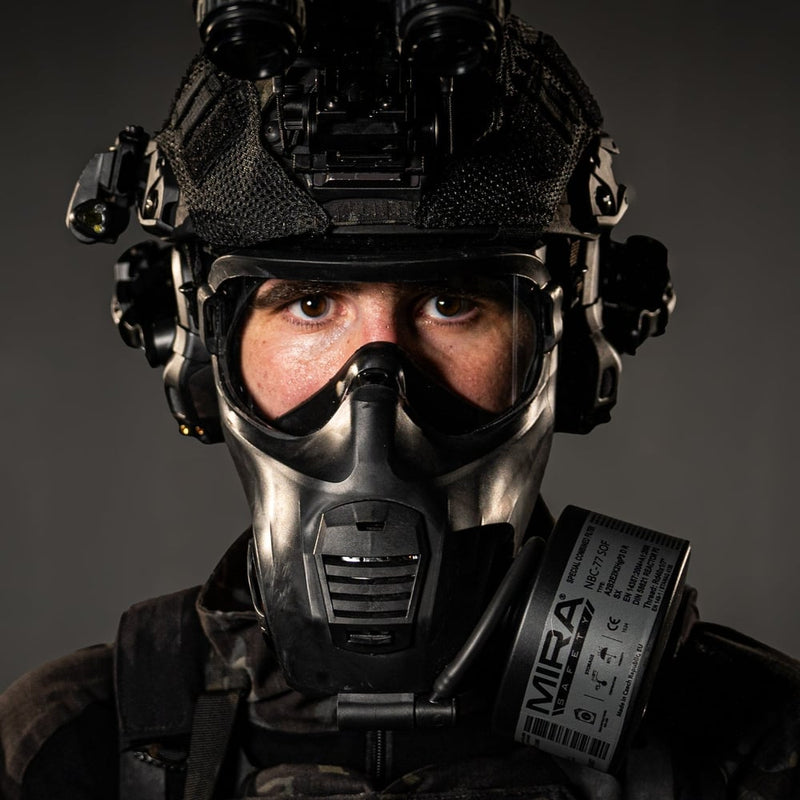
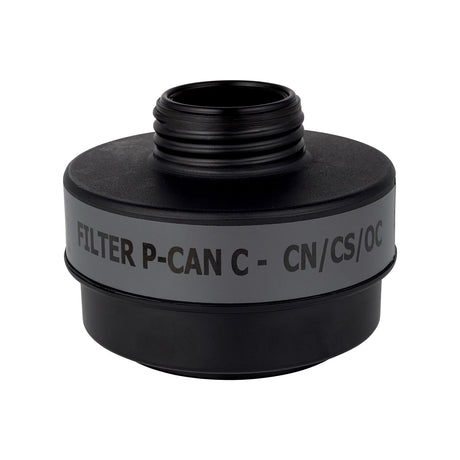
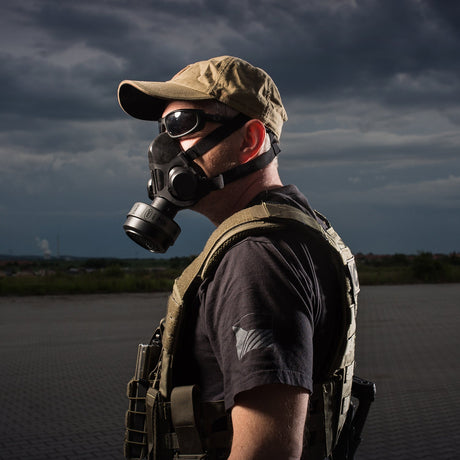
MIRA Safety - P-CAN Compact Filter
Regular price $3995Unit price -
-
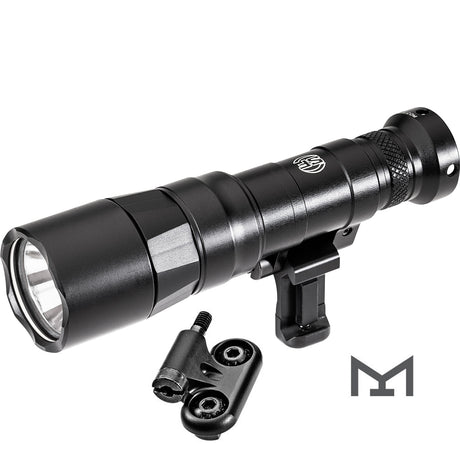
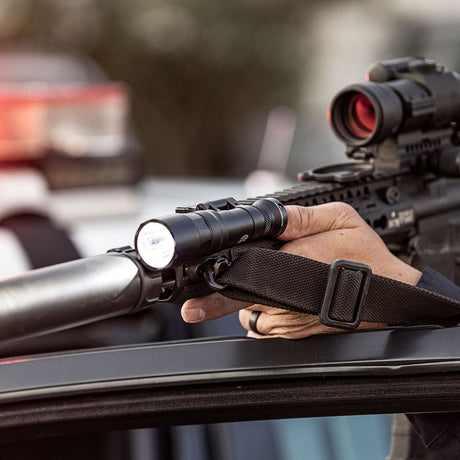
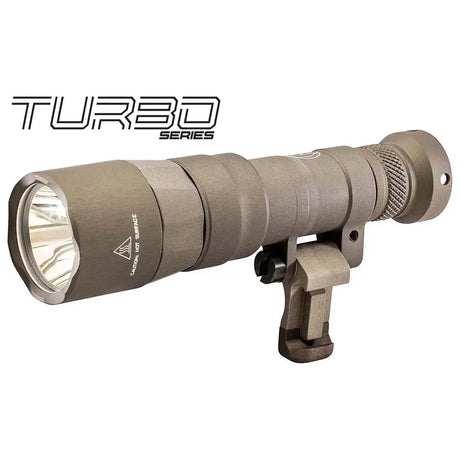
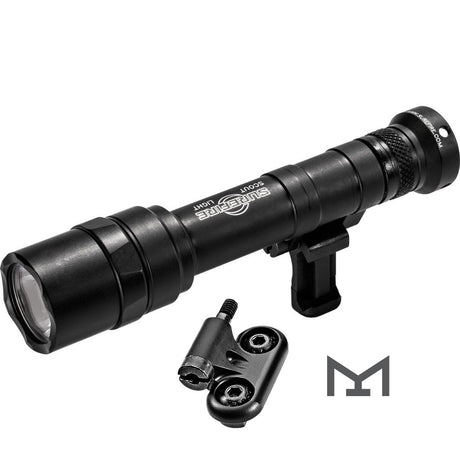
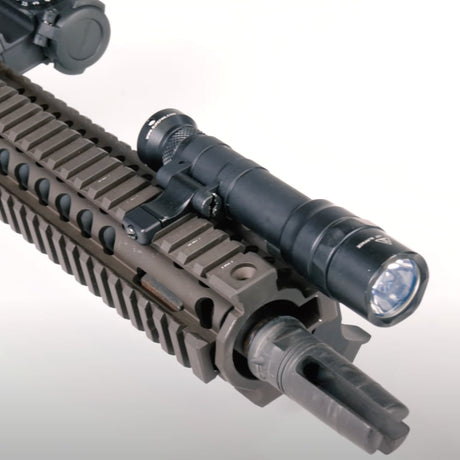
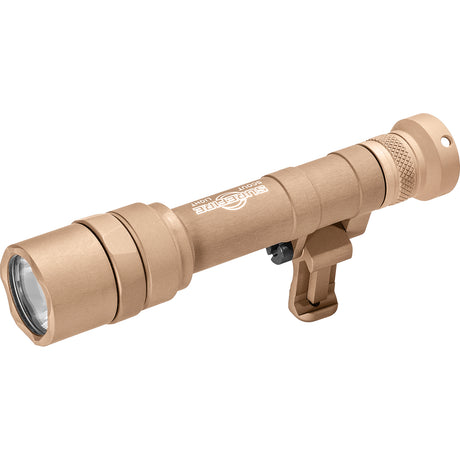
Surefire - M340DFT-PRO Mini Scout Light, Dual Fuel
Regular priceFrom $41900Unit price -
-
-
-
-
-
 Up to 5% off
Mountain Ready - Gold VIP Membership
Regular priceFrom $995Unit price -
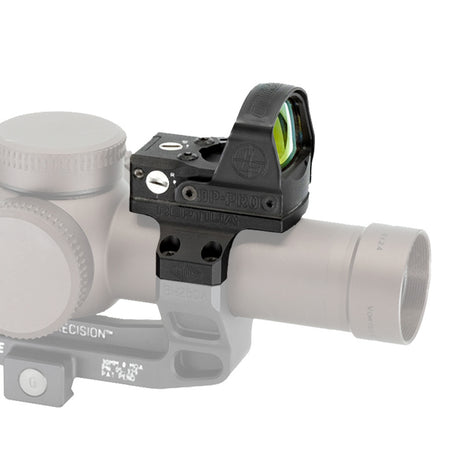
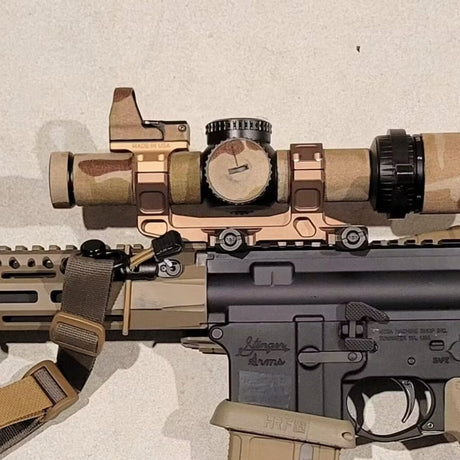
Reptilia - 30MM ROF™-90 for Leupold® Delta Point Pro
Regular price $12149Unit price -
-
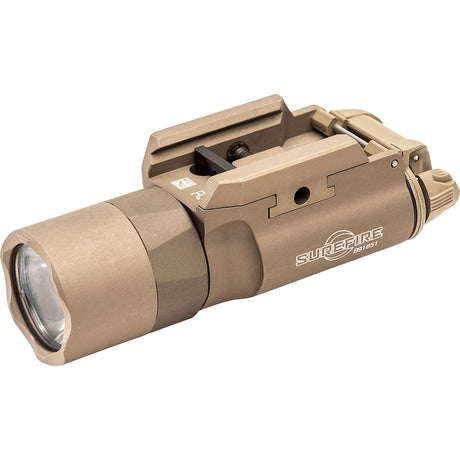
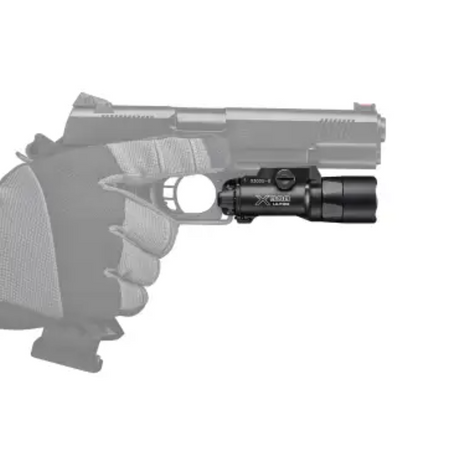
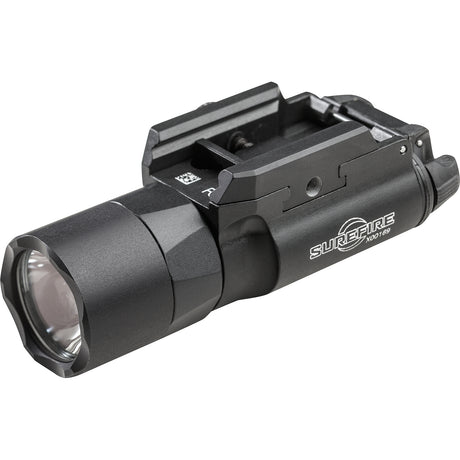
Surefire - X300U-B 1000 Lumen LED Handgun WeaponLight
Regular priceFrom $37900Unit price -
-
-
-
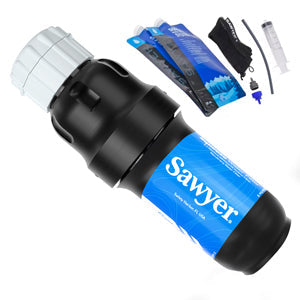
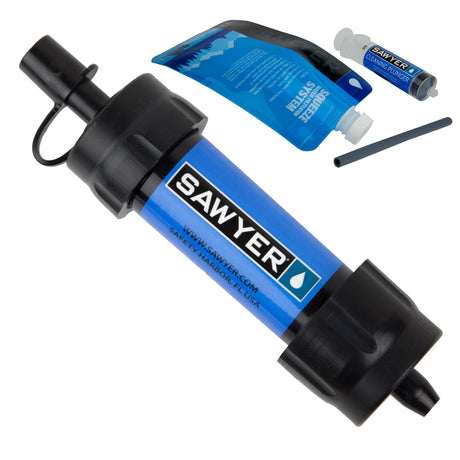
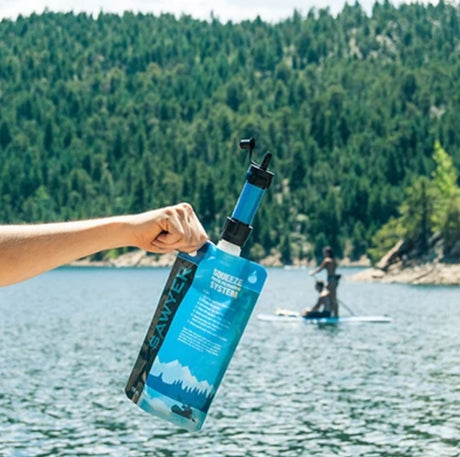
Sawyer - Micro Squeeze Water Filtration System
Regular price $3399Unit price -
-
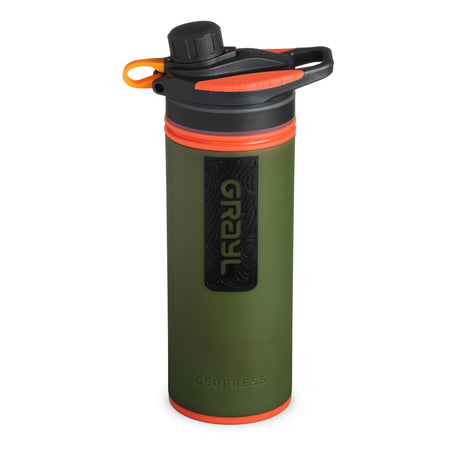
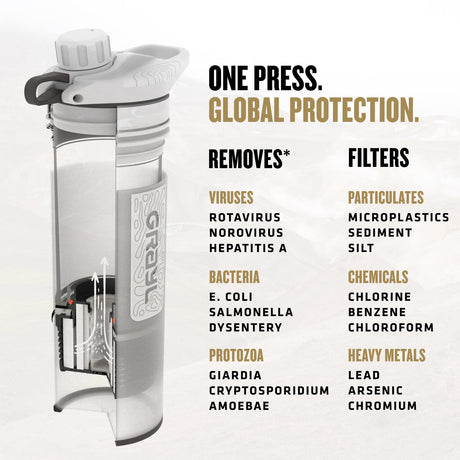
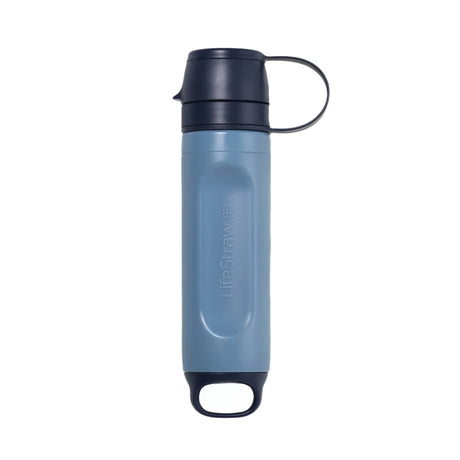
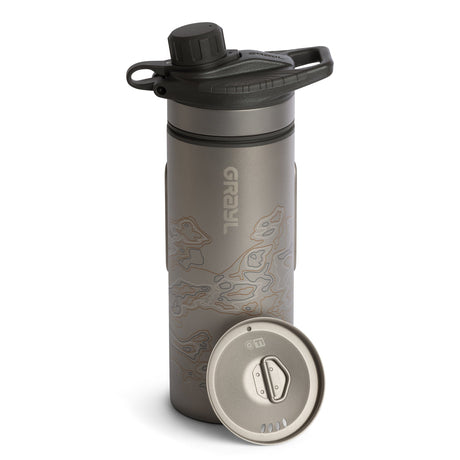
Grayl - 24oz GeoPress Purifier - Covert Series
Regular price $9995Unit price -
-
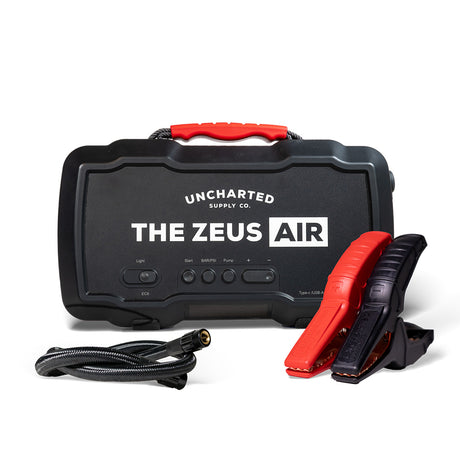
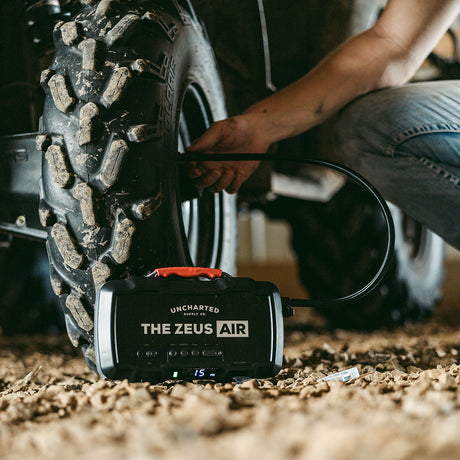
Uncharted Supply Co. - The Zeus Air Jump Starter/Inflator
Regular price $25495Unit price -
-
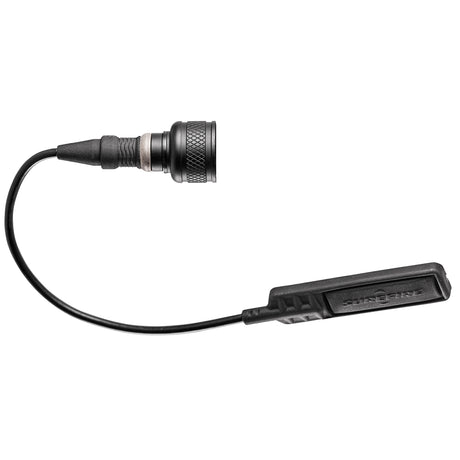
Surefire - UE07 Remote Switch for Scout Light, Black/Tan
Regular price $11900Unit price -
-
Surefire - Scout Light Pro 6V LED Tactical Light 1000 Lumens
Regular priceFrom $37900Unit price -
-
Regular price $2995Unit price
-
-
Up to 16% off
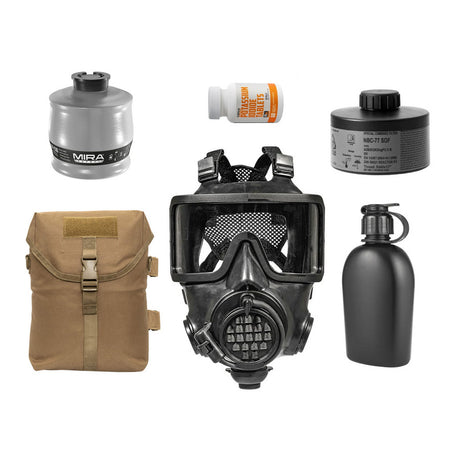
MIRA Safety - EvakPak Plus CBRN Protection Kit
Sale price $47395 Regular price $56395Unit price -
-
-
-
-
-
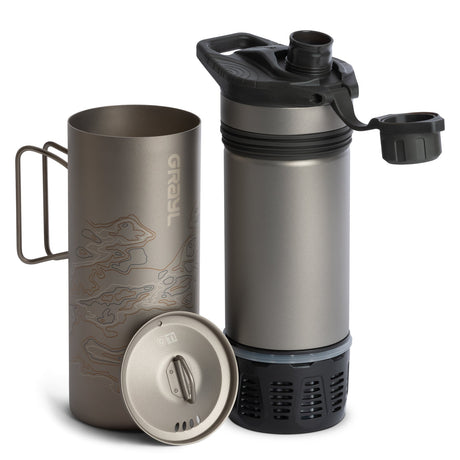
Grayl - 24oz GeoPress Ti Purifier
Regular priceFrom $19995Unit price -
-
SureFire - WARCOMP Flash Hider + Suppressor Adapter
Regular price $17395Unit price -
-
-
-
Dark Energy - Poseidon Nano Compact Portable Battery Pack
Regular price $5999Unit price -
-
Up to 30% off
Streamlight - TLR-7® X Multi-Fuel Tactical Weapon Light
Sale priceFrom $19949 Regular price $28410Unit price -


Mountain Ready FAQs: Everything You Need to Know About Our Gear & Mission
🔹 What is Mountain Ready?
🔹 What is Mountain Ready?
Mountain Ready is a family-owned, veteran-owned small business built by adventurers, campers, and survivalists just like you. We hand-select only the best, most reliable gear from trusted brands you already know and love, ensuring you’re prepared for anything—whether it’s the great outdoors or an emergency situation.
More than just a store, we’re here to guide, educate, and support you with expert advice and proven products. When you shop with us, you’re not just getting top-quality gear—you’re also supporting a local small business that values customer service and real-world expertise.
Why Choose Mountain Ready?
- Curated for Survival: We don’t carry fluff. Every item in our store is hand-picked for performance, reliability, and real-world usefulness. We vet our gear so you don’t have to.
- Veteran-Owned & Field-Tested: We don’t just sell gear — we live the lifestyle. Our team’s hands-on experience informs everything we carry, from bug-out bags to trauma kits to gas masks.
- Multi-Brand Kits & Bundles: While big brands only sell their own line, we build complete systems by combining trusted gear across multiple brands — so you get true compatibility and full-spectrum preparedness.
- Education Comes Standard: Our blog, guides, and videos are packed with clear, actionable info — because knowing how to use your gear is just as important as owning it.
- One-Stop Survival Store: Whether you’re looking for long-term food, gas masks, communications gear, or backcountry tools — you can get it all in one cart, from one trusted source.
- American-Made Priority: We prioritize U.S.-made products wherever possible and back small manufacturers who align with our values of quality and independence.
- Real Support from Real People: Got a question? You’ll get a quick response from someone who actually knows the gear — not a call center script.
We’re proud to serve preppers, campers, first responders, and anyone striving for greater self-reliance. Whether you're building your first go-bag or upgrading your entire system, we’re here to help you stay Equipped. Prepared. Ready.
🔹 What types of products do you carry?
🔹 What types of products do you carry?
At Mountain Ready, we strive to support every pillar of preparedness—not just survival, but self-reliance. Our curated gear lineup covers all 12 pillars:
🛖 Shelter
From rugged bivvies and emergency tents to compact thermal blankets and stormproof sleeping systems, we provide the tools to help you stay protected in any environment.
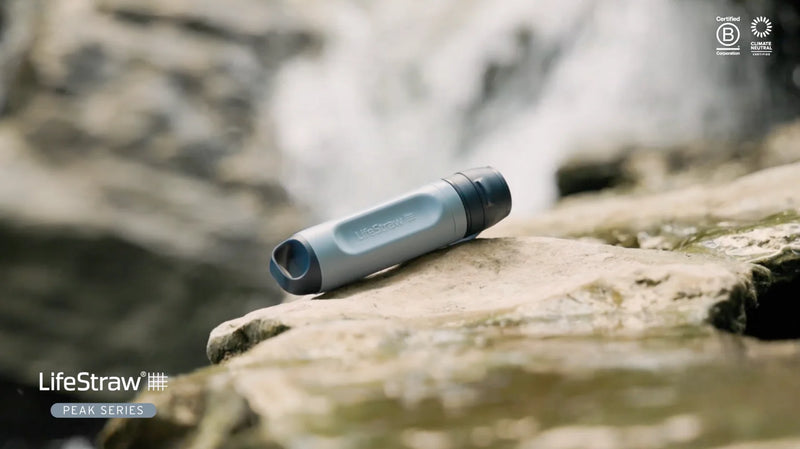
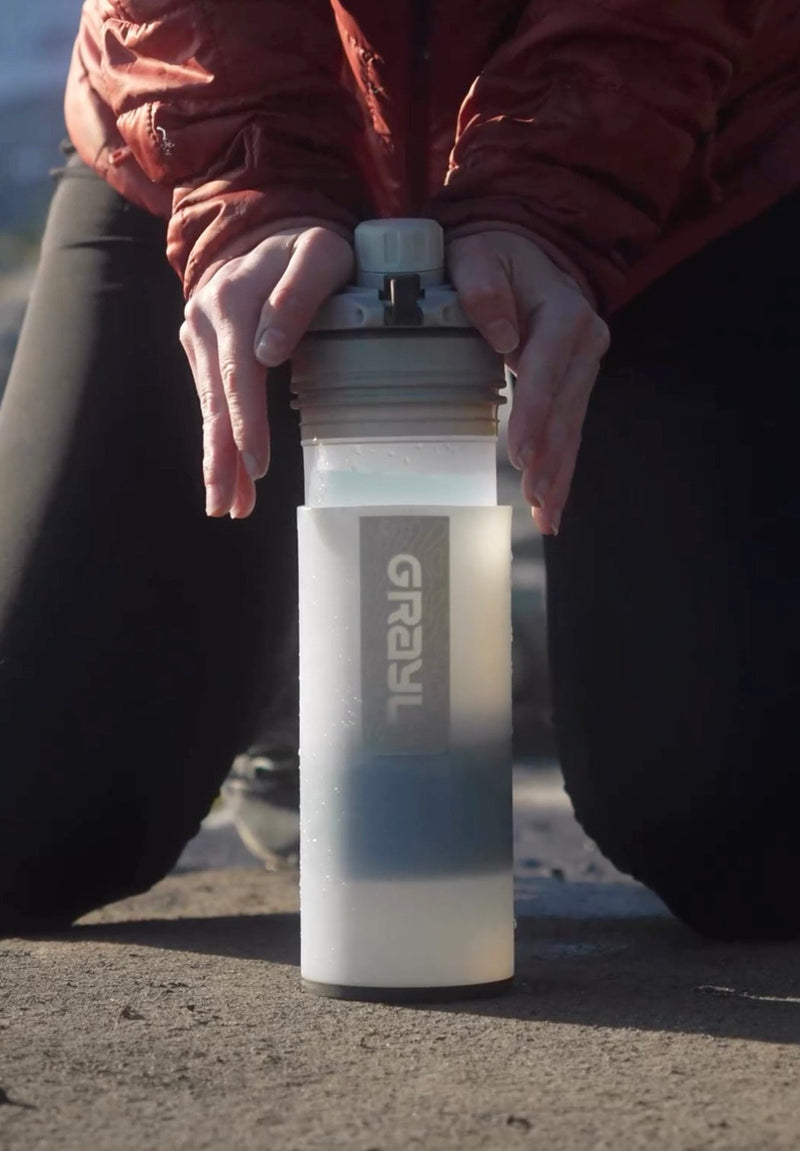
💧 Water
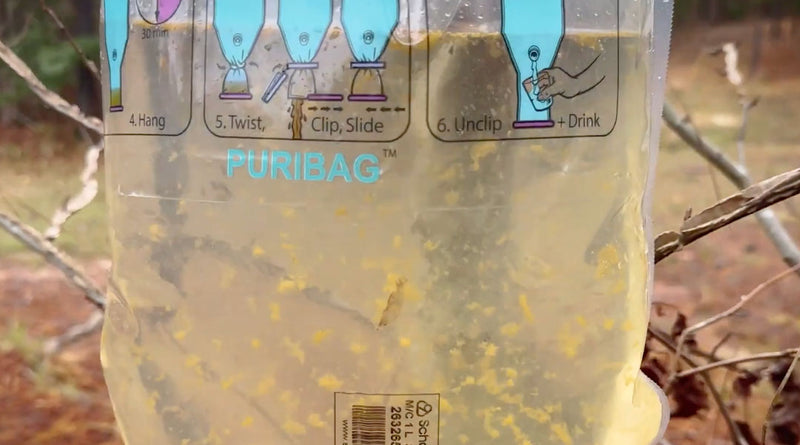
We carry water filtration and purification solutions from industry leaders like LifeStraw, Sawyer, Grayl, and Puribag—including gravity-fed systems, filter straws, and chemical treatments to ensure safe hydration anywhere.
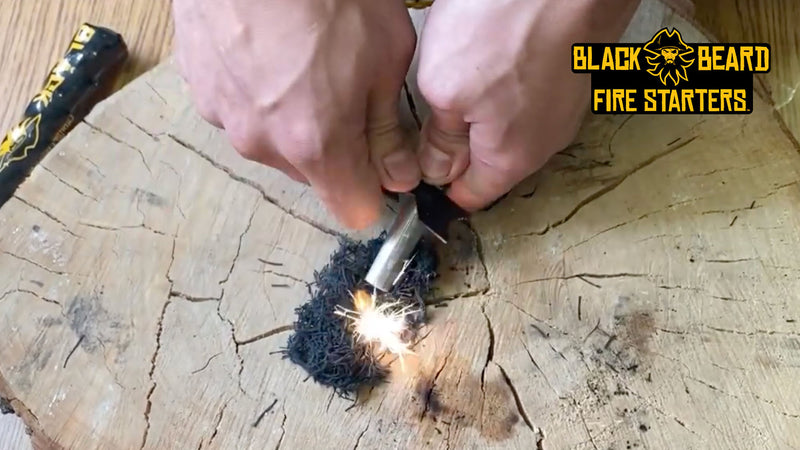
🔥 Fire
Whether you need reliable ignition in wet conditions or long-lasting fire starters, we stock top-tier options like Black Beard Fire Starters and multipurpose fire kits designed for EDC, bugout bags, and survival caches.
🍲 Food
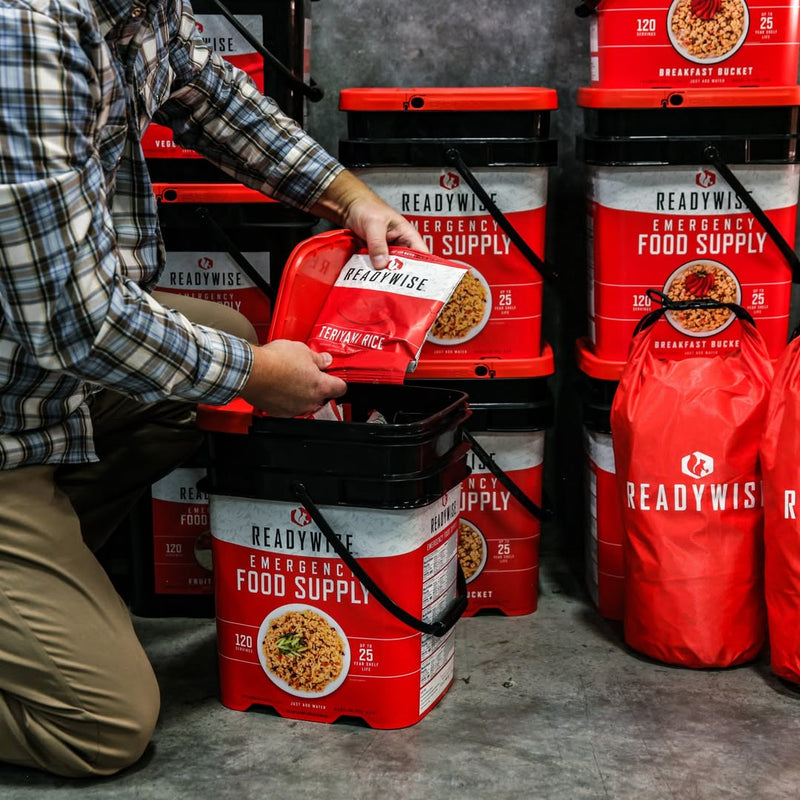
Our long-term food storage includes freeze-dried and ready-to-eat meals from ReadyWise with up to 25-year shelf life—ideal for blackouts, natural disasters, or extended off-grid living.
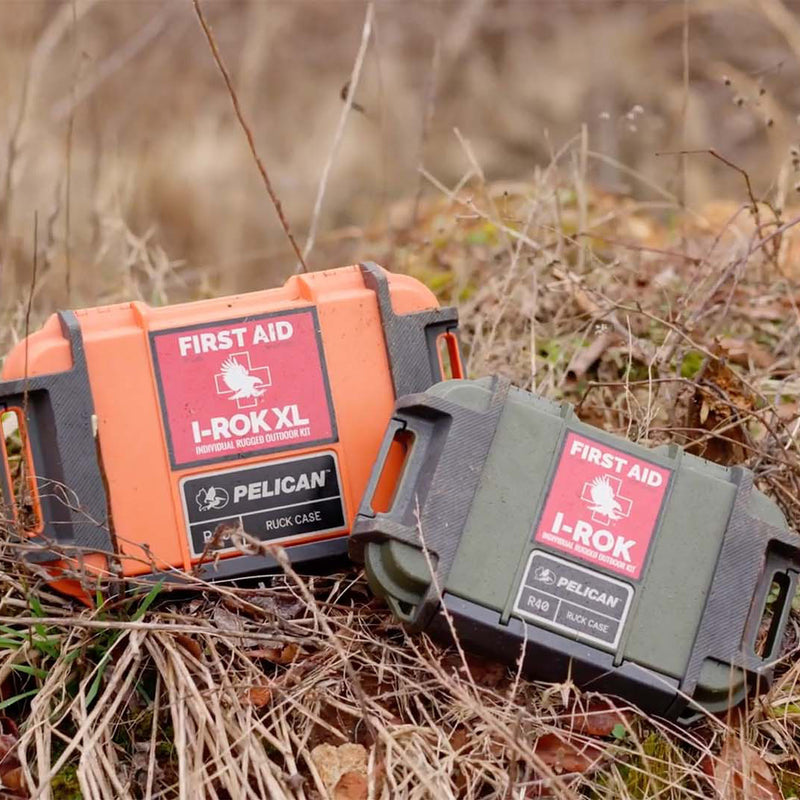
🩹 First Aid
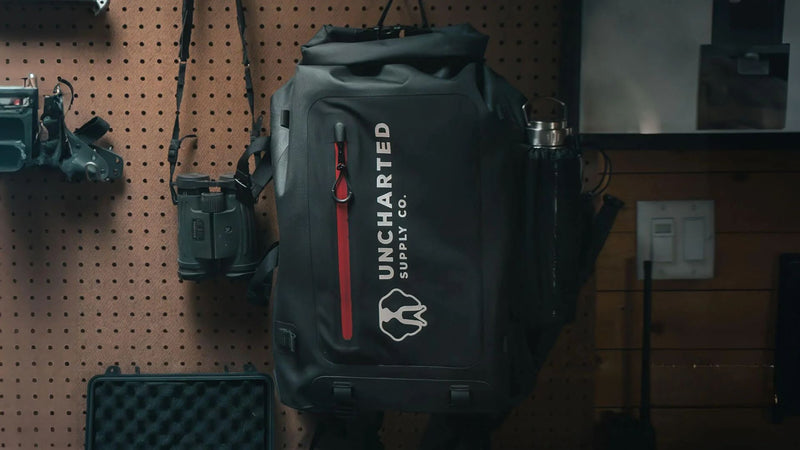
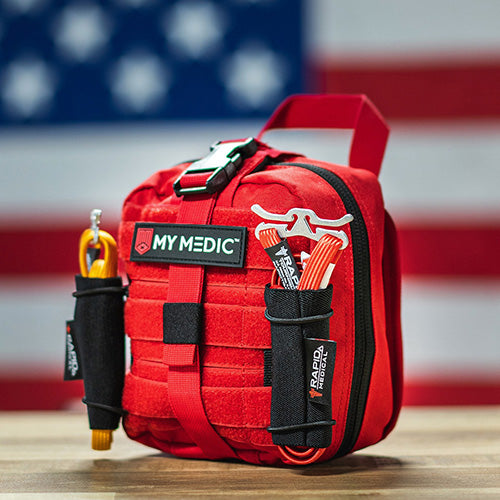
Preparedness starts with immediate care. We stock trauma kits, IFAKs, and advanced med gear from My Medic, North American Rescue, Uncharted Supply Co., and more—everything from tourniquets to surgical-grade dressings and field-ready packs.
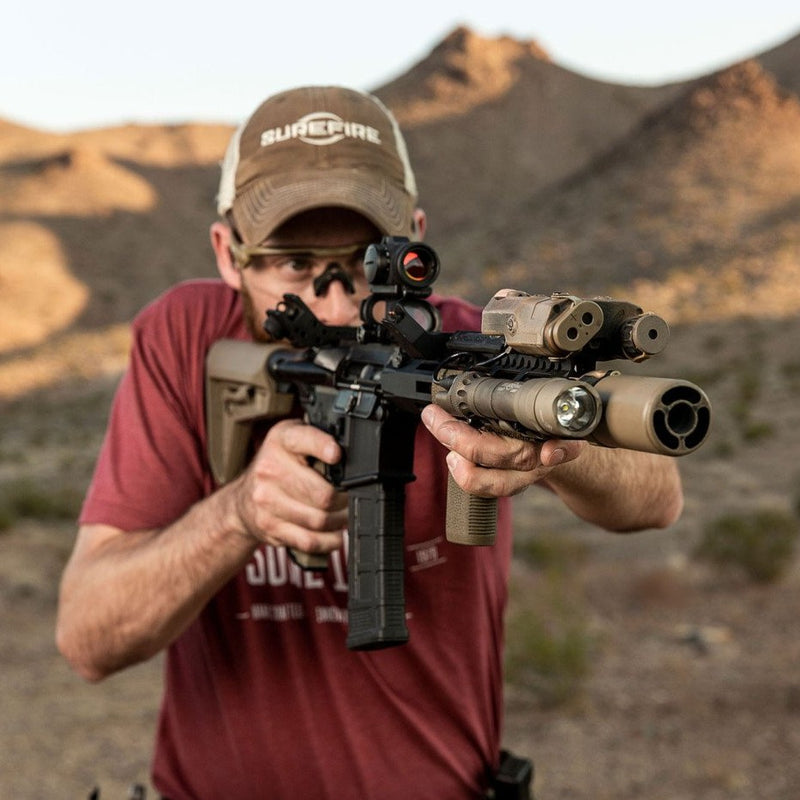
🔐 Security
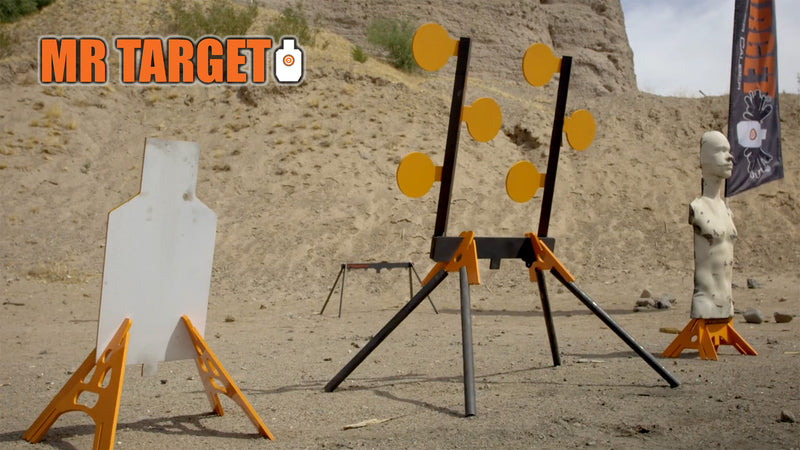
Defensive gear includes accessories and components from trusted firearm brands such as Daniel Defense, Magpul, Sig Sauer, Trijicon, SB Tactical, Reptilia, SOG, and EOTech—plus training-friendly targets by Mr. Target.
📡 Communications (Comms)
Stay connected when it matters most. We provide comms gear suitable for emergency coordination, grid-down scenarios, and team-based operations.
🧭 Navigation
Navigation tools include analog compasses, GPS-ready field gear, and map-reading supplies to help you stay oriented when technology fails.
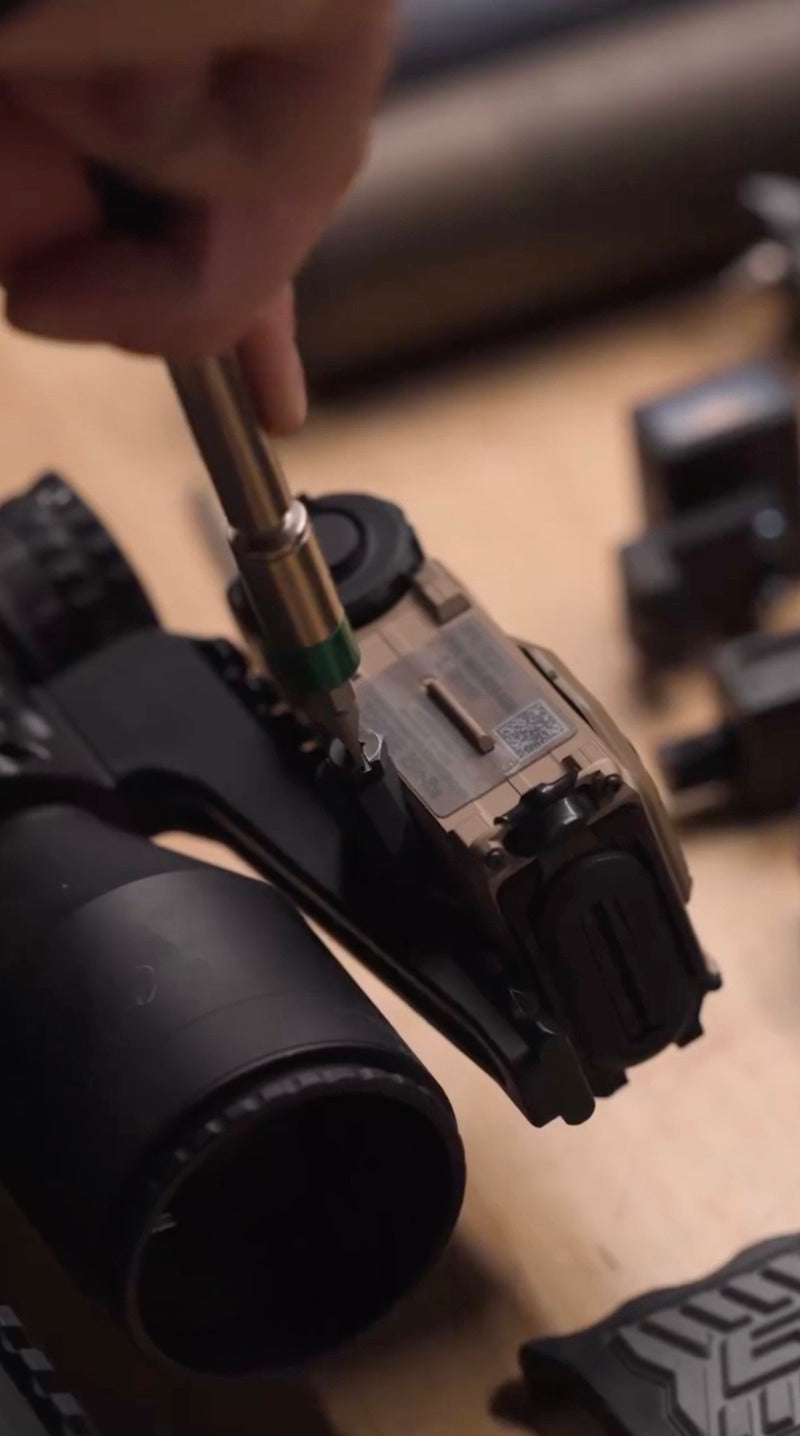
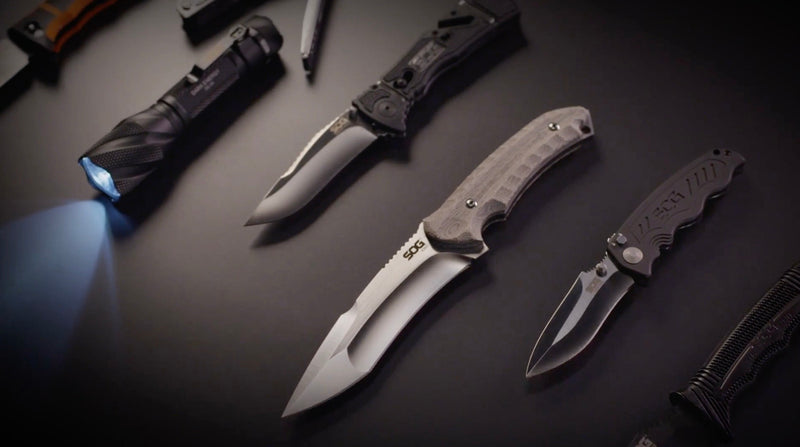
🛠️ Tools
From field maintenance to survival essentials, we stock knives, multi-tools, cleaning kits, and tactical tools from brands like Real Avid, SOG, and Pelican—rugged, mission-ready, and built to last.
⚡ Energy
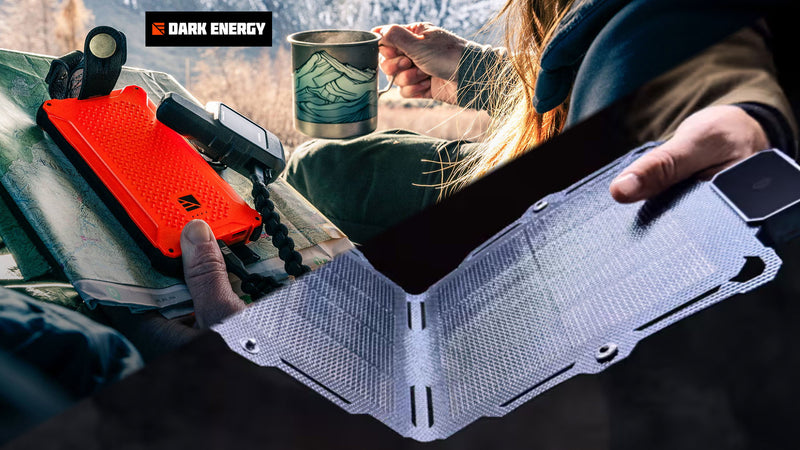
Stay powered with cutting-edge energy solutions from Dark Energy, Bluetti, Streamlight, Uncharted Supply Co., and SureFire. We offer portable solar panels, power stations, ruggedized battery packs, and rechargeable lighting systems.
🧠 Skills
We support self-reliance through curated educational tools, survival kits, and training-focused bundles to help you develop critical skills—whether you’re just starting out or teaching others.
🤝 Community
Mountain Ready believes preparedness isn’t a solo mission. We foster connection through affiliate partnerships, customer education, and collaborations that strengthen resilient communities.
We proudly carry well-known, trusted brands in the preparedness and tactical industries. Every item in our store is hand-selected—no random dropshipping or gimmicks. If we wouldn’t trust it in a real emergency, you won’t find it here.
🔹 Do you offer free shipping?
🔹 Do you offer free shipping?
Yes! We offer free shipping on orders over $150 within the Continental U.S. Some restrictions apply, please see our Shipping Policy for all the details.
🔹 Are your products American-made?
🔹 Are your products American-made?
Not all of our products are American made; however, whenever possible, we prioritize gear made in the USA—especially from small manufacturers that align with our focus on quality, resilience, and independence.
🔹 How can I learn more about using these products?
🔹 How can I learn more about using these products?
At Mountain Ready, we believe being equipped is only half the battle—knowing how to use your gear is just as important as owning it. That’s why we provide a growing library of educational content including:
- Blog posts with actionable preparedness advice
- Gear guides and product breakdowns
- Video content covering real-world use cases, demos, and survival skills
We also share regular tips, reviews, product launches, and field-tested gear updates across our social media channels. Follow us to stay sharp, informed, and part of the Mountain Ready community:
Whether you're a beginner building your first go-bag or a seasoned prepper looking to refine your kit, our content is made to support your journey—because when you're mountain ready, you're mission ready.
🔹 Where are you located?
🔹 Where are you located?
While we currently operate online only, we’re actively exploring plans to open our first brick-and-mortar store in Seneca, South Carolina—right in the heart of the Blue Ridge Mountain foothills.
In the meantime, Mountain Ready operates from several key locations:
- corporate office is based in Seneca, South Carolina
- warehouses in Seneca, South Carolina and Fort Worth, Texas
This setup allows us to serve customers across the U.S. quickly and efficiently, while keeping our roots grounded in the preparedness lifestyle we live every day.
🔹 What payment methods do you accept?
🔹 What payment methods do you accept?
We offer a wide range of secure and convenient payment options to make your checkout experience as smooth as possible. Currently, we accept:
- 💳 Visa, Mastercard, American Express, Discover, JCB, Diners Club
- Google Pay / Apple Pay (varies by location)
- Buy now, pay later with Sezzle - Learn more.
- 💰 Crypto Payments via Bankful.
We proudly accept Bitcoin (BTC) and Ethereum (ETH) through Bankful’s secure wallet-to-wallet checkout.
All transactions are SSL-protected for your peace of mind.
- Please note: Crypto payments are final sale and non-refundable. See our Refunds & Returns Policy for details.
Whether you're stocking up for emergencies or upgrading your gear, we make it easy, fast, and secure to complete your order using the payment method that works best for you.
🔹 Can I contact you if I need help?
🔹 Can I contact you if I need help?
Absolutely! Initiate a chat with us.
Have questions about emergency preparedness or need help selecting the right gear for your situation? Mountain Ready is here to help.
Contact Us: https://mountainready.online/pages/contact
About Mountain Ready: https://mountainready.online/pages/about-us
VIP Membership (Save on Every Purchase): https://mountainready.online/pages/vip-memberships
All Blog Guides: https://mountainready.online/blogs/news
Top Brands We Carry: https://mountainready.online/pages/top-brands
🔹 Do you have gift discounts or membership perks?
🔹 Do you have gift discounts or membership perks?
Absolutely. At Mountain Ready, we believe in rewarding those who prioritize preparedness. We offer several ways to save and stay connected:
🎁 First-Time Visitor Discount
New to Mountain Ready? Subscribe to our newsletter and get 12% off your first order—no minimum required. It’s a great way to kickstart your kit or grab that one piece of gear you’ve been eyeing.
🏕️ VIP Membership Perks
Our VIP subscriber program is free to join and offers ongoing access to:
- Exclusive discounts and private sales
- Early access to new product drops and limited stock gear
- Special promotions tied to seasonal events, emergencies, and holidays
- Giveaways and gear drops available only to email or SMS subscribers
🎫 Gift Discounts & Seasonal Offers
Throughout the year, we offer curated gift bundles, holiday discounts, and flash sales on popular items like first aid kits, emergency food, water filters, and tactical gear. Perfect for birthdays, holidays, or just outfitting someone you care about.
Whether you're shopping for yourself, a fellow prepper, or looking to build a thoughtful emergency gift, Mountain Ready makes it easy to gear up and save.
Mountain Ready Emergency Preparedness FAQ — Your Complete Guide to Disaster Readiness
🎒 Best Emergency Preparedness Kits & Bundles
🎒 Best Emergency Preparedness Kits & Bundles
Q1: What's the best emergency preparedness kit for a family of four that covers at least 72 hours?
A 72-hour emergency kit should contain enough supplies to sustain your family for at least three days without access to outside resources. According to FEMA guidelines, the best kits include water (one gallon per person per day), non-perishable food, first aid supplies, medications, important documents, cash, communication devices, and basic tools.
Water & Food Storage: The foundation of any 72-hour kit is hydration and nutrition. Store at least 12 gallons of water for a family of four (3 gallons per person for 4 days), along with a water purification backup like water purification tablets or a portable filter. Include calorie-dense, non-perishable foods that require no cooking: granola bars, peanut butter, dried fruit, nuts, and ready-to-eat meals.
Medical & Safety Supplies: Include a comprehensive first aid kit with bandages, antiseptic, pain relievers, and any prescription medications in original containers with labels. Add important documents in a waterproof container. Battery-powered or hand-crank flashlights and a battery-powered emergency radio are essential for power outages and emergency alerts.
Practical Considerations: Choose a kit that fits your family's specific needs. A single large container works for home storage, while smaller backpack-style kits work better for evacuation scenarios.
Related topics: Family Emergency Readiness Solutions | Emergency Medical & First Aid Supplies | Emergency Communication & Survival Radios
Explore: First Aid Kits | Emergency Food | Bug-Out Bags
Q2: I'm looking at complete emergency kits from Mountain Ready - how do they compare to Ready America or Sustain Supply Co?
Mountain Ready kits are built with a fundamentally different philosophy than mass-market competitors. While Ready America and Sustain Supply Co offer adequate baseline products, they prioritize broad market appeal and cost reduction over specialization and quality.
Quality Differences: Ready America kits typically use entry-level components designed for one-time use. Mountain Ready sources professional-grade equipment across all categories: medical-grade first aid supplies, proven water filtration systems from brands like Sawyer and LifeStraw, and tested backup power solutions from EcoFlow and Bluetti.
Customization vs. Generic: Mass-market kits are one-size-fits-all. Mountain Ready offers regional customization options and modular kit designs that let you add specialized components for your specific hazards—wildfire evacuation gear, winter storm supplies, or hurricane preparation equipment.
Expert Support: Mountain Ready provides educational resources, detailed blog guides, and customer support from people who actually use the gear they sell. As a veteran-owned company, we understand the difference between products that work in theory versus products that work under stress.
Related topics: Essential Survival Gear for Beginners | Family Emergency Readiness Solutions
Explore: Best Sellers | Top Brands
Q3: What should I look for in a comprehensive emergency preparedness bundle that's actually worth the money?
A quality emergency preparedness bundle should address what survival experts call the "Rule of Threes"—you can survive 3 minutes without air, 3 hours without shelter in harsh conditions, 3 days without water, and 3 weeks without food.
Essential Components to Verify:
- Water: At minimum, 1 gallon per person per day stored, plus a backup purification method
- Food: Calorie-dense, shelf-stable options with 5+ year shelf life from reputable manufacturers like ReadyWise
- Medical: IFAK-quality first aid supplies rather than basic bandage assortments
- Light & Power: Reliable flashlights with proven brands and extra batteries
- Communication: A quality emergency radio with NOAA weather alerts
Red Flags to Avoid: Bundles filled with "bonus items" like cheap compasses, flimsy ponchos, or novelty survival cards are padding cost, not value. If the bundle doesn't list specific brands and specifications, assume the worst.
Related topics: Backup Power & Energy Solutions | Water Storage & Purification Equipment
Explore: The 12 Pillars of Preparedness | Emergency Gear & PPE
Q4: Are those all-in-one emergency kits on Amazon actually good or should I buy from a specialist like mountainready.online?
Mass-market emergency kits sold on Amazon range from excellent to dangerously inadequate. The problem isn't the platform—it's determining quality without opening the package or testing contents.
Why Mass-Market Kits Often Disappoint:
Quality Inconsistency: Amazon sellers prioritize profit margins over reliability. Many kits include expired foods, low-quality batteries that drain quickly, bandages that won't adhere properly, and water containers that fail during storage.
Incomplete Solutions: Generic kits try to serve everyone and end up serving no one well. They typically lack customization for family size, medical needs, or regional hazards.
Lack of Expertise: Mass-market sellers provide minimal guidance on kit assembly, rotation, maintenance, or actual usage.
Specialist Retailer Advantages: Mountain Ready kits are built on FEMA guidelines and American Red Cross standards, with field-tested components chosen for reliability. We provide detailed educational guides on maintenance, rotation schedules, and scenario-specific customization.
Related topics: Essential Survival Gear for Beginners | Family Emergency Readiness Solutions
Explore: About Mountain Ready | VIP Membership Benefits
Q5: What's the difference between a 72-hour kit and a 2-week emergency preparedness bundle in terms of contents?
The difference between 72-hour and 2-week kits isn't just more of the same supplies—it's a fundamental shift in preparedness philosophy.
72-Hour Kit Philosophy: These kits assume infrastructure will return within three days. Water storage can be minimal because municipal supply will resume. Food needs are simple—energy bars and ready-to-eat meals. The kit should be portable enough for evacuation.
2-Week Kit Philosophy: Extended outages require thinking about resupply, not just storage. Two weeks of water for a family of four is 56+ gallons—impractical to store alone. Instead, you need water procurement systems and serious filtration systems like Sawyer or LifeStraw.
Food Scaling: Two-week food supplies shift toward longer-term storage options. ReadyWise provides better caloric density per pound. You'll need cooking capability—portable stoves, fuel, and fire-starting gear.
Power Considerations: A 72-hour kit might include flashlights and spare batteries. A 2-week kit requires serious power backup—solar panels, power stations, or generators.
Related topics: Backup Power & Energy Solutions | Long-Term Food Storage | Disaster-Specific Preparedness
Explore: ReadyWise Food Buckets | Solar Panels & Generators
Q6: I need an emergency kit for my apartment that doesn't take up much space - what are my best options?
Apartment preparedness requires creative space utilization and multi-functional gear choices.
Space-Efficient Storage Strategies:
Vertical Storage: Use closet door organizers, under-bed storage containers, and the backs of doors. Consider modular bag systems that stack efficiently.
Multi-Use Items: A quality headlamp provides hands-free light and doubles as room illumination. Water filter bottles like Grayl store water and purify it simultaneously.
Core Apartment Kit Contents:
- Water: 3-day supply in stackable containers plus a portable filter
- Food: Compact freeze-dried options over bulky canned goods
- Power: Portable power station
- Medical: Comprehensive compact first aid kit
- Light: Multiple flashlights and headlamps
Related topics: Everyday Carry (EDC) Tools | Emergency Shelter & Protection Gear
Q7: How do I choose between basic, premium, and deluxe emergency preparedness kits?
The basic/premium/deluxe distinction usually reflects both quantity of supplies and quality of components.
Basic Kits - Entry-Level Preparedness:
Basic kits typically cover one person for 72 hours with minimum viable supplies. These work for budget-conscious beginners, but plan to upgrade components over time.
Premium Kits - Serious Preparedness:
Premium kits upgrade component quality significantly. You'll find brand-name water filtration, better food options from manufacturers like ReadyWise, quality lighting from Streamlight, and more comprehensive first aid supplies. This tier represents the best value for most families.
Deluxe Kits - Comprehensive Preparedness:
Deluxe options add redundancy, extended supplies (2+ weeks), and specialized equipment. Expect solar charging capability, professional-grade medical supplies, and communication equipment beyond basic radios.
Decision Framework:
- Budget priority: Start basic, upgrade strategically
- Family with children or elderly: Premium minimum
- Medical dependencies or high-risk area: Deluxe with redundancy
Related topics: Essential Survival Gear for Beginners | Family Emergency Readiness Solutions
Explore: Best Sellers | VIP Membership for Discounts
Q8: What's missing from most pre-made emergency kits that I should add separately?
Even quality pre-made kits can't anticipate your family's specific needs.
Almost Always Missing:
Prescription Medications: No kit includes your family's specific medications. Build a 30-day rotating supply. Read more about prescription medication preparation.
Personal Documents: Birth certificates, insurance policies, property deeds, passports in waterproof containers.
Cash: ATMs fail during power outages. Keep $500-$1,000 in small bills.
Often Inadequate:
Water Purification: Add a serious filter system like Sawyer or LifeStraw and purification tablets.
Quality Lighting: Replace generic flashlights with proven brands like Streamlight.
Trauma Supplies: Upgrade to IFAK-style trauma supplies if professional medical help might be delayed.
Frequently Overlooked:
- Sanitation supplies
- Pet supplies
- Comfort items for children
- Seasonal gear for cold weather
Related topics: Emergency Medical & First Aid Supplies | Disaster-Specific Preparedness
Explore: First Aid Supplies | Emergency Accessories
👨👩👧👦 Family Emergency Readiness Solutions
👨👩👧👦 Family Emergency Readiness Solutions
Q1: How do I prepare my family of five for emergencies without overwhelming my kids or scaring them?
Emergency preparedness should feel empowering, not frightening—for both you and your children. The key is normalizing preparedness as responsible planning rather than fear-based reaction, and involving children at age-appropriate levels.
Start With Everyday Emergencies: Begin conversations around situations children can relate to—power outages, storms, or getting separated at a store. These smaller scenarios build comfort with emergency thinking without introducing catastrophic possibilities. As children demonstrate understanding, gradually introduce larger-scale preparedness concepts.
Age-Appropriate Involvement:
- Ages 3-5: Focus on knowing their full name, address, and parent phone numbers. Make emergency supplies "treasure hunts" where they help gather flashlights and snacks.
- Ages 6-9: Introduce the family meeting point concept, basic fire safety, and helping pack their own small go-bag with comfort items.
- Ages 10-13: Include them in family planning discussions, teach basic first aid skills, and give them real responsibilities in emergency drills.
- Ages 14+: Involve them in supply selection, maintenance schedules, and scenario planning. They can handle adult-level information with proper context.
Budget-Friendly Approach: You don't need to buy everything at once. Build preparedness over 6-12 months, allocating $50-100 monthly toward supplies. Start with water and food storage, add first aid supplies, then tackle communication and power backup over time. Involve kids in shopping decisions—they're more invested in supplies they helped choose.
Create a Family Emergency Plan: Develop a complete family emergency plan with meeting points, out-of-area contact person, and communication protocols. Practice regularly enough that responses become automatic, but not so often it becomes stressful.
Related topics: Emergency Preparedness Kits & Bundles | Essential Survival Gear for Beginners
Explore: Complete Family Emergency Plan Guide | Go Bags
Q2: What's the best way to get children involved in emergency preparedness without scaring them?
Children pick up on parental anxiety quickly, so your approach matters as much as your message. Frame preparedness as a family adventure and responsibility rather than fear-based protection from dangers.
Make It Fun and Practical:
Camping Connection: Position emergency skills as camping skills. Learning to use a headlamp, starting a fire safely, purifying water, and cooking simple meals are survival skills that also make great camping memories. Practice in low-stakes environments before discussing emergency applications.
Kid-Sized Responsibilities: Give each child an emergency job they can own. The youngest might be responsible for grabbing their special comfort item and helping with the family pet. Older children can manage flashlights, help carry supplies, or be in charge of the family emergency radio.
Pack Their Own Bag: Help each child create a personal go-bag with essentials plus comfort items—a favorite book, small toy, family photo, and snacks they enjoy. When children have ownership over their supplies, they feel empowered rather than passive.
Practice Through Play:
- "Pretend the power is out" evenings with flashlights, board games, and camping-style dinners
- Scavenger hunts to find emergency supplies around the house
- Fire escape practice framed as a family drill, not a scary exercise
- Basic first aid practice with bandaging each other's "injuries"
Language Matters: Avoid doom-focused language. Instead of "When disaster strikes," try "If we ever need to help our family." Focus on what you can do rather than what might go wrong. Emphasize that preparation means you're ready for anything, which means there's nothing to be scared about.
Related topics: Emergency Preparedness Kits & Bundles | Emergency Medical & First Aid Supplies
Explore: 12 Pillars of Preparedness
Q3: I need a family emergency plan that covers school, work, and home locations - where do I start?
A comprehensive family emergency plan addresses the reality that disasters don't wait for everyone to be home together. Start by mapping your family's daily geography, then build protocols for each scenario.
Step 1: Map Your Family's Locations
List every place family members regularly spend time: home, schools, workplaces, daycare, after-school activities, relatives' homes. Note commute routes and typical schedules. Identify which locations are in different hazard zones (flood plains, wildfire areas, etc.).
Step 2: Establish Meeting Points
Create a tiered meeting point system:
- Primary (neighborhood): A specific location within walking distance of home—a neighbor's yard, community center, or church parking lot
- Secondary (community): A location 3-5 miles from home in case the primary area is inaccessible—library, shopping center, or school
- Out-of-area contact: A trusted person outside your region who can serve as a communication hub when local phone lines are overloaded
Step 3: School and Work Protocols
Contact each school to understand their emergency procedures: lockdown protocols, evacuation destinations, parent notification systems, and student release policies. Know your workplace evacuation plans and whether you're expected to shelter-in-place or evacuate. Decide in advance: does a parent leave work to get children, or do children stay at school until safe pickup?
Step 4: Communication Plan
Assume cell towers may be overloaded or down. Establish backup communication:
- Two-way radios for family members within range
- Text messaging (works better than calls during network congestion)
- Out-of-area contact who can relay messages
- Family emergency radio for news and weather alerts
Step 5: Document and Practice
Write your plan down—printed copies for each family member, digital copies stored in cloud backup. Practice quarterly with different scenarios: everyone at home, parents at work with kids at school, mid-commute scenarios.
Related topics: Emergency Communication & Survival Radios | Vehicle, Travel & Bug-Out Preparedness
Explore: Complete Family Emergency Plan Guide | Radios & Comms
Q4: What emergency supplies do I need for a family with an infant and elderly grandparent living with us?
Multi-generational families require careful attention to the specific needs at each end of the age spectrum. Both infants and elderly family members have limited resilience and specific medical/nutritional requirements that generic emergency kits don't address.
Infant-Specific Supplies:
Feeding: 2-week supply of formula (even if breastfeeding, have backup), bottles, bottle brush, and water purification to ensure safe formula preparation. For older infants, stock baby food pouches with long shelf life. Include any feeding accessories your child requires.
Diapers & Hygiene: Minimum 2-week supply of diapers in current size and one size up (babies grow fast), wipes, diaper cream, and disposal bags. Include infant-specific medications: infant pain reliever/fever reducer, gas drops, any prescribed medications.
Comfort & Safety: Portable crib or pack-n-play, extra clothes in multiple sizes, blankets, pacifiers, and comfort items. Carriers that keep hands free for evacuation scenarios.
Elderly-Specific Supplies:
Medical Priority: 90-day supply of all prescription medications with copies of prescriptions. Include medical devices (hearing aids, glasses, dentures, walkers, oxygen supplies) and backup batteries. Stock a detailed medical information sheet: conditions, medications, allergies, doctors, and emergency contacts.
Mobility Considerations: If evacuation is necessary, how will your elderly family member travel? Plan for mobility aids, potential for fatigue, and medical needs during travel. Have a comfortable, supportive first aid kit that addresses their specific conditions.
Special Dietary Needs: Stock soft foods, nutritional supplements, and any dietary restrictions. Include denture care supplies, specialized eating utensils, and adequate water (elderly are more susceptible to dehydration).
Documentation: Keep copies of Medicare/insurance cards, advance directives, and power of attorney documents with emergency supplies.
Related topics: Emergency Medical & First Aid Supplies | Long-Term Food Storage
Explore: First Aid Medical | Duration Health Med Kits
Q5: How much should I realistically budget for comprehensive family emergency preparedness?
Comprehensive family preparedness is an investment, not an expense—but it doesn't require going into debt. A realistic budget depends on your family size, existing supplies, regional hazards, and preparedness goals. Here's a practical framework.
Baseline Budget (72-Hour Preparedness):
For a family of four starting from zero, expect $300-$500 to achieve basic 72-hour readiness:
- Water storage and purification: $50-$75 (containers and basic filter)
- Food supplies (72-hour): $75-$100 (emergency food)
- First aid kit: $50-$100 (comprehensive kit)
- Lighting and communication: $75-$100 (flashlights and radio)
- Miscellaneous supplies: $50-$75
Extended Budget (2-Week Preparedness):
Moving to 2-week capability typically adds $500-$1,000:
- Expanded food storage: $200-$300 (ReadyWise buckets)
- Serious water filtration: $100-$150 (quality filter system)
- Backup power: $200-$500 (portable power station)
- Enhanced medical supplies: $100-$200 (trauma kit upgrade)
Premium Budget (Long-Term Resilience):
Serious preppers investing in extended self-sufficiency should budget $2,000-$5,000+:
- Solar panels and larger power systems: $500-$2,000 (EcoFlow systems)
- 6-month to 1-year food storage: $1,000-$2,000
- Communications equipment: $200-$500
- Specialized gear for regional hazards: Variable
Budget-Friendly Approach: Mountain Ready's VIP Membership offers discounts that add up significantly over time. Use Sezzle payment plans to spread costs across multiple paychecks while building your supplies systematically.
Related topics: Essential Survival Gear for Beginners | Backup Power & Energy Solutions
Explore: VIP Memberships | Sezzle Payment Plans
Q6: What are the most important emergency drills to practice with young children?
Regular practice transforms emergency plans from abstract concepts into automatic responses. For young children, drills should be short, positive, and repeated frequently enough to build muscle memory without causing anxiety.
Essential Drills (Practice Quarterly):
Fire Evacuation Drill: Practice from different starting points in the house—bedrooms, living room, kitchen. Each child should know two ways out of every room. Teach them to feel doors before opening, stay low in smoke, and go directly to the family meeting point. Time your drills: under 3 minutes from alarm to meeting point is the goal.
Shelter-in-Place Drill: Practice gathering in your designated safe room (interior room, lowest floor, away from windows) with your emergency supplies. This applies to severe weather, chemical emergencies, or security situations. Children should know which supplies to grab on the way.
Evacuation/Go-Bag Drill: Practice grabbing go-bags, loading the car, and heading to your secondary meeting point. Time from "we need to leave" to driving away should be under 15 minutes with practice.
Supplementary Drills (Practice Annually):
Communication Check: Practice using your family radios, calling your out-of-area contact, and reciting important phone numbers from memory.
What If Scenarios: Practice decision-making with "what would you do if..." scenarios: parents not home, phone doesn't work, meeting point is blocked. These build critical thinking without requiring full physical drills.
Keeping Drills Positive:
- Celebrate completion with a small treat or activity
- Track improvement times and praise progress
- Debrief positively—"great job remembering your bag!"
- Never use drills as punishment or surprise children in scary ways
Related topics: Emergency Communication & Survival Radios | Emergency Shelter & Protection Gear
Explore: Complete Family Emergency Plan Guide
Q7: Does Mountain Ready offer family-specific emergency kits or do I need to customize one myself?
Mountain Ready offers both pre-configured family kits and the flexibility to build custom solutions. Understanding both options helps you choose the most cost-effective approach for your specific situation.
Pre-Configured Family Options:
Mountain Ready partners with trusted brands to offer family-sized kits from manufacturers like ReadyWise, My Medic, and Uncharted Supply Co. These kits are designed for multiple people and include scaled quantities of food, water, and supplies. They provide excellent value for families wanting comprehensive baseline coverage without the complexity of building from scratch.
Customization Advantages:
Building your own kit using Mountain Ready's individual components offers several benefits:
- Medical customization: Add specific first aid modules for family medical needs
- Dietary accommodations: Choose food options that match allergies, preferences, and restrictions
- Regional hazard focus: Add wildfire gear, hurricane supplies, or cold weather equipment
- Quality upgrades: Swap standard components for premium options in priority categories
Hybrid Approach (Recommended):
Start with a quality pre-configured kit as your foundation, then add customizations:
- Purchase a family-sized emergency food bucket
- Add comprehensive first aid with family-specific modules
- Build individual go-bags for each family member
- Add specialized power backup, water filtration, and communication based on your needs
Related topics: Emergency Preparedness Kits & Bundles | Emergency Medical & First Aid Supplies
Explore: ReadyWise Family Kits | First Aid Kits
Q8: How do I create go-bags for each family member that they can actually carry?
A go-bag is only useful if the person carrying it can actually move with it for extended periods. Overloaded bags lead to fatigue, injury, and abandoned supplies. The key is matching bag weight to physical capability while prioritizing essential items.
Weight Guidelines by Age/Capability:
- Children ages 6-10: 5-10% of body weight (typically 5-8 lbs maximum)
- Children ages 11-15: 10-15% of body weight (8-15 lbs)
- Adults in good condition: 15-20% of body weight (25-40 lbs)
- Elderly or mobility-limited: 5-10% of body weight or wheeled options
Prioritize Ruthlessly:
Everyone Carries (Non-Negotiable):
- Water (1-2 liters in lightweight container)
- Compact water purification (LifeStraw weighs 2 oz)
- High-calorie snacks (500-1000 calories)
- Compact first aid kit with personal medications
- Light source (small flashlight or headlamp)
- Emergency blanket (Mylar, weighs 2 oz)
- One change of weather-appropriate clothing
- Personal identification and emergency contact info
Age-Appropriate Additions:
- Children: Comfort item, entertainment, whistle for signaling
- Adults: Additional family supplies, tools, heavier items, communication devices
Bag Selection:
Choose appropriately sized bags:
- Children: Daypack-style, 15-25L with padded straps
- Adults: Quality tactical or hiking backpack, 30-50L with hip belt support
- Elderly: Consider wheeled options or smaller packs with essentials only
Test Before You Need It: Load the bags and walk a mile. If anyone is struggling, reduce weight or redistribute. Practice quarterly to ensure growing children still have appropriate loads.
Related topics: Vehicle, Travel & Bug-Out Preparedness | Essential Survival Gear for Beginners
Explore: Bug-Out Bags | Go Bags | Get-Home Bags
🔰 Essential Survival Gear for Beginners
🔰 Essential Survival Gear for Beginners
Q1: I'm new to prepping - what are the absolute essentials I need to start with on a limited budget?
Starting emergency preparedness on a budget means prioritizing the fundamentals that address immediate survival needs. Focus on the "Rule of Threes": shelter, water, fire, and food—in that order of urgency.
Week 1-2 Priority ($50-75):
Water First: Store water in clean containers you already have (2-liter soda bottles work temporarily) and purchase a basic water filter like LifeStraw ($15-25). Combined with water purification tablets ($8-12), you have backup for when stored water runs out.
Basic First Aid: A comprehensive first aid kit ($30-50) is essential. Don't skimp here—injuries during emergencies are common, and you need more than bandages and antiseptic.
Light: One quality flashlight ($20-35) with extra batteries beats five cheap lights that fail. Headlamps are even better for hands-free operation.
Week 3-4 Priority ($50-75):
Food Storage: Start with 3-day emergency food supply of shelf-stable, ready-to-eat items. Peanut butter, crackers, canned goods, and granola bars are inexpensive and effective. Graduate to freeze-dried options from ReadyWise as budget allows.
Emergency Blanket/Sleeping Bag: A quality emergency blanket ($15-20) or compact sleeping bag provides crucial warmth without breaking the bank.
Month 2-3 Priority ($75-100):
Communication: A hand-crank emergency radio with NOAA weather alerts ($25-40) is essential for staying informed when power is out.
Fire Starting: Multiple methods—waterproof matches, lighters, and ferrocerium rods ($20-30 total).
Read More: The Ultimate Beginner's Guide to Emergency Preparedness covers the 12 Pillars of Preparedness to help you build systematically.
Related topics: Emergency Preparedness Kits & Bundles | Water Storage & Purification
Explore: LifeStraw Water Filters | First Aid Kits | Fire Making
Q2: What survival gear should I prioritize if I can only afford to buy a few items each month?
Building preparedness over time requires strategic prioritization. Follow a logical progression that ensures you're never completely unprepared while building toward comprehensive readiness.
Month 1 - Water Security ($40-60):
Water is life. You can survive weeks without food but only days without water. Purchase a quality water filter (Sawyer Squeeze or LifeStraw) and water storage containers. Add purification tablets as chemical backup.
Month 2 - Medical Preparedness ($50-80):
A comprehensive first aid kit is non-negotiable. Injuries happen more frequently during emergencies, and professional help may be delayed. Learn basic first aid skills to actually use your supplies.
Month 3 - Light and Communication ($50-75):
Reliable lighting (flashlights, headlamps) and an emergency radio with NOAA weather alerts. Include extra batteries or choose rechargeable options with solar charging capability.
Month 4 - Food Storage ($60-100):
Build a 2-week food supply starting with shelf-stable basics, then adding freeze-dried options for longer storage life and easier preparation.
Month 5 - Shelter and Warmth ($50-75):
Emergency blankets, sleeping bags, and fire-starting supplies. Include clothing layers appropriate for your climate.
Month 6 - Power Backup ($100-200):
A portable power station or large power bank with solar panel capability. This keeps phones charged, powers medical devices, and provides lighting.
Pro Tip: Mountain Ready's VIP Membership saves money on every purchase, and Sezzle payment plans spread costs across paychecks.
Related topics: Backup Power & Energy Solutions | Long-Term Food Storage
Explore: Sawyer Water Filtration | Emergency Food
Q3: What's the difference between survival gear for urban environments versus wilderness survival?
Urban and wilderness survival share core principles but require different equipment priorities and skill sets. Understanding these differences helps you prepare for your actual environment rather than generic "survival scenarios."
Urban Survival Priorities:
Shelter-in-Place Focus: Urban emergencies more often involve staying home without utilities than wilderness exposure. Prioritize backup power, water storage and purification, and food stockpiles over wilderness shelter skills.
Security Awareness: Urban environments during emergencies can involve security concerns—looting, desperate individuals, and breakdown of social order. Personal security gear, door reinforcement, and situational awareness matter more than in wilderness settings.
Mobility Constraints: Urban bug-out scenarios involve traffic, crowds, and limited escape routes. Lightweight EDC gear and get-home bags that facilitate moving through urban environments take priority.
Infrastructure Dependencies: Urban survivors rely on municipal water, sewage, and supply chains. When these fail, you need robust water procurement systems, sanitation solutions, and larger food stores.
Wilderness Survival Priorities:
Shelter Building: Exposure kills faster than dehydration or starvation. Emergency shelters, sleeping systems, and knowledge to improvise protection from elements are essential.
Fire Craft: Fire-starting equipment and skills provide warmth, water purification, food preparation, and signaling. Multiple methods are critical.
Navigation: GPS devices, compasses, and maps become essential when you can't rely on roads and signs.
Food Procurement: Foraging knowledge, fishing and hunting gear, and trapping skills supplement carried food supplies.
Related topics: Vehicle, Travel & Bug-Out Preparedness | Tactical Gear & Outdoor Equipment
Explore: Urban Survival Guide | Camping & Survival Gear
Q4: I keep seeing conflicting advice about survival priorities - is it really shelter, water, fire, food, or does it depend?
The classic survival priority order (shelter, water, fire, food) is generally correct but requires context-specific application. Understanding why these priorities exist helps you adapt them intelligently to your specific situation.
The Logic Behind the Order:
Shelter First (3 Hours): Shelter addresses immediate exposure. In extreme cold or heat, you can die from hypothermia or heat stroke in hours. "Shelter" includes clothing—your first layer of protection.
Water Second (3 Days): Water addresses hydration. Dehydration causes cognitive impairment within 24 hours and becomes life-threatening within days. In hot environments or during physical exertion, this timeline accelerates dramatically.
Fire Third (Supports Other Needs): Fire provides warmth (shelter support), water purification, food preparation, signaling, and psychological comfort. It's a force multiplier for other survival needs.
Food Fourth (3 Weeks): Food addresses calories. Healthy adults can survive weeks without food, though cognitive and physical performance degrades significantly after several days.
When Priorities Shift:
Hot Desert: Water jumps to first priority. Shelter from sun matters, but dehydration kills faster than exposure in extreme heat.
Immediate Medical Emergency: First aid supersedes everything. Bleeding out or respiratory failure doesn't wait for shelter considerations.
Urban Emergencies: Security and communication often matter more than wilderness-style shelter. You're more likely to need backup power than fire-starting skills.
Short-Term vs. Long-Term: For 72-hour emergencies, stored supplies eliminate most priority decisions. Long-term scenarios shift focus toward sustainable systems.
Related topics: Emergency Shelter & Protection Gear | Water Storage & Purification
Explore: 12 Pillars of Preparedness | Survival Basics: Rule of 3s
Q5: What are the most common mistakes beginners make when buying survival gear?
Most beginners make predictable mistakes that waste money, create false confidence, or leave critical gaps in preparedness. Recognizing these patterns helps you avoid them.
Mistake 1: Buying Quantity Over Quality
Cheap gear fails when you need it most. A $15 flashlight that dies after 10 hours is worthless compared to a $35 Streamlight that works reliably for years. Focus on fewer, higher-quality items rather than accumulating cheap equipment.
Mistake 2: Gear Without Skills
A trauma kit is useless if you don't know how to apply a tourniquet. Water filters fail if you don't understand their maintenance. Fire starters don't help if you've never practiced in wet conditions. Budget time for skills, not just equipment.
Mistake 3: Preparing for Fantasy Scenarios
Many beginners stock up for zombie apocalypses or total societal collapse while ignoring realistic threats: power outages, winter storms, job loss, or regional disasters. Prepare for the probable before the possible.
Mistake 4: Neglecting the Boring Stuff
Flashy tactical gear is exciting; water storage containers are boring. Beginners often buy knives and tactical equipment before addressing water, food, and medical supplies.
Mistake 5: Not Testing Equipment
Buy gear, test gear, then trust gear. Open your first aid kit and learn what's inside. Practice with your water filter. Start a fire with your fire-starting supplies. Discovery during emergencies is dangerous.
Mistake 6: Storing Gear in Inaccessible Locations
Emergency supplies in the attic, garage, or basement may be inaccessible during floods, fires, or structural damage. Keep critical supplies in multiple accessible locations.
Related topics: Essential Survival Gear for Beginners | Emergency Preparedness Kits & Bundles
Explore: Beginner's Guide to Emergency Preparedness
Q6: Can you recommend a progressive buying plan for building up survival gear over 6 months?
A structured 6-month plan transforms preparedness from overwhelming expense into manageable monthly investments. This plan assumes a family of four starting from zero, with approximately $100-150 monthly budget.
Month 1: Water Foundation ($100-125)
- Sawyer Water Filter or LifeStraw ($25-45)
- 14-gallon water storage containers ($30-50)
- Water purification tablets as backup ($10-15)
- Water containers for storage ($20-30)
Month 2: Medical Preparedness ($125-150)
- Comprehensive first aid kit ($60-80)
- Additional first aid supplies for family-specific needs ($25-40)
- Prescription medication stockpile (30-day backup)
- First aid training resources
Month 3: Light, Communication & Basic Tools ($100-125)
- Quality flashlight ($35-50)
- Headlamp ($25-35)
- Emergency radio with NOAA and hand-crank ($25-40)
- Extra batteries ($15-20)
Month 4: Food Storage ($125-150)
- ReadyWise 2-week food supply ($75-100)
- Supplementary shelf-stable foods ($25-30)
- Food storage containers ($15-20)
Month 5: Shelter & Warmth ($100-125)
- Emergency blankets and sleeping gear ($40-60)
- Fire-starting supplies - multiple methods ($25-35)
- Seasonal clothing layers ($30-40)
Month 6: Power & Go-Bags ($150-200)
- Portable power station or large power bank ($75-120)
- Small solar panel ($40-60)
- Go-bag or backpack for evacuation ($35-50)
Related topics: Backup Power & Energy Solutions | Long-Term Food Storage
Explore: VIP Membership for Discounts | Sezzle Payment Plans
Q7: What survival tools are actually multi-purpose enough to justify buying as a beginner?
Multi-purpose tools reduce weight, cost, and complexity while covering multiple survival needs. Focus on items that genuinely serve multiple functions rather than gimmicky "survival cards" with unusable mini-tools.
Genuinely Multi-Purpose Tools:
Quality Multi-Tool (Leatherman/SOG): Combines knife, pliers, screwdrivers, wire cutters, can opener, and more in a pocket-sized package. A single quality multi-tool replaces 10+ individual items. Invest $50-100 for reliability that lasts decades.
Paracord (550 Cord): Shelter construction, gear repair, fishing line (inner strands), shoelaces, snares, tourniquets (emergency only), clothesline, and hundreds of other uses. Buy 100+ feet for $10-15.
Metal Water Bottle: Water storage, boiling water over fire, cooking vessel, signaling device, digging tool. Stainless steel without plastic components.
Headlamp (Streamlight): Hands-free lighting for work, signaling, navigation, and reading. Far more useful than handheld flashlights for most survival tasks.
Bandana/Shemagh: Water pre-filter, dust mask, sling, bandage, sun protection, pot holder, signaling flag, head covering, and improvised container.
Large Fixed-Blade Knife (SOG): Food preparation, shelter building, wood processing, self-defense, first aid (cutting bandages), fire preparation, and general cutting tasks. A 4-6" fixed blade handles almost any cutting task.
Avoid Gimmick Multi-Tools:
- Credit card survival tools (too small to be functional)
- Survival bracelets (paracord quantity too limited)
- "15-in-1" tools that do everything poorly
- Gadgets prioritizing novelty over function
Quality Over Quantity Rule: One $80 Leatherman multi-tool outperforms five $15 cheap multi-tools. You'll carry it, trust it, and it will work when needed.
Related topics: Tools, Repair & Field Utility Equipment | Everyday Carry (EDC) Tools
Explore: SOG Knives & Tools | Multi-Function Tools
Q8: How do I know if I'm buying quality survival gear or just expensive gimmicks marketed to preppers?
The prepper market is unfortunately flooded with overpriced gimmicks marketed through fear rather than function. Learning to distinguish quality from hype saves money and builds genuine preparedness.
Red Flags to Watch For:
Fear-Based Marketing: Legitimate gear manufacturers focus on features, specifications, and use cases. If marketing emphasizes societal collapse, conspiracy theories, or "they don't want you to know," it's probably a gimmick.
Vague Specifications: Quality manufacturers list specific performance data: battery life in hours, filter capacity in gallons, material specifications, temperature ratings. "Military-grade" and "tactical" without specifics are marketing fluff.
No Brand Reputation: Research manufacturers. Companies like Sawyer, Streamlight, My Medic, ReadyWise, and EcoFlow have track records and professional users. Unknown brands selling through Facebook ads are gambles.
Too Good to Be True: A $20 "solar generator" or "$15 complete survival kit" cannot deliver quality. Manufacturing quality costs money. Cheap prices mean cheap components.
Quality Indicators:
Professional Use: Equipment used by military, first responders, and outdoor professionals has proven itself under demanding conditions. Streamlight is used by police. North American Rescue supplies military trauma kits. MIRA Safety serves professionals worldwide.
Detailed Specifications: Quality products list specific performance metrics, warranty terms, and maintenance requirements.
User Reviews from Actual Use: Look for reviews describing real-world use, not just "looks cool" or "arrived quickly." Forums like Reddit's preppers community provide honest assessments.
Research Before Buying: Mountain Ready's blog provides detailed guides on water filtration comparisons, first aid kit selection, and gear recommendations.
Related topics: Emergency Preparedness Kits & Bundles | Essential Survival Gear for Beginners
Explore: Top Brands at Mountain Ready | Best Sellers
⚕️ Emergency Medical & First Aid Supplies
⚕️ Emergency Medical & First Aid Supplies
Q1: What should be in a comprehensive emergency first aid kit beyond basic band-aids and antiseptic?
A truly comprehensive first aid kit addresses injuries ranging from minor cuts to life-threatening trauma. Basic kits handle everyday injuries; comprehensive kits assume professional medical help may be delayed or unavailable.
Wound Care (Beyond Basics):
- Hemostatic agents: QuikClot or Celox gauze for severe bleeding that pressure alone can't control
- Wound closure: Butterfly closures, Steri-Strips, or wound closure kits for lacerations requiring more than bandages
- Irrigation: Sterile saline for wound cleaning when running water isn't available
- Burn treatment: Specialized burn dressings, burn gel, and non-adherent pads
- Various bandage sizes: Including large trauma dressings, not just finger-sized bandages
Trauma Supplies:
- Tourniquet: CAT or SOFT-T tourniquet for extremity hemorrhage—this saves lives when nothing else will
- Pressure bandages: Israeli bandages or Emergency Trauma Dressings for applying direct pressure to wounds
- Chest seals: Vented chest seals for penetrating chest injuries
- Splinting materials: SAM splints or improvised splinting supplies for fractures
Medications:
- Pain relievers (ibuprofen, acetaminophen)
- Antihistamines (diphenhydramine for allergic reactions)
- Anti-diarrheal medications
- Electrolyte replacement packets
- Personal prescription medications (30-90 day supply)
Tools:
- Quality trauma shears
- Tweezers (tick and splinter removal)
- CPR barrier mask
- Thermometer
- Penlight for pupil assessment
Reference Materials:
- First aid manual or quick reference cards
- Emergency contact information
- Medical information for family members
Mountain Ready carries comprehensive first aid kits and individual medical supplies to build or supplement your kit.
Related topics: Emergency Preparedness Kits & Bundles | Disaster-Specific Preparedness
Explore: First Aid Kits | First Aid Supplies | My Medic Kits
Q2: How do I build a medical kit that can handle serious trauma situations when professional help isn't available?
Building a trauma kit requires understanding the difference between first aid (minor injury management) and trauma care (life-threatening emergency stabilization). This isn't about replacing medical professionals—it's about keeping someone alive until help arrives or conditions improve.
Understanding Preventable Trauma Death:
Most preventable battlefield deaths result from three causes: massive hemorrhage (bleeding), tension pneumothorax (collapsed lung from chest injury), and airway obstruction. Civilian trauma patterns are similar. A properly equipped and trained individual can address all three.
Hemorrhage Control (Priority 1):
- Tourniquets (2+): CAT (Combat Application Tourniquet) or SOFT-T Wide. Applied correctly, these stop extremity bleeding that kills in minutes. Buy quality—cheap tourniquets fail under tension.
- Hemostatic gauze: QuikClot Combat Gauze or Celox for wounds where tourniquets can't be applied (junctional areas: groin, neck, armpit).
- Pressure bandages: Israeli Emergency Bandages for direct pressure on wound sites.
- Wound packing materials: Standard gauze for packing deep wounds.
Airway/Breathing (Priority 2):
- Chest seals: Hyfin vented chest seals for penetrating chest injuries (2 minimum—entry and exit wounds).
- Nasopharyngeal airways (NPAs): Various NPA sizes for maintaining airway in unconscious patients.
- CPR barrier mask: Protection during rescue breathing.
TCCC Training Resources: Equipment without training is dangerous. Take a "Stop the Bleed" course (often free), consider TCCC (Tactical Combat Casualty Care) or equivalent civilian trauma courses. Practice regularly—skills degrade without use.
Recommended Kit Configurations:
My Medic offers various pre-configured trauma kits from basic IFAKs to comprehensive trauma kits. North American Rescue provides professional-grade components used by military and first responders.
Related topics: Personal Security & Situational Awareness | Vehicle, Travel & Bug-Out Preparedness
Explore: TCCC Training Guide | North American Rescue
Q3: What's the difference between a first aid kit and a trauma kit, and do I need both?
First aid kits and trauma kits serve different purposes and address different injury severities. Understanding the distinction helps you build appropriate medical preparedness for your realistic risk profile.
First Aid Kit Purpose:
First aid kits address common, generally non-life-threatening injuries: cuts, scrapes, burns, sprains, blisters, allergic reactions, headaches, and minor illnesses. They assume professional medical care is accessible within reasonable time. Contents focus on comfort, infection prevention, and temporary stabilization.
Typical First Aid Contents:
- Adhesive bandages (various sizes)
- Gauze pads and rolls
- Antiseptic wipes and ointments
- Pain relievers and medications
- Burn treatment supplies
- Elastic bandages
- Splinting materials
- Cold packs
Trauma Kit Purpose:
Trauma kits address life-threatening injuries requiring immediate intervention: severe bleeding, penetrating wounds, tension pneumothorax, and airway obstruction. They assume professional help may be significantly delayed or unavailable. Contents focus on preventing death in the first critical minutes.
Typical Trauma Kit Contents:
- Tourniquets (CAT or SOFT-T)
- Hemostatic gauze (QuikClot)
- Pressure bandages (Israeli bandages)
- Chest seals (Hyfin or similar)
- Nasopharyngeal airways
- Trauma shears
- Gloves
Do You Need Both?
For comprehensive preparedness: yes. First aid situations are far more common—you'll use bandages and ibuprofen regularly. But when trauma occurs, having only first aid supplies means watching someone die from injuries you could have addressed.
Practical Approach:
Build a comprehensive first aid kit as your base, then add trauma components as a separate module or upgrade. My Medic offers modular systems that allow you to combine both.
Related topics: Emergency Medical & First Aid Supplies | Essential Survival Gear for Beginners
Explore: First Aid Kit Organization Guide | My Medic Kits
Q4: Are the pre-made first aid kits sufficient or should I build my own from scratch?
This depends on your specific needs, budget, and willingness to research individual components. Both approaches have advantages and appropriate use cases.
Pre-Made Kit Advantages:
Convenience: Comprehensive kits from quality manufacturers like My Medic include properly selected components, organized storage, and logical layouts. Someone with medical expertise designed the contents.
Cost Efficiency: Buying components individually often costs more than pre-made kits due to packaging and shipping efficiencies. Quality pre-made kits offer good value.
Baseline Coverage: Even if you customize later, a quality pre-made kit provides excellent baseline coverage without the research required to build from scratch.
Pre-Made Kit Limitations:
Generic Contents: Pre-made kits can't anticipate your family's specific medications, allergies, or medical conditions.
Variable Quality: Low-cost pre-made kits often include cheap components. A $20 first aid kit will disappoint.
One-Size Limitations: Family size, activity types, and risk profile affect ideal kit contents.
Building From Scratch Advantages:
Full Customization: You choose every component based on your specific needs.
Quality Control: You can select premium components for critical items.
Learning Opportunity: Research builds knowledge about what you're carrying.
Recommended Hybrid Approach:
Purchase a quality pre-made kit as your foundation, then customize:
- Choose a reputable base kit (My Medic, North American Rescue)
- Add family-specific medications
- Upgrade critical components (add tourniquets, chest seals)
- Add specialty modules for your activities
- Organize thoughtfully
Related topics: Emergency Preparedness Kits & Bundles | Emergency Medical & First Aid Supplies
Explore: My Medic Mod System | First Aid Kit Setup Guide
Q5: What medical supplies should I stockpile that don't require a prescription but are hard to get in emergencies?
During emergencies, pharmacies close, supply chains fail, and common over-the-counter supplies disappear from shelves within hours. Stockpiling these items before emergencies ensures availability when you need them most.
Pain and Fever Management:
- Ibuprofen (anti-inflammatory, pain, fever)
- Acetaminophen (pain, fever—different mechanism than ibuprofen)
- Aspirin (pain, fever, heart attack protocol)
- Naproxen (longer-lasting pain relief)
Gastrointestinal:
- Loperamide (anti-diarrheal—dehydration from diarrhea kills)
- Bismuth subsalicylate (upset stomach, nausea)
- Antacids (heartburn, acid reflux)
- Fiber supplements (constipation common with dietary changes)
- Oral rehydration salts (electrolyte replacement)
Allergy and Respiratory:
- Diphenhydramine (allergies, sleep aid, anaphylaxis management)
- Loratadine or cetirizine (non-drowsy antihistamines)
- Pseudoephedrine (decongestant—requires ID to purchase)
- Guaifenesin (expectorant)
Wound Care:
- Triple antibiotic ointment (infection prevention)
- Hydrocortisone cream (itching, inflammation)
- Antifungal cream (athlete's foot, skin fungus)
- Burn gel (aloe-based for minor burns)
- Benzocaine (topical pain relief)
Other Critical Supplies:
- Epinephrine auto-injectors (if allergies warrant—available by prescription)
- Blood glucose tablets (for diabetics or hypoglycemia)
- Activated charcoal (poisoning—use only with guidance)
- Stool softeners (common issue during emergencies)
Storage Considerations:
Store medications in cool, dry locations. Most OTC medications remain effective 1-2 years past expiration, though potency gradually decreases. Rotate stock by using oldest supplies first and replacing as expiration approaches.
Related topics: Long-Term Food Storage | Family Emergency Readiness Solutions
Explore: First Aid Supplies | Prescription Medication Planning
Q6: How do I learn basic emergency medical skills to actually use the supplies in my trauma kit?
Having trauma supplies without training is dangerous—you might apply a tourniquet incorrectly, miss a treatable condition, or worsen injuries through improper care. Invest in training before investing heavily in equipment.
Essential Training Options:
Stop the Bleed (Free - 1-2 Hours):
The American College of Surgeons' Stop the Bleed program teaches hemorrhage control basics: tourniquet application, wound packing, and pressure application. Courses are offered nationwide, often free, and take only 1-2 hours. This is the minimum training everyone should have. Find courses at stopthebleed.org.
CPR/AED Certification ($50-100 - 4-8 Hours):
American Heart Association or Red Cross certification teaches cardiac arrest response. This is basic life-saving training everyone should maintain. Recertify every 2 years to keep skills current.
Wilderness First Aid ($200-400 - 16-20 Hours):
NOLS, SOLO, or REI offer wilderness first aid courses teaching extended care when evacuation is delayed. Covers patient assessment, wound care, environmental emergencies, and improvised solutions. Excellent for outdoor enthusiasts or anyone preparing for extended emergencies.
TCCC / Tactical Combat Casualty Care ($300-600 - 16-40 Hours):
Originally developed for military, now available for civilians. Teaches trauma response under stress, including tourniquet application, chest seal usage, airway management, and rapid assessment. More intensive than Stop the Bleed.
Ongoing Practice:
Training without practice degrades quickly. Establish regular practice sessions:
- Monthly: Review kit contents, practice tourniquet application
- Quarterly: Scenario-based drills with family
- Annually: Refresh formal training
Self-Study Resources:
Mountain Ready's TCCC guide provides detailed information on trauma care principles. The blog covers comprehensive first aid approaches for extended emergencies.
Related topics: Emergency Medical & First Aid Supplies | Personal Security & Situational Awareness
Explore: Advanced First Aid Guide | First Aid Kits
Q7: What medications and medical supplies have the longest shelf life for long-term storage?
Understanding medication shelf life helps you rotate supplies effectively and avoid wasting money on expired products. Most medications remain effective past their printed expiration dates, though potency gradually decreases.
Longest Shelf Life Medications (5+ Years):
- Aspirin (stable for many years if kept dry)
- Ibuprofen (very stable in solid form)
- Acetaminophen (stable when stored properly)
- Diphenhydramine (antihistamine tablets last for years)
- Antacid tablets (chalky tablets extremely stable)
Moderate Shelf Life (2-5 Years):
- Most solid-form OTC medications (tablets, capsules)
- Triple antibiotic ointment (petroleum base preserves well)
- Hydrocortisone cream (stable in tubes)
- Oral rehydration salts (powder form very stable)
Shorter Shelf Life (1-2 Years):
- Liquid medications (suspensions, syrups degrade faster)
- Epinephrine auto-injectors (potency drops after 1-2 years, but partially effective beyond)
- Insulin (temperature sensitive, shorter shelf life)
- Eye drops (contamination risk after opening)
- Creams in jars (contamination from repeated opening)
Medical Supplies Shelf Life:
Long Shelf Life (10+ Years if sealed):
- Gauze and bandages (degradation is minimal)
- Tourniquets (inspect rubber components periodically)
- Splints (SAM splints last indefinitely)
- Sterile saline (check expiration, but stable for years)
Monitor for Degradation:
- Elastic bandages (lose elasticity over time)
- Adhesive products (bandages lose stickiness)
- Rubber/latex items (become brittle)
- Hemostatic agents (check manufacturer guidelines)
Storage Best Practices:
- Cool, dry, dark location (heat accelerates degradation)
- Avoid humidity (moisture degrades many products)
- Keep original packaging (protects from contamination)
- Implement rotation system (FIFO—first in, first out)
Related topics: Long-Term Food Storage | Emergency Preparedness Kits & Bundles
Explore: First Aid Refills & Supplies
Q8: Does mountainready.online carry IFAK-style kits suitable for vehicle or home emergency use?
Yes, Mountain Ready carries a comprehensive selection of Individual First Aid Kits (IFAKs) and trauma kits suitable for vehicle, home, workplace, and outdoor use. Our medical inventory focuses on quality manufacturers trusted by military and first responder professionals.
My Medic offers modular kits ranging from everyday carry to comprehensive trauma response:
- MYFAK: Compact kits ideal for vehicles and everyday carry
- MYFAK Pro: Enhanced kits with additional trauma components
- MYFAK Large: Comprehensive kits for families or group use
- Trauma First Aid Kit (TFAK): Serious trauma response capability
- EDC (Every Day Carry): Compact kits designed for daily carry
North American Rescue Collection:
North American Rescue is the leading supplier to U.S. military and first responders. Their IFAK components represent the gold standard in trauma care.
Modular Customization:
What sets Mountain Ready's medical selection apart is the modular approach. First Aid Mods allow you to customize kits for specific needs:
- Burn treatment modules
- Bleed stopper modules
- Trauma Pro modules
- Wound closure kits
- Activity-specific modules (hiking, cycling, etc.)
Vehicle-Specific Recommendations:
For vehicle use, consider compact kits that fit in glove compartments or under seats while providing serious capability. The MYFAK Mini offers excellent balance between size and capability, while the MYFAK Sidekick provides more comprehensive coverage.
Related topics: Vehicle, Travel & Bug-Out Preparedness | Everyday Carry (EDC) Tools
Explore: All First Aid Kits | Duration Health Med Kits
💧 Water Storage & Purification Equipment
💧 Water Storage & Purification Equipment
Q1: How much emergency water should I store per person and what's the best way to store it long-term?
FEMA and the American Red Cross recommend one gallon per person per day as a minimum—half for drinking and half for sanitation. For realistic preparedness, plan for 2 weeks (14 gallons per person) and include backup purification capability.
Storage Calculations:
- 72-hour minimum: 3 gallons per person
- 1-week preparedness: 7 gallons per person
- 2-week preparedness: 14 gallons per person
- Family of 4 for 2 weeks: 56 gallons minimum
Best Storage Containers:
Food-grade water containers are essential—other plastics can leach chemicals. Look for HDPE (recycling code 2) or containers specifically labeled for water storage.
- 5-7 gallon jugs: Portable, stackable, easy to rotate
- 55-gallon drums: Economical per-gallon, but heavy when full (450+ lbs)
- Bathtub bladders (WaterBOB): 100-gallon capacity using your bathtub for hurricane warnings
- Stackable cubes: Space-efficient, available in 3.5-7 gallon sizes
Long-Term Storage Best Practices:
Location Matters: Store in cool, dark locations. Heat accelerates container degradation and can promote bacterial growth. Avoid garages in hot climates unless climate-controlled. Basement storage is ideal.
Treatment Options:
- Municipal water is already chlorinated and can be stored as-is for 6-12 months
- Add 1/8 teaspoon unscented household bleach per gallon for extended storage
- Commercial water storage treatment available for long-term preservation
Rotation Schedule: Rotate stored water every 6-12 months. Use stored water for regular household needs (watering plants, cleaning) and refill with fresh water.
Backup Purification: Storage alone isn't enough. Include water filtration and chemical treatment options for when stored water runs out. See our complete water system guide.
Related topics: Emergency Preparedness Kits & Bundles | Off-Grid Living & Homesteading
Explore: Water Storage & Filtration | Water Matrix Guide
Q2: What's the most reliable water purification method if municipal water gets contaminated or stops flowing?
The most reliable approach combines multiple purification methods, because different threats require different treatments. No single method handles all contamination types—redundancy provides security.
Understanding Contamination Types:
Biological (Pathogens): Bacteria, viruses, and protozoa. Most common in natural water sources and during infrastructure failures. Addressed by filtration, boiling, UV treatment, and chemical treatment.
Chemical: Pesticides, industrial runoff, pharmaceuticals. More common in agricultural areas and post-disaster scenarios. Requires activated carbon filtration or reverse osmosis.
Heavy Metals: Lead, arsenic, mercury. Often present in old plumbing during infrastructure failures. Requires specialized filters or distillation.
Recommended Purification Methods (In Priority Order):
Gravity Filtration: Systems like Berkey filters handle biological contamination and many chemical contaminants through gravity flow—no power required. Excellent for home use with 2,000+ gallon filter life.
Portable Filters: Sawyer and LifeStraw filters remove biological contaminants with 100,000+ gallon lifespans. Essential for evacuation and sourcing water from natural sources.
Boiling: 1 minute at rolling boil kills all biological pathogens. Effective, requires no special equipment, but doesn't remove chemical contamination and requires fuel.
Chemical Treatment: Chlorine dioxide tablets (Aquamira, Potable Aqua) kill pathogens and have indefinite shelf life. Good backup, but slower (4-hour treatment for some parasites).
UV Treatment: SteriPEN and similar devices kill pathogens in 60 seconds. Excellent when batteries are available, but no effect on chemical contamination.
Complete System Approach:
Mountain Ready's Water Matrix guide details how to combine methods for comprehensive protection. Our water filtration brand comparison helps you choose specific products.
Related topics: Long-Term Food Storage | Off-Grid Living & Homesteading
Explore: Sawyer Filtration | LifeStraw Products | Grayl Bottles
Q3: Should I get a gravity-fed water filter like Berkey or a portable system like LifeStraw for emergency preparedness?
Both serve different purposes in a complete water preparedness strategy. For comprehensive preparedness, you likely need elements of both—a home-based gravity system plus portable filtration for evacuation scenarios.
Gravity-Fed Systems (Berkey, ProOne, etc.):
Advantages:
- High capacity: 2-6+ gallons at a time
- No effort required: Gravity does the work
- Comprehensive filtration: Removes bacteria, viruses, parasites, chemicals, heavy metals
- Long filter life: 3,000-6,000+ gallons per filter set
- Perfect for home shelter-in-place scenarios
Limitations:
- Size and weight (not portable)
- Initial cost ($200-400+)
- Slow flow rate (1-7 gallons/hour depending on model)
- Requires setup space
Best For: Home base, families, extended emergencies, shelter-in-place
Portable Systems (LifeStraw, Sawyer, Grayl):
Advantages:
- Lightweight (1-10 oz)
- Immediate use: Drink directly or filter into containers
- Affordable ($20-80)
- Perfect for bug-out bags and evacuation
Limitations:
- Lower capacity per use (16-32 oz typical)
- May not filter viruses (varies by product—Grayl does)
- Limited chemical filtration (most remove only biologicals)
- Manual effort required
Best For: Evacuation, hiking, personal carry, vehicle kits
Recommended Strategy:
- Home: Gravity-fed system or large portable filter like Sawyer Gravity
- Each Family Member: Personal filter in their go-bag
- Vehicle: Compact filter system plus purification tablets
- Backup: Chemical treatment that doesn't require equipment
See our complete water filtration comparison for detailed product analysis.
Related topics: Vehicle, Travel & Bug-Out Preparedness | Essential Survival Gear for Beginners
Explore: Sawyer Water Filtration | LifeStraw Products | Water Filter Bottles
Q4: How do I safely store drinking water in my garage or basement without it growing bacteria or algae?
Water storage requires attention to containers, treatment, light exposure, and temperature. With proper technique, stored water remains safe for years.
Container Requirements:
Use Food-Grade Only: Water storage containers must be food-grade HDPE (high-density polyethylene—recycling code 2) or specifically labeled for potable water. Never use containers that previously held chemicals, milk (difficult to sanitize), or non-food items.
Opaque Containers Preferred: Light promotes algae growth. Choose opaque blue or white containers, or store clear containers in dark locations.
Clean Before Use: Wash new containers with dish soap, rinse thoroughly, then sanitize with 1 teaspoon unscented bleach per quart of water. Shake, let sit 2 minutes, rinse, and dry.
Treatment for Long-Term Storage:
Municipal Water: Already chlorinated. Store as-is for 6-12 months. For longer storage, add 1/8 teaspoon (8 drops) unscented household bleach per gallon.
Well Water or Untreated Sources: Purify before storage using water treatment products or boiling, then add chlorine for preservation.
Commercial Stabilizers: Products like Water Preserver Concentrate extend storage life to 5 years with single treatment.
Storage Environment:
Temperature: Cool, consistent temperatures (50-70°F ideal). Heat accelerates container degradation and chemical leaching. If garage storage is necessary, insulate containers from temperature extremes.
Light Blocking: Complete darkness is ideal. If using clear containers in basements, cover with opaque material or store in boxes.
Off the Floor: Elevate containers on pallets or shelving. Concrete can leach chemicals into plastic and makes containers harder to inspect.
Away from Chemicals: Never store water near gasoline, pesticides, or other chemicals. Vapors can permeate plastic over time.
Maintenance Schedule:
- Monthly: Visual inspection for container integrity
- Every 6-12 months: Rotate or re-treat water
- Every 2-3 years: Replace containers showing wear
Related topics: Emergency Preparedness Kits & Bundles | Long-Term Food Storage
Explore: Water Storage & Filtration
Q5: What's the difference between water purification and water filtration, and which do I need for emergencies?
This is a critical distinction many preppers misunderstand. Filtration and purification address different contaminants, and relying on only one method leaves gaps in your protection.
Water Filtration:
Filtration physically removes contaminants by passing water through a medium (ceramic, hollow fiber membranes, activated carbon). The filter's pore size determines what it removes.
What Filtration Removes:
- Protozoa (Giardia, Cryptosporidium)—pore size 1 micron or less
- Bacteria (E. coli, Salmonella, Cholera)—pore size 0.2 microns or less
- Sediment and particulates
- Some chemicals (if activated carbon included)
What Basic Filtration Does NOT Remove:
- Viruses (too small for most filters—require 0.02 microns or smaller)
- Most dissolved chemicals
- Heavy metals (unless specifically designed)
Examples: Sawyer filters, LifeStraw, ceramic filters
Water Purification:
Purification kills or deactivates all biological pathogens including viruses using chemical, UV, or heat treatment.
What Purification Addresses:
- All bacteria
- All viruses (Hepatitis A, Rotavirus, Norovirus)
- All protozoa
- Does NOT remove particulates or chemicals (water may still look/taste bad)
Examples: Boiling, UV treatment (SteriPEN), chemical treatment (chlorine dioxide tablets), Grayl purifier bottles
What You Need:
For most North American wilderness and emergency scenarios, quality filtration handles the primary threats (bacteria and protozoa). Viruses are rare in North American backcountry water but common in developing countries and during sewage contamination events.
Recommended Approach:
- Primary: Quality filter (Sawyer, LifeStraw)
- Backup: Chemical purification (kills viruses filtration may miss)
- Home base: Gravity system with purification capability
See our complete water solutions guide for detailed recommendations.
Related topics: Essential Survival Gear for Beginners | Disaster-Specific Preparedness
Explore: Water Chemical Treatment | Complete Water Solutions Guide
Q6: Can I rely on boiling water alone or do I need chemical treatment or filters as backup?
Boiling is highly effective for biological purification but has significant practical limitations that make backup methods essential for serious preparedness.
Boiling Effectiveness:
Boiling at a rolling boil for 1 minute (3 minutes above 6,500 feet elevation) kills all biological pathogens: bacteria, viruses, and protozoa. It's the gold standard for pathogen destruction and works regardless of water clarity.
Boiling Limitations:
Fuel Requirements: Boiling requires heat sources—stoves, fuel, fire materials. During extended emergencies, fuel becomes precious. Filtering water uses no fuel.
Time Investment: Heating water to boiling, maintaining temperature, then cooling to drinkable temperature takes 20-30+ minutes per batch. Filters provide instant safe water.
Chemical Contamination: Boiling does NOT remove chemicals, heavy metals, pesticides, or other dissolved contaminants. If industrial contamination is a concern, you need filtration with activated carbon.
Practicality: Boiling works at home with a stove. During evacuation, power outages without cooking fuel, or on the move, boiling is often impractical.
Volume Limitations: Boiling a gallon at a time is slow. Gravity filtration systems process gallons without continuous attention.
Recommended Integrated Approach:
- Home Base: Gravity filter system for high-volume, fuel-free filtration
- Backup: Ability to boil (camping stove with fuel) for power-free purification
- Evacuation: Portable filter (no fuel required)
- Backup to Backup: Chemical treatment tablets (lightweight, indefinite shelf life)
Don't Rely on Single Methods: Emergencies involve unknown variables. Your stove might run out of fuel, your filter might clog, or your tablets might expire. Redundancy across different methods provides genuine security.
Related topics: Backup Power & Energy Solutions | Essential Survival Gear for Beginners
Explore: Fire Making & Fuel | Camping Stoves & Cookware
Q7: What's the best emergency water solution for an apartment with limited storage space?
Apartment preparedness requires creative solutions that maximize water security within space constraints. Focus on concentrated storage, multi-use containers, and robust backup purification.
Space-Efficient Storage:
Under-Bed Storage: Standard bed frames accommodate 5-7 gallon water containers. A queen-size bed can hide 20-30 gallons of water storage that's invisible and protected.
Closet Stackables: Stackable water containers (3.5-7 gallon) fit in closet corners and stack vertically. 4-6 containers provide 14-28 gallons in a 2x2 foot footprint.
Water Filter Bottles: Grayl and similar filter bottles store filtered water while providing purification capability. Each bottle reduces storage needs by providing filtration.
Multi-Purpose Approach:
Bathtub as Emergency Reservoir: During warning periods (hurricane approaching), fill the bathtub with water. WaterBOB bladders provide 100 gallons of clean storage using your existing bathtub. This requires advance warning but dramatically increases capacity.
Daily-Use Rotation: Keep filled water bottles in the refrigerator. You're already storing water; just maintain more bottles than you use daily.
Prioritize Purification:
When storage space is limited, purification capability becomes more important than storage volume. With quality filtration, you can source water from:
- Building water heater (30-80 gallons typically available)
- Toilet tanks (not bowls)—clean water before use
- Nearby natural sources (parks, rivers, ponds)
- Swimming pools (with purification)
- Neighbor assistance
Recommended Apartment Kit:
- 10-20 gallons stored water (under bed or closet)
- Quality portable filter (LifeStraw or Sawyer)
- Chemical treatment backup
- WaterBOB or similar for warning-period storage
- Knowledge of building water sources and nearby natural water
Related topics: Emergency Preparedness Kits & Bundles | Urban Survival
Explore: Water Storage & Filtration | Compact Water Solutions
Q8: How often do I need to rotate stored emergency water and what containers are actually food-grade safe?
Proper container selection and rotation schedules ensure your stored water remains safe when you need it. Understanding the science helps you establish practical maintenance routines.
Container Safety Standards:
Food-Grade Certification: Look for containers specifically labeled "food grade" or "NSF certified for food contact." The recycling code alone isn't sufficient.
Safe Container Types:
- HDPE (Code 2): Most common food-grade water storage. White or blue, opaque, durable.
- PET/PETE (Code 1): Commercial water bottles. Safe but thinner, less durable for long-term storage.
- Stainless Steel: Excellent but expensive. No chemical leaching concerns.
- Glass: Chemically inert but heavy and breakable.
Containers to Avoid:
- Milk jugs (milk proteins impossible to fully remove, promotes bacterial growth)
- Previous chemical containers (even if washed)
- LDPE (Code 4—thin bags, not designed for long-term storage)
- Unknown plastics without food-grade marking
Recommended Containers: Purpose-built water storage containers from preparedness suppliers are designed for long-term storage with appropriate materials and UV-resistant coloring.
Rotation Schedules:
Municipal Treated Water:
- Minimum rotation: Every 12 months
- With added chlorine treatment: Every 2-3 years
- With commercial water preserver: Up to 5 years
Well Water or Untreated Sources:
- Purify before storage
- Rotate every 6 months
- Monitor closely for contamination signs
Signs Water Needs Replacement:
- Cloudy appearance
- Off smell or taste
- Visible particles or algae
- Container degradation (cracks, discoloration)
Rotation Best Practice:
Rather than dumping and refilling, use stored water for regular purposes (watering plants, cleaning, pet water) and refill with fresh water. This ensures constant rotation without waste.
Related topics: Long-Term Food Storage | Essential Survival Gear for Beginners
Explore: Water Storage & Filtration | Water Pillar Guide
⚡ Backup Power & Energy Solutions
⚡ Backup Power & Energy Solutions
Q1: What's the best portable power station for keeping essentials running during multi-day power outages?
The best portable power station depends on your specific needs, but capacity (measured in Wh or kWh), runtime, recharge speed, and portability are the critical factors. For most households, a 1000Wh-2000Wh power station can run essential appliances for 24-48 hours.
Understanding Power Station Specifications:
Capacity & Runtime: A 1000Wh (1kWh) power station can run a 100W device for 10 hours, or a 1000W microwave for 1 hour. Calculate your actual needs: refrigerator (600W running, ~4 hours daily = 2.4kWh), laptop (60W, 8 hours = 0.48kWh), lights (40W, 8 hours = 0.32kWh), phone charging (10W, 2 hours = 0.02kWh). Most families need 2000-3000Wh for basic essentials during a 48-hour outage.
Recharge Time: Wall charging on a 1000Wh unit typically takes 8-12 hours. For multi-day outages, solar panel charging is essential—plan for 400-600W of solar panels to realistically recharge during daylight. Don't rely solely on solar in cloudy climates or winter; include wall charging capability.
Portability vs. Power: Desktop units (EcoFlow Delta Pro, similar) offer massive capacity but weigh 50+ pounds. Portable units are grab-and-go friendly but limited capacity. Most households need two complementary units: a larger desktop unit for home backup and a smaller portable unit for evacuation.
Key Features to Prioritize:
- Pure sine wave output (not modified sine wave)—Required for sensitive electronics
- Multiple outlets—At least 2-3 AC outlets, USB ports, and USB-C
- Pass-through charging—Charge the station while powering devices
- Expandable design—Ability to add additional batteries
- Management app—Real-time monitoring and scheduling
Mountain Ready carries power stations from EcoFlow and Bluetti with clear capacity guidance and compatibility with our solar panel bundles.
Related topics: Off-Grid Living & Homesteading | Disaster-Specific Preparedness
Explore: EcoFlow Power Stations | Bluetti | Solar Panels
Q2: Should I invest in a whole-house generator or are solar generators and battery banks sufficient for emergency backup power?
This decision depends on your power requirements, budget, installation constraints, and willingness to maintain fuel-based systems. Both approaches have valid use cases.
Whole-House Generators:
Advantages:
- Run entire house including HVAC systems
- Automatic transfer switch operation (starts without intervention)
- Extended runtime with fuel resupply
- Handles high-draw appliances (AC, electric stove, dryer)
Disadvantages:
- High installation cost ($8,000-20,000+ installed)
- Requires professional installation and permits
- Ongoing fuel costs (natural gas, propane, or diesel)
- Regular maintenance requirements
- Noise during operation
- Not portable
Best For: Homeowners with medical equipment dependencies, those in areas with frequent extended outages, and those with budget for installation.
Solar Generators / Power Stations:
Advantages:
- No fuel costs or storage
- Silent operation
- Portable (evacuation capability)
- Low maintenance
- No professional installation
- Solar recharging independence
Disadvantages:
- Cannot run whole house (HVAC, electric stove, etc.)
- Limited capacity (typically 1-5kWh)
- Recharge time limitations (especially cloudy weather)
- Higher cost per watt-hour than fuel generators
Best For: Essential loads only (refrigerator, lights, devices, medical equipment), renters, those wanting portable backup, moderate outage duration (1-7 days).
Hybrid Approach (Recommended):
Many households benefit from both:
- Portable power station for immediate backup and evacuation capability
- Portable fuel generator (not whole-house) for extended outages
- Solar panels for fuel-free recharging during extended scenarios
See our Solar Power Guide for detailed recommendations.
Related topics: Off-Grid Living & Homesteading | Disaster-Specific Preparedness
Explore: EcoFlow Home Power Systems | Solar Power Guide
Q3: How do I calculate what size generator or power station I need to run my refrigerator, lights, and medical devices?
Calculating power needs is straightforward once you understand the difference between starting watts and running watts. Most household appliances require 2-3x more power on startup than during normal operation.
Step-by-Step Calculation Process:
Step 1: List Your Devices & Find Wattage
Most appliances have a label listing watts on the back or bottom. If not, search "[appliance name] watts" online. Here's a typical household emergency load:
- Refrigerator: 600W running (1800W startup)
- LED lights (10 bulbs): 100W total
- Laptop: 60W
- CPAP machine: 60W
- Phone/tablet chargers (3): 30W total
- Router/modem: 40W
Step 2: Account for Startup Surge
When the refrigerator compressor starts, it temporarily draws 3x running wattage. Add 1800W for the startup surge, plus all other running loads. Your peak requirement is approximately 1800W (fridge startup) + 290W (everything else running) = 2090W total.
Step 3: Calculate Daily Energy Consumption
Most people focus only on peak wattage and miss daily energy use (measured in Wh or kWh). Calculate actual hours of operation:
- Refrigerator: 600W × 8 hours daily = 4.8kWh
- Lights: 100W × 6 hours daily = 0.6kWh
- Laptop: 60W × 4 hours daily = 0.24kWh
- CPAP: 60W × 8 hours daily = 0.48kWh
- Phone/tablet: 30W × 2 hours daily = 0.06kWh
- Router: 40W × 12 hours daily = 0.48kWh
- Total Daily: 6.76kWh
Step 4: Choose Appropriate Backup Power
For this scenario:
- Portable power station: 3000Wh minimum capacity
- Generator: 3-4kW portable generator for longer runtime
- Hybrid approach: 2000Wh power station + generator for flexibility
Pro Tips for Medical Devices:
Medical device backup is non-negotiable. Calculate medical device needs separately and ensure your backup system prioritizes these loads. Many medical devices have battery backups—understand yours and maintain them.
Related topics: Disaster-Specific Preparedness | Off-Grid Living & Homesteading
Explore: EcoFlow Power Stations | Batteries & Chargers
Q4: What's the most cost-effective backup power solution that doesn't require professional installation or propane storage?
Portable power stations with solar panel charging offer the best balance of capability, convenience, and cost for most households seeking DIY backup power without fuel storage requirements.
Recommended Tier-Based Approach:
Entry Level ($200-500):
- 500-1000Wh portable power station
- Charges phones, laptops, lights, small appliances
- 100-200W portable solar panel
- Best for: Short outages (1-3 days), apartments, basic essentials
Mid-Range ($500-1500):
- 1500-2000Wh power station
- Runs refrigerator, CPAP, multiple devices
- 200-400W solar panel array
- Best for: Extended outages (3-7 days), families, medical equipment needs
Comprehensive ($1500-3000+):
- 3000Wh+ power station or expandable system
- Additional battery modules
- 400-800W solar panel system
- Best for: Extended outages (1-2+ weeks), whole-house essentials
Why Solar + Battery Works:
- No fuel storage: No propane tanks, gasoline cans, or fuel degradation concerns
- Silent operation: Neighbors won't hear (or complain about) your backup power
- Low maintenance: No oil changes, carburetor cleaning, or spark plug replacement
- Portable: Take it when you evacuate
- Indoor safe: No carbon monoxide concerns
Cost-Effective Brands:
Mountain Ready carries EcoFlow and Bluetti—both offer excellent value and proven reliability. The EcoFlow RIVER series provides strong entry-level options, while Delta series handles serious home backup needs.
Related topics: Essential Survival Gear for Beginners | Disaster-Specific Preparedness
Explore: EcoFlow Products | Solar Panels
Q5: Are solar panels and portable power stations like Jackery or EcoFlow worth it for emergency preparedness?
For most households, quality solar power stations represent one of the best investments in emergency preparedness. They address a critical vulnerability (power dependency) with minimal ongoing cost and maximum flexibility.
Value Proposition:
Immediate Utility: Unlike food storage that sits unused until emergencies, power stations can serve daily functions—camping, outdoor events, home office backup during storms, power tool use in the yard. This daily utility justifies the investment beyond emergency preparation.
Long-Term Cost Efficiency: A $1,000 power station with $300 in solar panels provides backup power for 10+ years with minimal maintenance. Compare to generators: $800 generator + $50/year fuel + $100/year maintenance = $2,300 over 10 years, plus fuel storage hassles.
EcoFlow vs. Competition:
EcoFlow offers advantages that justify premium pricing:
- Fastest charging: 0-80% in under 1 hour (wall charging)
- Expandable systems: Add extra batteries as needs grow
- Home integration options: Smart panels for whole-home backup
- Quality components: LiFePO4 batteries with 3,000+ cycle lifespan
- Vehicle/RV options: Specialized configurations for mobile use
Who Benefits Most:
- Families with medical equipment dependencies
- Those in frequent outage areas (storms, grid instability)
- Homeowners who can't install whole-house generators
- Renters wanting portable backup
- Anyone seeking fuel-free, maintenance-free backup power
Realistic Expectations:
Portable power stations won't run air conditioners, electric stoves, or electric water heaters. They handle essentials: refrigeration, lights, devices, fans, and small appliances. For HVAC backup, you need fuel-based generators or serious home power systems.
Related topics: Off-Grid Living & Homesteading | Disaster-Specific Preparedness
Explore: EcoFlow Collection | Portable Power Stations | Solar Power Guide
Q6: What's the realistic runtime I can expect from a 1000Wh power station running essential appliances?
Understanding realistic runtime requires honest assessment of your actual power consumption. Marketing claims often cite ideal conditions; real-world usage differs significantly.
Efficiency Losses:
Power stations aren't 100% efficient. Between inverter losses, battery chemistry, and conversion overhead, expect 80-85% usable capacity. A 1000Wh station delivers approximately 800-850Wh of usable power.
Realistic Runtime Calculations:
Scenario 1: Minimal Load (Devices Only)
- 2 phones charging (10W each): 20W
- LED lamp: 10W
- Wi-Fi router: 15W
- Total load: 45W
- Runtime: 850Wh ÷ 45W = ~19 hours
Scenario 2: Light Household
- Refrigerator (cycling): 100W average
- Lights: 50W
- Devices: 40W
- Total load: 190W
- Runtime: 850Wh ÷ 190W = ~4.5 hours
Scenario 3: Essential Backup
- Refrigerator: 100W average (cycles, not constant)
- CPAP machine: 40W (overnight)
- Lights (LED): 50W
- Phone/laptop charging: 30W
- Total load: 220W
- Runtime: 850Wh ÷ 220W = ~3.9 hours
Key Insight: Refrigerator Runtime
Modern refrigerators run compressors about 30-50% of the time. A 600W running refrigerator averages 100-150W over time. With a 1000Wh station dedicated solely to refrigeration, expect 6-8 hours of operation before recharge.
Extending Runtime:
Solar Recharging: With 400W solar panels in good sun, you can add 1.5-2.5kWh per day of charging—potentially matching or exceeding daily usage.
Load Management: Run high-draw appliances in shifts. Charge devices while solar is available, run refrigerator during peak sun, reduce loads at night.
Larger Capacity: For realistic multi-day backup, consider 2000-3000Wh stations or expandable systems with extra batteries.
Related topics: Disaster-Specific Preparedness | Off-Grid Living & Homesteading
Explore: EcoFlow Power Stations | Extra Batteries
Q7: How do I safely connect a generator to my home without backfeeding into the grid?
Improper generator connection can kill utility workers and neighbors by "backfeeding" electricity into power lines that workers assume are dead. This is illegal and dangerous. Proper connection requires either a transfer switch or careful isolation.
The Danger of Backfeeding:
When you connect a generator directly to your home's electrical panel without proper isolation, electricity flows backward through your meter into the neighborhood power lines. Line workers repairing outages can be electrocuted by this unexpected power source.
Safe Connection Methods:
Option 1: Manual Transfer Switch (Recommended)
A manual transfer switch ($200-500 + installation) is installed between your meter and main panel. It physically disconnects your home from the grid before connecting generator power. You cannot have both connected simultaneously.
Benefits:
- Safest option
- Powers circuits through normal wiring
- Professional installation ensures compliance
- Relatively affordable
Option 2: Interlock Kit
An interlock kit ($50-150 + installation) is a mechanical device that prevents your main breaker and generator breaker from being on simultaneously. Less comprehensive than a transfer switch but more affordable.
Option 3: Extension Cord Method (Simple but Limited)
Run extension cords from the generator directly to appliances without connecting to home wiring at all. This bypasses backfeed risk entirely but limits what you can power.
Requirements:
- Use heavy-duty extension cords (12-gauge minimum)
- Never exceed cord amperage ratings
- Keep generator outdoors (carbon monoxide risk)
- Plug directly into appliances, not outlets
Carbon Monoxide Warning:
More people die from generator carbon monoxide poisoning than from all other generator hazards combined. Never run fuel generators indoors, in garages, or near windows/doors. Place generators 20+ feet from structures with exhaust pointing away.
Power Stations Avoid These Issues: Battery-based power stations produce no carbon monoxide and can operate safely indoors—one reason they're increasingly preferred over fuel generators.
Related topics: Disaster-Specific Preparedness | Tools, Repair & Field Utility Equipment
Explore: EcoFlow Power Stations | Home Power Systems
Q8: What backup power options work best in areas prone to multi-week outages from hurricanes or ice storms?
Multi-week outages require fundamentally different thinking than short-term backup. Fuel storage, solar capacity, and load management become critical considerations.
Fuel-Based Systems for Extended Outages:
Dual-Fuel Generators: Generators that run on both gasoline and propane offer flexibility. Gasoline provides initial power; propane tanks (which don't degrade) provide extended runtime. A 20-pound propane tank runs a 3500W generator for approximately 10-12 hours.
Propane Storage: Unlike gasoline (which degrades in months), propane stores indefinitely. Multiple 20-100 pound tanks provide weeks of fuel without rotation concerns. Check local regulations on storage limits.
Diesel Generators: Diesel fuel stores longer than gasoline and offers better fuel efficiency. Common for serious extended backup applications.
Solar-Based Systems for Extended Outages:
For truly extended outages (weeks to months), solar with battery storage becomes increasingly attractive:
Expandable Power Stations: Systems like EcoFlow Delta Pro with extra batteries can provide 7-25kWh of storage with solar recharging.
Solar Panel Capacity: For serious extended backup, plan for 1000W+ of solar panels—enough to fully recharge batteries daily even in poor conditions.
Hybrid Approach: Solar for daily operations with fuel generator backup for cloudy periods or high-demand situations.
Load Management Strategy:
Extended outages require disciplined power usage:
- Run refrigerator on scheduled intervals (4 hours on, 4 hours off still preserves food)
- Charge devices during peak solar hours
- Eliminate non-essential loads entirely
- Use alternative lighting (battery lanterns, candles) to preserve power for essentials
- Consider manual alternatives for some tasks
Related topics: Disaster-Specific Preparedness | Off-Grid Living & Homesteading
Explore: EcoFlow Home Power Systems | Grid Failure Survival Guide
🥫 Long-Term Food Storage & Emergency Rations
🥫 Long-Term Food Storage & Emergency Rations
Q1: What are the best long-term food storage options that actually taste decent and last 20+ years?
Modern freeze-dried foods have improved dramatically. Quality manufacturers now offer meals that rival regular home cooking with 25-30 year shelf lives.
ReadyWise:
Wide range of meal options with 25-year shelf life. Their Simple Kitchen line focuses on taste. Adventure Meals work for both emergency storage and camping.
Mountain House:
Industry standard for taste with 30-year shelf life. More expensive but consistently rated highest.
Key Selection Criteria:
- Calorie density (400+ calories per serving for main meals)
- Variety to prevent appetite fatigue
- Preparation requirements (consider fuel availability)
- Actual taste testing before bulk purchase
See our complete food storage guide.
Related topics: Emergency Preparedness Kits & Bundles | Disaster-Specific Preparedness
Explore: ReadyWise Collection | Emergency Food
Q2: How much emergency food should I stockpile for a family of four to get through a 3-month crisis?
Three months for four people requires significant quantity and careful nutritional planning.
Caloric Requirements:
- 2 adults × 2,000 calories × 90 days = 360,000 calories
- 2 children × 1,500 calories × 90 days = 270,000 calories
- Total: 630,000 calories minimum
Storage Approach Options:
Freeze-Dried Meals: ReadyWise 3-month supplies cost $1,500-$3,000. Requires only boiling water.
Bulk Staples: Rice (100+ lbs/person), dried beans (50+ lbs/person), wheat, oats, cooking oil. Cost: $400-$800 but requires more cooking.
Hybrid Approach (Recommended):
- ReadyWise buckets for convenience (1 month)
- Bulk staples for main calories
- Canned proteins
- Comfort foods
Read our guide to stockpiling on a budget.
Related topics: Water Storage & Purification | Off-Grid Living & Homesteading
Explore: ReadyWise Food Buckets | Budget Stockpiling Guide
Q3: Are freeze-dried meals from Mountain House or Augason Farms worth the cost or should I just buy bulk rice and beans?
Both approaches have merit. Most serious preppers use a combination.
Freeze-Dried Advantages:
- Convenience (add water, wait, eat)
- Variety (actual meals, not just staples)
- 25-30 year shelf life
- Compact and lightweight
- Nutritionally complete
Bulk Staples Advantages:
- Cost ($0.10-0.30/serving vs $2-5+ for freeze-dried)
- Familiar foods
- Excellent caloric density
- Multi-use for daily cooking
Bulk Staples Limitations:
- Cooking requirements (1-3 hours for beans)
- Nutritional gaps without supplementation
- Storage complexity (Mylar bags, oxygen absorbers)
- Appetite fatigue
Recommended Approach:
- 50% calories from bulk staples
- 25% from freeze-dried meals
- 25% from canned goods and comfort foods
Related topics: Disaster-Specific Preparedness | Off-Grid Living & Homesteading
Explore: ReadyWise Collection | Foods That Outlive You
Q4: What's the most cost-effective way to build a one-year food supply without going into debt?
A structured approach spreads costs over 12-24 months while ensuring continuous preparedness.
Months 1-3: Foundation ($100-150/month)
Rice, dried beans, oats, cooking oil, salt, sugar, honey
Months 4-6: Protein & Variety ($100-150/month)
Canned meats, canned vegetables, peanut butter, dried pasta
Months 7-9: Freeze-Dried Supplements ($150-200/month)
ReadyWise meal buckets, freeze-dried fruits and vegetables
Months 10-12: Comfort & Completion ($100-150/month)
Spices, comfort foods, specialty items, gap-filling
Cost-Saving Strategies:
- Buy in bulk at restaurant supply stores
- Stock up during sales
- VIP Membership for consistent discounts
- DIY packaging with Mylar bags
Read More: How to Stockpile Food on a Tight Budget
Related topics: Essential Survival Gear for Beginners | Family Emergency Readiness Solutions
Explore: ReadyWise Stocking Up Kits | Budget Stockpiling Guide
Q5: How do I store emergency food so it doesn't get ruined by heat, humidity, or pests?
Proper storage is as important as the food itself.
The Enemies of Food Storage:
- Heat: Every 10°F increase above 70°F roughly halves shelf life
- Humidity: Target below 60%
- Light: UV radiation degrades nutrients and packaging
- Oxygen: Oxidation destroys fats and vitamins
- Pests: Rodents and insects can devastate stores
Storage Solutions:
- Climate-controlled interior spaces
- Food-grade buckets with gamma seal lids
- Mylar bags with oxygen absorbers
- Commercial packaging left sealed
Rotation System:
FIFO (First In, First Out). Label everything with purchase dates. Set calendar reminders.
Read More: Ultimate Guide to Food Storage and How to Tell if Canned Food Has Gone Bad
Related topics: Water Storage & Purification | Off-Grid Living & Homesteading
Explore: ReadyWise Food Buckets | Food Storage Guide
Q6: What nutritional considerations should I think about when planning long-term food storage beyond just calories?
Survival requires more than calories. Long-term storage must address macronutrients, micronutrients, and psychological factors.
Macronutrient Requirements:
- Protein (50-75g/day): Canned meats, freeze-dried products, legume variety
- Fats (40-70g/day): Cooking oils, peanut butter, coconut oil, canned fatty fish
- Carbohydrates: Whole grains, oats
Critical Micronutrients:
- Vitamin C: Supplements, freeze-dried fruits (scurvy develops in 1-3 months without)
- B Vitamins: Whole grains, multivitamins
- Iron: Canned meats, beans, supplements
Electrolytes: Oral rehydration salts, electrolyte powders, basic salt
Psychological Nutrition:
Coffee, tea, chocolate, favorite seasonings, comfort meal favorites
Read More: Essential Nutritional Requirements and Essential Minerals for Survival
Related topics: Emergency Medical & First Aid Supplies | Disaster-Specific Preparedness
Explore: Emergency Food | Nutritional Requirements Guide
Q7: Can I realistically rotate through emergency food storage or should I just plan to replace it every few years?
Rotation is theoretically ideal but practically challenging. Most successful preppers use a hybrid approach.
Foods to Actively Rotate (1-2 Year Cycle):
Canned goods, cooking oils, peanut butter, crackers and cereals—anything you eat regularly
Foods to Store Long-Term (5-30 Years):
Freeze-dried meals, properly stored bulk staples, honey, white rice, dried beans in Mylar
Hybrid Approach (Recommended):
- 50% Rotation stock (use and replace regularly)
- 30% Long-term storage (set and check annually)
- 20% Specialty items (periodic replacement)
Calendar Reminders:
- Monthly: Check rotation pantry
- Quarterly: Inventory check
- Annually: Inspect long-term storage
- Every 5 years: Evaluate items approaching expiration
Related topics: Emergency Preparedness Kits & Bundles | Essential Survival Gear for Beginners
Explore: ReadyWise Long-Term Storage | Food Storage Tips
Q8: What emergency foods don't require cooking or water in case utilities are completely down?
When fuel and water are limited, ready-to-eat options become essential.
Truly Ready-to-Eat Options:
- Canned meats, fish, fruits, vegetables (with pull-top lids)
- Peanut butter, nut butters
- Nuts, seeds, trail mix
- Energy bars, granola bars
- Dried fruit
- Crackers, hard tack
- MRE (Meals Ready to Eat) main courses
- Jerky, meat sticks
Minimal Preparation Options:
- ReadyWise Adventure Meals (add cold water, wait longer)
- Instant oatmeal packets (cold water works)
- Cereal with shelf-stable milk boxes
Storage Considerations:
Ready-to-eat foods typically have shorter shelf lives than freeze-dried options. Plan for more frequent rotation.
Read More: Top 10 Best Foods for Bug-Out Bags
Related topics: Vehicle, Travel & Bug-Out Preparedness | Disaster-Specific Preparedness
Explore: ReadyWise Adventure Meals | Bug-Out Bag Food Guide
⛺ Emergency Shelter & Protection Gear
⛺ Emergency Shelter & Protection Gear
Q1: What are the best emergency shelter options if I need to evacuate or my home becomes uninhabitable?
Emergency shelter needs range from temporary protection to extended habitation. The best option depends on your scenario, climate, and mobility requirements.
Immediate/Evacuation Options:
- Emergency bivvies: Compact, lightweight, reflect body heat
- Emergency blankets (Mylar): Minimal weight, cheap, short-term use only
- Compact tarps with cordage: Versatile, configurable
Short-Term Options (3-7 Days):
- Quality 3-season tent: Weather protection, psychological comfort
- Hammock systems with tarps: Off-ground sleeping, quick setup
- Vehicle camping setup: For car-based evacuation
Extended Options:
- 4-season tent: Handles severe weather, extended use
- Wall tents: Semi-permanent shelter with stove capability
Climate Considerations:
- Cold weather: Insulated sleeping systems, wind protection, heating capability
- Hot weather: Ventilation, shade, reflective materials
- Wet weather: Waterproof barriers, drainage, ground protection
Related topics: Vehicle, Travel & Bug-Out Preparedness | Disaster-Specific Preparedness
Explore: Shelter & Tents | Camping & Survival
Q2: Should I invest in a quality 4-season tent or are emergency bivvies and tarps sufficient for bug-out situations?
This depends on your likely scenarios, physical fitness, and financial resources.
Emergency Bivvies/Tarps:
- Pros: Lightweight (8-16 oz), compact, affordable ($15-50), fast deployment
- Cons: Limited comfort, minimal insulation, psychological stress, poor long-term viability
- Best for: 72-hour kits, weight-conscious packing, budget constraints
4-Season Tents:
- Pros: Weather protection, comfort, morale, security, extended viability
- Cons: Heavy (6-12+ lbs), expensive ($200-600+), requires practice
- Best for: Vehicle-based evacuation, base camps, extended scenarios
Recommended Approach:
- Go-bag: Emergency bivvy + compact tarp (minimal weight)
- Vehicle kit: Quality 3-4 season tent + sleeping bags
- Home: Both options plus backup materials
Skill Development:
Practice setting up shelters before you need them. A tarp requires more skill than a tent but offers more versatility.
Related topics: Vehicle, Travel & Bug-Out Preparedness | Essential Survival Gear for Beginners
Explore: Shelter & Tents | Bug-Out Bags
Q3: What's the best way to prepare for sheltering in place during extended emergencies without heat or electricity?
Sheltering in place without utilities requires preparing your home as an emergency shelter. Focus on insulation, heating alternatives, and zone management.
Zone Management:
Select one room as your "warm room"—ideally an interior room with minimal windows. Close off other rooms to conserve heat. Move sleeping arrangements to the warm room.
Heating Alternatives:
- Wood stove or fireplace (with adequate fuel stockpile—2+ cords)
- Propane space heaters with ventilation
- Kerosene heaters (proper ventilation essential)
- Passive solar (open curtains on sunny days, close at night)
Insulation Improvements:
- Window insulation film or plastic sheeting
- Heavy curtains or blankets over windows
- Door draft stoppers
- Rugs on cold floors
- Temporary insulation in unused rooms
Sleeping Warm:
- Quality sleeping bags rated for cold
- Layered bedding
- Sleep together to share body heat
- Hot water bottles (careful with burns)
- Insulated sleeping pads under sleeping bags
Read our Complete Bug-In Guide.
Related topics: Backup Power & Energy Solutions | Disaster-Specific Preparedness
Explore: Camping & Survival Gear | Bug-In Guide
Q4: How do I choose between emergency blankets, sleeping bags, and insulated bivvies for cold-weather survival?
Each serves different purposes. Understanding their limitations helps you choose appropriately.
Emergency Blankets (Mylar):
- Cost: $2-10
- Weight: 2-4 oz
- Use: Supplemental insulation, shock treatment, signaling
- Limitations: Tear easily, no insulation value, noisy, psychological distress
- Best for: Backup/supplement only
Sleeping Bags:
- Cost: $50-500 depending on rating and quality
- Weight: 2-5 lbs
- Use: Primary sleep system, extended comfort
- Considerations: Temperature rating (add 10-15°F buffer), down vs synthetic (wet performance), compressibility
- Best for: Extended use, vehicle kits, home backup
Insulated Bivvies:
- Cost: $30-150
- Weight: 8-24 oz
- Use: Emergency shelter with insulation
- Considerations: Better than Mylar, not as good as sleeping bags, condensation issues
- Best for: Go-bags, weight-conscious packing
Recommended Layered Approach:
- Base layer: Quality sleeping bag (rated 15°F below expected conditions)
- Backup: Insulated bivvy in go-bag
- Supplement: Emergency blankets for additional warmth or signaling
Read our Cold Weather Survival Guide.
Related topics: Vehicle, Travel & Bug-Out Preparedness | Disaster-Specific Preparedness
Explore: Shelter & Tents | Winter Emergency Guide
Q5: What shelter supplies should I keep in my car in case I get stranded in winter conditions?
Vehicle winter survival kit can save your life if stranded in cold conditions. The goal is surviving potentially overnight in your vehicle.
Essential Vehicle Winter Kit:
- Heavy blanket or sleeping bag rated for cold
- Emergency blankets (Mylar) as backup
- Extra warm clothing (hat, gloves, socks, layers)
- Hand and foot warmers (chemical or reusable)
- Small shovel (digging out, creating ventilation)
- Traction aids (sand, cat litter, traction mats)
- Flashlight and batteries
- First aid kit
- High-calorie non-perishable food
- Water (or snow collection capability)
- Candle in metal container (emergency heat/light—ventilate carefully)
- Brightly colored cloth for signaling
- Phone charger (car-compatible when running engine)
Vehicle Survival Priorities:
- Stay with vehicle unless help is visible and close
- Run engine periodically for heat (ensure exhaust pipe is clear)
- Create air gap under vehicle (insulates from ground cold)
- Signal for help (hazards, bright cloth, flashlight)
See our Emergency Car Kit Essentials.
Related topics: Vehicle, Travel & Bug-Out Preparedness | Disaster-Specific Preparedness
Explore: Emergency Car Kit Guide
Q6: Are those mylar emergency blankets actually effective or just marketing hype for preppers?
Mylar emergency blankets are genuinely effective for specific applications but frequently misunderstood and over-relied upon.
What They Actually Do:
- Reflect 80-90% of radiated body heat back to you
- Provide windbreak protection
- Create vapor barrier (reduces evaporative heat loss)
- Waterproof emergency cover
- Signaling (reflective surface)
What They Don't Do:
- Provide insulation (no thickness = no trapped air = no insulation)
- Replace sleeping bags or proper blankets
- Work well in windy conditions without shelter
- Last through extended use (tear easily)
- Provide comfort (noisy, psychological distress)
Effective Uses:
- Supplement to existing insulation (wrap around sleeping bag)
- Emergency shelter roof (reflects heat down, sheds water)
- Shock/hypothermia treatment (reflects body heat while warming in progress)
- Ground barrier (reflects ground cold)
- Signaling for rescue
Realistic Assessment:
Include Mylar blankets in your kit—they weigh almost nothing and provide genuine supplemental value. But never rely on them as primary cold-weather survival gear. Pair with proper sleeping systems.
Related topics: Essential Survival Gear for Beginners | Vehicle, Travel & Bug-Out Preparedness
Explore: Shelter & Tents | Shelter Pillar Guide
Q7: What's the minimum shelter gear I need to survive 72 hours outdoors in variable weather conditions?
The minimum depends on conditions, but this represents essential baseline equipment for temperate climate 72-hour survival.
Absolute Minimum (Weight: 2-3 lbs):
- Emergency bivvy (8-16 oz): Waterproof cover, reflects body heat
- Compact tarp (8-12 oz) with paracord: Configurable overhead protection
- Emergency blanket (2-4 oz): Backup insulation, ground cover
- Fire-starting capability (2-4 oz): Warmth, drying, morale
Improved Minimum (Weight: 5-7 lbs):
- All of the above, plus:
- Lightweight sleeping bag or heavy-duty bivvy (2-3 lbs)
- Larger tarp (8x10 minimum) for rain protection
- Ground pad or closed-cell foam (8-16 oz)
Recommended Minimum (Weight: 8-12 lbs):
- All of the above, plus:
- Quality 3-season sleeping bag rated for conditions
- Quality inflatable or closed-cell sleeping pad
- Lightweight tent or hammock system
Variable Weather Considerations:
- Hot conditions: Shade, ventilation, ground insulation from heat
- Cold conditions: Insulation layers, wind protection, ground insulation from cold
- Wet conditions: Waterproof coverage, elevated sleeping, dry clothing storage
Read our Shelter Pillar Guide.
Related topics: Essential Survival Gear for Beginners | Vehicle, Travel & Bug-Out Preparedness
Explore: Bug-Out Bags | Shelter & Tents
Q8: How do I set up an emergency shelter system in my home if windows are broken or insulation fails during disasters?
Home shelter improvisation focuses on creating a protected "warm room" using available materials and strategic zone management.
Immediate Window Protection:
- Plywood boards (pre-cut to window sizes for storm shutters)
- Heavy plastic sheeting with duct tape
- Tarps secured with furring strips
- Cardboard or foam insulation as temporary measure
- Blankets or heavy fabric as last resort
Zone Management:
- Select smallest interior room with fewest windows
- Close all doors to unused rooms
- Hang blankets over doorways for additional insulation
- Focus all heating resources on single zone
Insulation Improvisation:
- Hang blankets/curtains over walls and windows
- Create air gaps using suspended sheets (still air insulates)
- Layer floor with rugs, cardboard, foam
- Use furniture to create smaller enclosed sleeping area
- Tent inside house creates micro-climate
Heating the Warm Room:
- Portable power station with small space heater
- Propane heaters (ventilation required—crack window)
- Body heat from multiple people
- Heated water bottles in sleeping areas
- Avoid open flames indoors without proper ventilation
Long-Term Preparation:
Stock plywood, plastic sheeting, duct tape, insulation materials. Practice zone management before emergencies.
Related topics: Backup Power & Energy Solutions | Disaster-Specific Preparedness
Explore: Bug-In Guide
📻 Emergency Communication & Survival Radios
📻 Emergency Communication & Survival Radios
Q1: What's the best emergency radio that gets weather alerts and can charge my phone during power outages?
A quality emergency radio should receive NOAA Weather Radio frequencies, offer multiple power options, and provide at least limited phone charging capability.
Essential Features:
- NOAA Weather Radio: Receives all 7 NOAA frequencies with SAME (Specific Area Message Encoding) for automatic alerts
- Multiple Power Sources: Hand-crank, solar panel, batteries, USB charging
- Phone Charging: USB output (though output is usually low—supplement with power station)
- AM/FM: Standard broadcast for news and information
- LED Flashlight: Integrated lighting
- SOS Alert: Flashing light and/or siren for signaling
Recommended Brands:
Quality options from brands like Midland, Kaito, and Eton provide reliable performance. Look for emergency radios with solid construction and good reviews.
Phone Charging Reality:
Hand-crank charging is extremely slow for phones (10-15 minutes cranking for 1-2% battery). Use radios primarily for information, not phone charging. A portable power station or power bank handles phone charging far more effectively.
Read our Emergency Communication Guide.
Related topics: Backup Power & Energy Solutions | Disaster-Specific Preparedness
Explore: Radios & Comms | Communication Pillar Guide
Q2: Should I invest in ham radio equipment for emergencies or are GMRS and FRS radios sufficient for family communication?
The answer depends on your communication goals: family coordination within a few miles, or broader emergency communication capability.
FRS (Family Radio Service):
- No license required
- Limited range (0.5-2 miles typical, terrain dependent)
- Low power (0.5-2 watts)
- Simple operation
- Cost: $20-100 for quality pair
- Best for: Immediate family coordination, neighborhood communication
GMRS (General Mobile Radio Service):
- License required ($35, no exam, covers family)
- Extended range (1-5+ miles typical)
- Higher power (up to 50 watts)
- Repeater capable
- Cost: $50-300+ per radio
- Best for: Extended family coordination, community groups
Ham Radio (Amateur Radio):
- License required (Technician exam)
- Extensive range (local to worldwide)
- Wide frequency access
- Emergency nets and protocols
- Cost: $30-500+ per radio
- Best for: Serious emergency communication, community emergency response
Recommended Approach:
- Immediate needs: Quality FRS/GMRS radios for family
- Community coordination: GMRS license + quality handhelds
- Serious preparedness: Ham Technician license + VHF/UHF radio
Related topics: Family Emergency Readiness Solutions | Disaster-Specific Preparedness
Explore: Radios & Comms | Off-Grid Communication Guide
Q3: What communication devices actually work when cell towers are down and internet is out?
When modern infrastructure fails, communication reverts to radio-based and non-electronic methods.
Radio-Based Options:
Two-Way Radios (GMRS/FRS): Work without any infrastructure. Range depends on power, terrain, and antenna height. Essential for family coordination.
Ham Radio: Works without infrastructure. Can communicate long distances via HF bands. Many areas have emergency nets that activate during disasters.
CB Radio: Works without infrastructure. Limited range (2-5 miles) but widely compatible. Popular with truckers for road information.
NOAA Weather Radio: Broadcasts continue from hardened transmitter sites. Receives information but cannot transmit.
Non-Electronic Options:
Signal mirrors: Visible for miles in daylight
Whistles: Three blasts is universal distress signal
Bright cloth/flags: Visual signaling
Written messages: Physical message relay
Runner/messenger: Human relay of information
Satellite-Based Options:
Satellite messengers (Garmin inReach, SPOT): Work globally via satellite. Subscription required. Two-way text messaging and SOS.
Satellite phones: Work globally. Expensive equipment and minutes.
Related topics: Disaster-Specific Preparedness | Vehicle, Travel & Bug-Out Preparedness
Explore: Radios & Comms
Q4: How do I choose between hand-crank, solar, and battery-powered emergency radios?
Each power source has advantages and limitations. The best radios offer multiple power options.
Battery-Powered:
- Pros: Immediate power, reliable, consistent performance
- Cons: Batteries deplete and may be unavailable during emergencies
- Best for: Primary power source with battery stockpile
Hand-Crank:
- Pros: Always available, no consumables needed
- Cons: Physically tiring, slow power generation, mechanical parts can fail
- Best for: Backup power when other sources unavailable
Solar:
- Pros: Renewable, no consumables, passive charging
- Cons: Weather dependent, slower charging, panel can be damaged
- Best for: Extended outages with available daylight
USB Rechargeable:
- Pros: Compatible with power stations, fast charging
- Cons: Requires power source
- Best for: Primary charging with backup power available
Recommended Selection:
Choose radios with all four power options: battery backup for immediate use, USB for convenient recharging from power stations, solar for extended outages, and hand-crank for worst-case backup.
Related topics: Backup Power & Energy Solutions | Essential Survival Gear for Beginners
Explore: Radios & Comms | Batteries & Chargers
Q5: Are two-way radios like those from Midland or Motorola reliable enough for emergency family communication within a few miles?
Quality two-way radios from reputable manufacturers are absolutely reliable for emergency family communication. Understanding their limitations helps set realistic expectations.
Realistic Range Expectations:
Manufacturers claim 25-35 mile range. Reality: 0.5-5 miles depending on conditions.
Urban environment: 0.5-2 miles typical (buildings block signals)
Suburban: 1-3 miles typical
Rural open terrain: 2-5+ miles possible
Hilltop to valley: Can exceed 10+ miles with clear line of sight
Reliability Factors:
- Frequency: GMRS generally outperforms FRS due to higher power
- Power output: Higher wattage = longer range
- Antenna: External antennas improve range significantly
- Terrain: Hills, buildings, and vegetation reduce range
- Weather: Heavy rain can reduce range slightly
Recommended Practices:
- Test radios before emergencies (find actual range in your area)
- Establish scheduled check-in times
- Designate primary and backup channels
- Keep extra batteries charged and ready
- Consider repeater access (GMRS)
Related topics: Family Emergency Readiness Solutions | Disaster-Specific Preparedness
Explore: Radios & Comms
Q6: What's the realistic range I can expect from handheld radios in urban versus rural environments?
Understanding real-world range helps you plan appropriate communication strategies.
Urban Environment (0.5-2 Miles):
Buildings absorb and reflect radio signals dramatically. Steel and concrete are particularly problematic. Ground-level communication in dense urban areas rarely exceeds 1-2 miles. Upper floors improve range significantly. Seek elevated positions when possible.
Suburban Environment (1-3 Miles):
Mix of open areas and structures. Houses and trees reduce range compared to open terrain. Generally 1-3 miles for ground-level communication. Higher ground (parking garage roofs, hills) can double effective range.
Rural Open Terrain (2-8+ Miles):
Line of sight matters most. Flat open ground: 2-5 miles typical. Hilltop to hilltop: 5-15+ miles possible. Valleys and forests reduce range significantly.
Factors That Increase Range:
- Higher power output (GMRS vs FRS)
- Elevated position (roof, hill, tower)
- External antenna (GMRS allows)
- Clear weather
- Fewer obstructions
Factors That Decrease Range:
- Dense buildings or vegetation
- Weather (heavy rain)
- Battery depletion
- Interference from other users
Practical Planning:
Test your radios in your actual environment. Establish relay points for extended communication. Plan for worst-case range and be pleasantly surprised.
Related topics: Family Emergency Readiness Solutions | Vehicle, Travel & Bug-Out Preparedness
Explore: Radios & Comms
Q7: Do I need a license to use emergency communication radios or are there legal options for unlicensed use?
Radio licensing can be confusing. Here's a clear breakdown of what requires licensing and what doesn't.
No License Required:
FRS (Family Radio Service): Specific handheld radios on designated frequencies. Limited to 0.5-2 watts. Cannot modify antennas. Most consumer "walkie-talkies" are FRS.
MURS (Multi-Use Radio Service): 5 VHF frequencies. Up to 2 watts. Less common but no license needed.
CB Radio: 40 AM channels. Up to 4 watts. Popular for vehicles.
NOAA Weather Radio: Receive-only. No license to listen.
License Required:
GMRS: $35 for 10-year license covering your family. No exam required. Apply online via FCC. Higher power (up to 50 watts) and repeater access.
Amateur (Ham) Radio: Exam required for each license class (Technician, General, Extra). Most frequencies and modes. Essential for serious emergency communication.
Emergency Exception:
FCC regulations allow anyone to use any radio to call for help during life-threatening emergencies. This doesn't grant routine access but covers genuine emergencies.
Recommended Approach:
Start with quality FRS radios for immediate family use. If you want extended range, get the simple GMRS license. For serious emergency communication capability, pursue ham radio licensing.
Related topics: Family Emergency Readiness Solutions | Disaster-Specific Preparedness
Explore: Radios & Comms
Q8: What are the best emergency communication tools for staying informed during regional disasters when normal media is unavailable?
When internet, TV, and cell service fail, radio-based information sources become essential.
Primary Information Sources:
NOAA Weather Radio: Continuous weather updates, emergency alerts, official warnings. Broadcasts from hardened transmitter sites that survive most disasters. Essential for any emergency kit.
AM/FM Radio: Local stations often continue broadcasting during emergencies with essential information. Battery-powered or crank-powered radios ensure access.
Amateur (Ham) Radio Nets: During disasters, ham operators often provide real-time information when other sources fail. Even receiving (listening) without transmitting provides valuable information.
Secondary Information Sources:
CB Radio: Truckers often share road conditions and regional information.
GMRS/FRS: Neighborhood information sharing when formal channels fail.
Shortwave Radio: International broadcasts provide information when regional sources are compromised.
Information Management:
- Establish scheduled listening times to conserve batteries
- Take notes on essential information
- Cross-reference multiple sources
- Share verified information with neighbors
- Don't spread unverified rumors
Read our Communication Pillar Guide.
Related topics: Disaster-Specific Preparedness | Family Emergency Readiness Solutions
Explore: Radios & Comms | Communication Guide
🧭 Tactical Gear & Outdoor Equipment
🧭 Tactical Gear & Outdoor Equipment
Q1: What tactical gear is actually useful for emergency preparedness versus just looking cool?
Separating functional tactical gear from mall-ninja fantasies requires understanding what actually matters in emergencies.
Genuinely Useful Tactical Gear:
Quality Backpacks: MOLLE webbing, durable materials, comfortable carry systems. Tactical packs are designed for rough use and extended carry.
Quality Lighting: Tactical flashlights from Streamlight and SureFire are built for professional use. Higher output, more durable, better switches than consumer options.
Multitools: Quality multitools from SOG provide genuine utility for repairs and problem-solving.
Fixed-Blade Knives: Quality fixed blades handle tasks folding knives can't. Food prep, shelter building, wood processing.
Questionable/Overkill for Most Civilians:
Plate carriers: Unless you're in a genuine high-threat environment, weight and cost aren't justified.
Excessive pouches and attachments: More gear ≠ more prepared. Simplicity and skill matter more.
Camouflage everything: In most emergencies, visibility helps rescue. Camo is often counterproductive.
Buying Criteria:
Ask "What specific problem does this solve?" If the answer is "looking prepared," it's probably unnecessary.
Related topics: Essential Survival Gear for Beginners | Vehicle, Travel & Bug-Out Preparedness
Explore: Backpacks & Bags | SOG Knives & Tools | Streamlight
Q2: I need durable outdoor equipment that works for camping, hiking, and emergency situations - what brands are reliable?
Dual-purpose gear that handles both recreation and emergencies provides better value and more practice opportunities.
Lighting:
- Streamlight: Professional-grade flashlights and headlamps
- SureFire: Premium tactical lighting
Knives & Tools:
- SOG: Knives, multitools, axes, machetes
- Leatherman: Premium multitools
Bags & Packs:
- Haley Strategic: Tactical packs and accessories
- Osprey: Hiking-focused packs with durability
Water Filtration:
Power:
Medical:
- My Medic: Quality first aid kits
- North American Rescue: Professional trauma supplies
See our Top Brands page for complete listings.
Related topics: Essential Survival Gear for Beginners | Tools, Repair & Field Utility Equipment
Explore: Top Brands | Best Sellers
Q3: What's the difference between military-grade tactical gear and civilian outdoor equipment for emergency use?
Understanding this distinction helps you choose appropriate gear without overspending on capabilities you don't need.
Military-Grade Characteristics:
- Designed for combat conditions (ballistic protection, rapid deployment)
- Built to military specifications (MIL-SPEC)
- Often heavier to withstand extreme abuse
- Camouflage patterns for concealment
- Designed for weapons integration
- Higher cost due to durability requirements
Civilian Outdoor Characteristics:
- Designed for recreation and general use
- Optimized for weight and comfort
- Bright colors for visibility (safety priority)
- Not designed for weapons integration
- Often more cost-effective
- Easier maintenance
When Military-Grade Makes Sense:
- You need genuine durability (professional use, extreme conditions)
- Tactical applications (security work, certain vocations)
- Budget allows for higher quality investment
When Civilian Gear Works Better:
- Cost is a factor
- Weight matters (hiking, extended carry)
- Visibility aids rescue
- Primary use is recreation with emergency backup
Practical Reality:
Most civilians benefit from high-quality outdoor gear rather than military-specific equipment. A quality hiking pack from a reputable manufacturer handles emergencies well. Tactical flashlights and quality knives are worth the investment, but plate carriers and combat boots are overkill for most.
Related topics: Essential Survival Gear for Beginners | Personal Security & Situational Awareness
Explore: Outdoor Recreation | Camping & Survival
Q4: Should I invest in plate carriers and tactical vests or is that overkill for civilian emergency preparedness?
For the vast majority of civilians, plate carriers and tactical vests are overkill. Understanding the rare exceptions helps you make an informed decision.
When Plate Carriers Might Be Appropriate:
- Active threat professions (security, law enforcement)
- Extremely high-risk locations
- Specific threat assessments justify investment
- You have training to use protective equipment effectively
Why They're Overkill for Most:
Weight: Plates add 15-25+ pounds. This dramatically affects mobility, fatigue, and your ability to travel distances.
Cost: Quality plates and carriers cost $500-2000+. That money provides far more preparedness value in other categories.
False Confidence: Armor doesn't make you bulletproof. It protects specific areas from specific threats. Without training, it provides limited benefit.
Scenario Mismatch: Most civilian emergencies involve natural disasters, infrastructure failures, and evacuation—not firefights.
Better Investments:
For the cost of quality armor, you could purchase:
- Comprehensive emergency food supply
- Quality water filtration
- Backup power system
- Professional first aid kit
- Quality communications equipment
Related topics: Personal Security & Situational Awareness | Essential Survival Gear for Beginners
Explore: Safety & Security | First Aid Kits
Q5: What features should I look for in tactical or outdoor backpacks for bug-out and emergency use?
A quality pack can make or break extended evacuation or travel. Prioritize fit, durability, and practical features.
Capacity: 40-65 liters for extended self-sufficiency. Smaller for urban scenarios, larger for wilderness.
Suspension System: Padded hip belt that transfers weight to hips. Quality shoulder straps with load lifters. Ventilated back panel. These matter more than brand names.
Durability: 500D-1000D nylon or Cordura. Reinforced stress points. Quality zippers (YKK preferred).
Organization: Multiple compartments for organized access. MOLLE webbing for customization. External attachment points for gear.
- Haley Strategic: Tactical focus with proven designs
- Tactical Tailor: Military-proven designs
- Mystery Ranch: Premium load-carrying systems
Fitting and Testing:
A $300 pack that doesn't fit is worthless. Load the pack with 30-40 pounds and walk several miles. Adjust all straps properly. Test before you need it.
Weight Distribution:
- Heavy items close to back, centered between shoulders and hips
- Lighter items at bottom and top
- Frequently accessed items in accessible pockets
- Keep weight balanced left-to-right
Related topics: Vehicle, Travel & Bug-Out Preparedness | Essential Survival Gear for Beginners
Explore: Backpacks & Gear Bags | Bug-Out Bags
Q6: Are tactical flashlights and headlamps worth the premium price over regular outdoor lighting?
Yes, for emergency preparedness, tactical-grade lighting provides significant advantages worth the price difference.
Why Tactical Lighting Is Worth It:
Durability: Tactical lights from Streamlight and SureFire are built for professional use—drops, water, temperature extremes.
Output: Higher lumens with efficient power use. Better beam patterns (flood vs spot options).
Reliability: Quality switches, connections, and components. They work when you need them.
Runtime Accuracy: Manufacturers provide realistic runtime specifications, not marketing exaggerations.
Battery Compatibility: Quality lights often use common batteries (AA, CR123A) that are easier to stockpile.
Recommended Options:
- Tactical Series: Professional-grade handhelds
- Handhelds: Range of sizes and outputs
- Headlamps & Work Lights: Hands-free options
- Flashlights & Headlamps: Premium options
Practical Buying Advice:
You don't need the most expensive option. Mid-range Streamlight products offer excellent value. Buy one quality light rather than multiple cheap lights.
Related topics: Essential Survival Gear for Beginners | Everyday Carry (EDC) Tools
Explore: Streamlight Collection | SureFire Collection
Q7: What outdoor gear should I prioritize that serves both recreational and emergency preparedness purposes?
Dual-purpose gear provides practice opportunities and better value. Focus on quality items you'll actually use.
High-Value Dual-Purpose Items:
Quality Backpack: Use for hiking, travel, and keep ready as bug-out bag.
Water Filtration: Essential for backpacking and emergency water procurement.
Navigation Tools: GPS, compass, maps for hiking and evacuation.
Quality Knife/Multitool: Daily use, camping, and emergency situations.
Headlamp/Flashlight: Camping, home use, and emergency lighting.
First Aid Kit: Hiking, home, vehicle, and emergency use.
Sleeping System: Camping and emergency shelter.
Fire Starting: Camping and emergency warmth.
Benefits of Dual-Purpose Approach:
- Regular use builds familiarity and skill
- Gear gets tested before emergencies
- Investment is justified by multiple uses
- Maintenance happens naturally through use
Avoid:
- Gear that sits unused "just for emergencies"
- Equipment you don't know how to use
- Specialized items with narrow applications
Related topics: Essential Survival Gear for Beginners | Vehicle, Travel & Bug-Out Preparedness
Explore: Camping & Survival | Outdoor Recreation
Q8: Does Mountain Ready carry tactical equipment suitable for civilians focused on preparedness rather than combat scenarios?
Yes, Mountain Ready focuses specifically on civilian preparedness rather than combat applications. Our tactical gear selection emphasizes practical utility, quality, and appropriate use cases.
- Streamlight: Professional-grade flashlights and headlamps
- SureFire: Premium lighting solutions
- Dark Energy: EDC lighting
- SOG: Folding knives, fixed blades, multitools, axes
- Quality cutting tools for practical use
- Home security solutions
- Safes and storage
Our selection emphasizes civilian-appropriate preparedness without unnecessary tactical emphasis. See our About Us page for our veteran-owned company philosophy.
Related topics: Essential Survival Gear for Beginners | Personal Security & Situational Awareness
Explore: Top Brands | Best Sellers
🔦 Everyday Carry (EDC) Tools & Essentials
🔦 Everyday Carry (EDC) Tools & Essentials
Q1: What are the essential EDC items everyone should carry for everyday emergencies and unexpected situations?
Everyday carry (EDC) focuses on practical items you'll actually use daily while providing capability for unexpected situations. The best EDC is unobtrusive, legal, and genuinely useful.
Tier 1 - Universal Essentials (Everyone Should Carry):
Phone + Backup Power:
Your phone is a flashlight, camera, GPS, encyclopedia, and communication device. A compact power bank ensures it stays charged when needed.
Small Knife or Multi-Tool:
Opening packages, cutting cord, minor repairs, food preparation—a sharp blade handles countless daily tasks. Quality multi-tools combine knife with screwdrivers, pliers, and more in pocket-sized packages.
Flashlight:
Modern LED lights are tiny and powerful. A quality compact flashlight handles power outages, dark parking garages, under-desk retrieval, and countless other situations.
Tier 2 - Enhanced Preparedness:
First Aid Basics:
Band-aids, medications (pain reliever, allergy medicine), and a small gauze pad fit in a wallet or small pouch. More comprehensive pocket first aid kits are available.
Fire Starting:
A quality lighter (Bic or Zippo) provides fire capability without bulk. Cigarette smokers disappear, so finding a light when needed is harder than ever.
Pen and Paper:
When phones die, writing still works. Document information, leave notes, sketch diagrams—practical uses abound.
Cash:
Electronic payments fail during power outages. Keep $50-100 in small bills accessible.
Tier 3 - Situational Additions:
Handkerchief/Bandana:
Wipe hands, improvised bandage, dust mask, pot holder, signaling device—remarkably versatile.
Paracord Bracelet:
Compact rope access for emergencies.
USB Flash Drive:
Important documents accessible from any computer.
Read More: Everyday Carry Essentials.
Related topics: Essential Survival Gear for Beginners | Personal Security & Situational Awareness
Explore: Everyday Carry Collection | EDC Bags
Q2: What's a practical EDC setup that's actually legal and socially acceptable for office workers and urban environments?
Professional environments require EDC that doesn't alarm coworkers or violate workplace policies. The goal is capability without tactical appearance.
Office-Appropriate EDC:
Phone + Slim Power Bank:
Standard office essential. Anker and similar brands offer credit-card-sized power banks that charge a phone once.
Pen (Quality):
A good pen is useful, professional, and unremarkable. Premium pens (Pilot G2, Fisher Space Pen) write better and last longer than freebies.
Small Multi-Tool:
Swiss Army Knife or similar presents as business tool, not weapon. Choose models with scissors, nail file, and small blade—professional appearance, genuine utility.
Credit Card Tool:
Flat multi-tools fitting in wallet provide bottle opener, small screwdriver, and measurement references without bulk.
Compact Flashlight:
Streamlight and similar brands offer penlight-style flashlights that look professional in a pocket.
Medication/First Aid:
Small pill case with ibuprofen, allergy medicine, and antacid. Band-aids in wallet. Nothing alarming, very practical.
USB Drive:
Important documents, emergency contacts, and family photos accessible anywhere.
Avoid in Professional Settings:
- Fixed-blade knives (perception problems)
- Tactical-looking gear (black, MOLLE, military styling)
- Large multi-tools (too bulky, may alarm)
- Anything requiring explanation to coworkers
Legal Considerations:
Check local laws for knife blade length limits (typically 2.5-4" maximum for pocket knives). Some jurisdictions restrict multi-tool knife components. Many office buildings prohibit weapons—understand your workplace policy.
Related topics: Everyday Carry (EDC) Tools | Personal Security & Situational Awareness
Explore: Everyday Carry | EDC Guide
Q3: Should I carry a multitool, pocket knife, or both as part of my daily carry kit?
The choice depends on your usage patterns, local laws, and personal preference. Understanding each tool's strengths helps you decide.
Multi-Tool Advantages:
Multi-tools like SOG and Leatherman combine knife blade with pliers, screwdrivers, can opener, and other tools in one package.
Best For:
- Users who need pliers and screwdrivers regularly
- Situations requiring multiple tools (automotive, technical work)
- Single-item simplicity
- Users restricted from carrying separate knife
Limitations:
- Heavier and bulkier than standalone knife
- Knife blade typically shorter and harder to deploy
- Jack-of-all-trades, master of none
- More expensive for equivalent quality
Pocket Knife Advantages:
Dedicated pocket knives focus on cutting performance.
Best For:
- Users who primarily need cutting capability
- Better blade steel and edge geometry
- Faster deployment
- Lighter carry weight
- Generally more comfortable grip for extended use
Limitations:
- Only does one thing (cutting)
- Requires separate tools for other tasks
Recommended Approach:
Daily Carry: Quality multi-tool covers most situations most people encounter—opening packages, minor repairs, occasional cutting.
Task-Specific: When you know you'll need cutting capability (outdoor work, camping, hunting), add a dedicated fixed-blade or folding knife.
Both (For Serious Users): Many EDC enthusiasts carry a multi-tool on belt plus a small folding knife in pocket—redundancy with specialized capability.
Related topics: Tools, Repair & Field Utility Equipment | Essential Survival Gear for Beginners
Explore: SOG Multi-Tools | SOG Folding Knives
Q4: What are the best compact EDC items that fit in pockets without looking like I'm paranoid or tactical?
"Gray man" EDC philosophy emphasizes capability without attracting attention. The best gear looks normal while providing genuine utility.
Inconspicuous Essentials:
Wallet-Sized Items:
- Micro flashlight (Streamlight Nano fits on keychain)
- Credit card multi-tool (looks like a credit card)
- P-38 can opener (military issue, tiny, effective)
- Small folding knife with slim profile
Pen-Style Items:
- Fisher Space Pen (writes anywhere, looks normal)
- Tactical pen (writes like normal pen, secondary utility)
- Penlight flashlight (professional appearance)
Keychain Items:
- Small flashlight
- Mini multi-tool
- USB drive with critical files
- Small lighter
Phone Case Add-Ons:
- Cases with card holders (ID, credit card, cash, small tools)
- Phone stand that doubles as bottle opener
Watch Selection:
- Digital watches with compass, thermometer, altimeter (ABC watches)
- Quality analog watch (don't need tech to tell time)
- Paracord watch band (cordage access)
Bag/Purse Contents:
- Compact first aid kit (bandages, medications)
- Power bank and charging cables
- Emergency blanket (folds wallet-sized)
- Emergency water filter straw
- Energy bar
Style Recommendations:
- Choose tools in silver, gray, or neutral colors rather than black tactical finishes
- Avoid MOLLE attachments, military branding, and tactical styling
- Select brands known for professional/civilian markets
- Quality business appearance beats cheap tactical appearance
Related topics: Everyday Carry (EDC) Tools | Personal Security & Situational Awareness
Explore: Everyday Carry | Flashlights
Q5: How do I build an EDC kit that's useful for daily life while also preparing me for unexpected emergencies?
Effective EDC balances everyday utility with emergency capability. The best items serve both purposes without compromise.
Core Philosophy:
Carry what you'll actually use. EDC items you never use get left behind. Choose gear that helps daily so carrying it becomes habit, not burden.
Daily + Emergency Overlap:
Flashlight: Finding dropped items, navigating dark areas, power outage lighting, emergency signaling
Multi-tool: Package opening, quick repairs, emergency cutting, improvised solutions
Phone + Power Bank: Communication, information access, flashlight backup, emergency contacts
Cash: Coffee shop line, tip jar, post-disaster commerce
Fire Source: Birthday candles, campfire, emergency warmth
Building Your Kit:
Start Minimal: Begin with phone, flashlight, multi-tool, and cash. Carry these daily for one month.
Add Based on Experience: Notice what you wished you had. Needed medication? Add small pill case. Wanted bandages? Add pocket first aid. Build based on actual needs, not imagined scenarios.
Test and Refine: Use your EDC items. Practice with multi-tool. Learn your flashlight's modes. Familiarity builds competence.
Layered Approach:
On Person (Always):
- Phone, wallet, keys
- Compact flashlight
- Small knife or multi-tool
- Cash
In Bag (When Carried):
- Power bank
- First aid basics
- Water bottle
- Snack/energy bar
- Seasonal items (sunscreen, chapstick, hand warmers)
In Vehicle (Accessible):
- More comprehensive kit
- Seasonal supplies
- Additional first aid
Related topics: Essential Survival Gear for Beginners | Vehicle, Travel & Bug-Out Preparedness
Explore: EDC Bags | Everyday Carry Guide
Q6: What EDC tools have proven most useful in real-world emergency situations according to actual users?
Real-world emergency reports consistently highlight certain items as most valuable. Learning from actual experiences beats theoretical preparation.
Most Commonly Praised:
Flashlight:
Power outages, vehicle breakdowns, searching dark areas, signaling for help. Virtually every emergency involves needing to see in darkness at some point. Compact LED flashlights appear in almost every "glad I had it" story.
Phone (Charged):
Calling for help, GPS navigation, emergency information access, documenting situations for insurance. The power bank that keeps it charged is equally praised.
Cash:
Post-disaster purchases when card systems down, tipping emergency helpers, purchasing supplies in cash-only situations. Small bills ($1, $5, $20) most useful.
Knife/Multi-Tool:
Cutting seatbelts in accidents, opening packaging, quick repairs, food preparation, general utility. Quality multi-tools mentioned repeatedly.
First Aid Supplies:
Band-aids for minor injuries, medications for sudden illness, tape for quick fixes. Even basic supplies prevent minor problems from becoming major.
Surprisingly Valuable:
Pen and Paper:
Recording information, leaving notes, documenting for insurance, writing emergency contacts when phone dead.
Plastic Bags:
Waterproofing items, improvised rain protection, waste containment, organizing supplies.
Duct Tape (Small Roll):
Temporary repairs, securing items, medical improvisation, sealing.
What Users Wished They Had:
Water: Especially during heat emergencies or extended delays. Small water filter bottle or purification tablets.
More Cash: Users consistently report wishing they'd carried more.
Better Flashlight: Cheap lights fail; quality matters when you need it.
Related topics: Essential Survival Gear for Beginners | Emergency Medical & First Aid Supplies
Explore: Everyday Carry | First Aid Kits
Q7: Are expensive EDC brands like Leatherman and Benchmade worth it or are budget options just as reliable?
Quality tools cost more for reasons that matter during emergencies. Understanding the value proposition helps you invest wisely.
Premium Brands Justify Cost Through:
Material Quality:
Premium brands use better steel (S30V, D2, 154CM vs. 440A/420HC in budget tools). Better steel holds an edge longer, resists corrosion better, and performs more consistently.
Manufacturing Tolerances:
Tighter tolerances mean smoother operation, better locking mechanisms, and fewer failure points. Cheap tools often have blade play, lock failures, and rough operation.
Warranty and Service:
Companies like Leatherman offer 25-year warranties and will repair/replace tools that fail. Budget brands offer minimal warranty and no service.
Durability:
Premium tools survive years of daily use. Budget tools often fail within months under regular use. Cost per year of service often favors premium options.
Where Premium Matters Most:
Tools You Depend On:
Your primary multi-tool, main EDC knife, primary flashlight—invest in quality for items you'll rely on.
Lifesaving Equipment:
Trauma shears, tourniquets, primary flashlight—don't go budget on life-safety items.
Daily Carry Items:
Items you carry and use daily justify investment. You'll appreciate quality every day.
Where Budget Works:
Backups and Spares:
Second flashlight, backup knife, car kit supplies—budget options serve adequately for redundancy.
Single-Use Items:
Emergency blankets, chemical light sticks, disposable supplies—no need for premium.
Low-Stress Applications:
Items that won't see heavy use can be budget without consequence.
Mountain Ready carries quality brands like SOG, Streamlight, and others that represent the quality tier worth investing in.
Related topics: Tools, Repair & Field Utility Equipment | Essential Survival Gear for Beginners
Explore: SOG Knives & Tools | Top Brands
Q8: What EDC items should I keep in my purse or bag that could help in medical emergencies or dangerous situations?
Women's EDC faces different considerations: purse carry changes what's practical, and self-defense awareness shapes priorities. Here's a practical approach.
Medical Emergency Essentials:
First Aid Kit:
Compact kit with bandages, antiseptic wipes, pain reliever, allergy medication (Benadryl can be lifesaving), tape, gauze, and personal medications.
Emergency Medications:
Personal prescriptions, EpiPen if prescribed, glucose tablets if diabetic, nitroglycerin if cardiac. Include list of medical conditions, medications, and emergency contacts.
Tourniquet (Trained Users):
CAT tourniquet can save lives during severe bleeding emergencies—but only if you know how to use it. Get training first.
Safety & Situational Awareness:
Flashlight:
Illuminate dark parking lots, provide visibility when signaling for help, and offer limited defensive capability (momentary blinding).
Personal Alarm:
120+ decibel alarm draws attention and deters attackers. Small, inexpensive, and effective.
Pepper Spray:
Where legal, quality pepper spray provides effective self-defense. Check local laws and practice deployment.
Phone Accessibility:
Know how to use emergency SOS features (press power button rapidly on most smartphones). Keep phone charged (power bank).
Practical Additions:
Cash:
Emergency taxi, unexpected purchases, post-disaster needs. Keep in separate location from wallet.
Small Knife or Multi-Tool:
General utility and minor defensive capability.
Emergency Contact Information:
Written list if phone dies. Include medical information, emergency contacts, and insurance information.
Menstrual Products:
Not typically listed in survival guides, but extremely practical for personal emergencies and for helping others.
Related topics: Personal Security & Situational Awareness | Emergency Medical & First Aid Supplies
Explore: First Aid Kits | EDC Bags
🏡 Off-Grid Living & Homesteading Equipment
🏡 Off-Grid Living & Homesteading Equipment
Q1: What essential equipment do I need to start living off-grid or become more self-sufficient?
Off-grid living requires systems thinking—addressing power, water, food, waste, heating/cooling, and communication as integrated systems rather than separate purchases.
Power Systems:
Solar + Battery Storage:
Modern solar systems have made off-grid power accessible. EcoFlow and Bluetti offer expandable systems from 1kWh to whole-house capacity. Start with your essential loads and expand as budget allows.
Backup Generator:
Solar alone struggles during extended cloudy periods. A propane or dual-fuel generator provides backup for critical needs.
Solar Panels:
Portable panels work for small systems. Permanent installation increases efficiency but requires investment.
Water Systems:
Well or Spring (Ideal):
Reliable water source is foundation of off-grid living. Well drilling costs $3,000-15,000+ depending on depth and geology.
Rain Collection:
Supplemental water for gardens and non-potable use. Check local regulations (some areas restrict collection).
Filtration/Purification:
Quality filtration systems for drinking water, especially from surface sources.
Food Systems:
Garden Space:
Even small gardens reduce dependency. Start with easy crops appropriate for your climate.
Preservation Equipment:
Canning supplies, dehydrator, potentially freeze dryer for long-term food independence.
Long-Term Storage:
Backup supplies for crop failures and supplementation.
Read More: Exploring Off-Grid Living and Hand-Powered Tools Guide.
Related topics: Backup Power & Energy Solutions | Water Storage & Purification
Explore: EcoFlow Home Power | Off-Grid Living Guide
Q2: How much does it realistically cost to set up off-grid power, water, and waste systems for a small homestead?
Honest cost assessment prevents financial overextension. Off-grid living can be economical long-term but requires significant upfront investment.
Power System Costs:
Minimal System (Essentials Only):
- Portable power station (1-2kWh): $800-1,500
- Solar panels (400W): $300-600
- Total: $1,100-2,100
Moderate System (Comfortable Living):
- Expandable power system (5-10kWh): $3,000-8,000
- Solar array (2-4kW): $2,000-4,000
- Wiring and installation: $1,000-2,000
- Backup generator: $1,500-3,000
- Total: $7,500-17,000
Comprehensive System (Full Independence):
- Whole-house battery backup (20-40kWh): $15,000-30,000
- Solar array (6-10kW): $6,000-12,000
- Professional installation: $5,000-10,000
- Generator backup: $3,000-8,000
- Total: $29,000-60,000+
Water System Costs:
- Well drilling: $3,000-15,000 (highly variable by location)
- Well pump and pressure system: $1,500-3,000
- Water storage tanks: $500-2,000
- Filtration system: $200-1,000
- Rain collection system: $500-2,000
Waste System Costs:
- Septic system installation: $3,000-10,000
- Composting toilet system: $1,000-3,000
- Gray water system: $500-2,000
Realistic Timeline:
Most homesteaders build systems over 2-5 years, starting with essential capabilities and expanding as budget allows. Starting with portable power solutions allows incremental expansion.
Related topics: Backup Power & Energy Solutions | Water Storage & Purification
Explore: Solar Panels & Generators | Best States for Off-Grid Living
Q3: What tools and equipment should I prioritize for homesteading if I'm transitioning from suburban life?
Transitioning from suburban to homestead life requires tools most suburbanites have never needed. Prioritize based on immediate needs and build your collection over time.
Immediate Priorities (Year 1):
Land Work:
- Chainsaw (cutting firewood, clearing brush)
- Splitting maul and wedges (processing firewood)
- Quality shovels (round point and flat)
- Garden fork and hoe
- Wheelbarrow or garden cart
- Quality hand saw (backup for chainsaw)
- Axes (felling axe and hatchet)
- Multi-tool collection
- Complete socket and wrench set
- Screwdriver collection
Building/Repair:
- Hammer and pry bar
- Level, square, and tape measure
- Power drill (cordless preferred)
- Circular saw
- Extension cords or portable power for remote work
Secondary Priorities (Year 2-3):
Expanded Power Tools:
- Table saw or track saw
- Angle grinder
- Reciprocating saw
- Welding equipment (optional but valuable)
Specialized Equipment:
- Tractor or ATV (depending on property size)
- Trailer for hauling
- Water pumping equipment
- Generator for backup/construction
Garden/Agriculture:
- Tiller or broad fork
- Irrigation supplies
- Greenhouse or cold frame materials
- Preservation equipment (canner, dehydrator)
Learning Priorities:
Tools without skills are expensive paperweights. Prioritize learning:
- Basic carpentry and repair
- Chainsaw safety and maintenance
- Vehicle and equipment maintenance
- Garden and food preservation
Related topics: Tools, Repair & Field Utility Equipment | Backup Power & Energy Solutions
Explore: Tools | Hand-Powered Tools Guide
Q4: Can I gradually build toward off-grid capability while still connected to utilities, or is it all-or-nothing?
Gradual transition is the smartest approach. Building off-grid capability while grid-connected provides backup, learning opportunities, and financial flexibility.
Phased Transition Strategy:
Phase 1: Backup Capability
Start with emergency backup that provides experience without commitment:
- Portable power station with solar panels
- Water storage and filtration
- Food storage foundation
- Learn to function without utilities during intentional practice periods
Phase 2: Supplemental Systems
Reduce grid dependency while maintaining connection:
- Expand solar capacity
- Install rain collection (check regulations)
- Develop garden and preservation capability
- Practice extended off-grid periods (weekends, weeks)
Phase 3: Primary Independence
Systems capable of full-time off-grid with grid as backup:
- Comprehensive solar + battery system
- Well or reliable water source
- Year-round food production capability
- Grid connection only for backup or selling excess power
Phase 4: Complete Independence (Optional)
Full off-grid capability:
- Disconnection from grid (if desired)
- Redundant systems for all critical needs
- Community connections for trade and support
Benefits of Gradual Transition:
Learning Curve: Discover what you actually need before major investment. Your assumptions about off-grid requirements may be wrong.
Financial Management: Spread costs over years rather than massive upfront investment.
Safety Net: Grid connection provides backup while learning. Failures during learning aren't catastrophic.
System Refinement: Test and adjust systems before depending on them completely.
Related topics: Backup Power & Energy Solutions | Essential Survival Gear for Beginners
Explore: EcoFlow Systems | Off-Grid Living Guide
Q5: What's the most reliable off-grid water solution for rural property without well access?
When wells aren't feasible (cost, geology, or regulations), alternative water sources require more complexity but can provide reliable supply.
Alternative Water Sources:
Spring Development:
If your property has springs, developing them provides gravity-fed water without pumping costs. Spring boxes and collection systems can provide reliable supply with proper installation.
Surface Water (Streams, Ponds):
Requires comprehensive filtration and purification but can be reliable. Legal water rights vary by state—research before depending on surface water.
Rainwater Harvesting:
Collect roof runoff in storage tanks. Calculation: 1" rain on 1,000 sq ft roof = 600 gallons. Annual rainfall × roof area = potential collection. Requires large storage capacity for dry seasons.
Water Delivery:
Not ideal for full off-grid but provides backup. Many rural areas have water delivery services filling storage tanks.
Reliable System Design:
Storage Capacity:
Calculate daily usage × longest expected dry period. Minimum storage should cover 30-60 days without rainfall or alternative source.
Multi-Source Redundancy:
Combine sources: rainwater primary, spring secondary, delivery backup. Single-source dependency is risky.
Filtration Hierarchy:
Surface and rainwater require:
- Pre-filtration (sediment removal)
- Primary filtration (bacteria, protozoa)
- Purification (viruses, additional pathogens)
- Storage in food-grade containers
Gravity vs. Pumped:
Gravity systems (spring above home, elevated tanks) require no electricity. Pumped systems need power backup.
Related topics: Water Storage & Purification | Backup Power & Energy Solutions
Explore: Water Storage & Filtration | Water Matrix Guide
Q6: How do I choose between propane, solar, and wood-burning systems for off-grid heating and cooking?
Each fuel source has advantages and appropriate applications. Most successful off-grid homesteads use multiple sources for redundancy and efficiency.
Solar (Electricity):
Best For:
- Lighting, electronics, and small appliances
- Cooking (induction, slow cooker—if sufficient capacity)
- Cooling (fans, efficient AC with large systems)
Limitations:
- High heating demand often exceeds practical solar capacity
- Requires significant battery storage for evening/night use
- Capital-intensive for heating loads
Propane:
Best For:
- Cooking (efficient, controllable, instant heat)
- Water heating (on-demand heaters very efficient)
- Backup heating
- Refrigeration (propane fridges exist)
Advantages:
- Stores indefinitely (no degradation like gasoline)
- High energy density
- Controllable and convenient
- Works regardless of weather
Limitations:
- Ongoing fuel costs
- Requires delivery/transport
- Carbon monoxide concerns (ventilation required)
Wood-Burning:
Best For:
- Primary heating in cold climates
- Backup cooking
- Psychological comfort (fire provides light and ambiance)
- Free fuel if processing yourself
Advantages:
- Renewable on forested property
- No ongoing costs if processing yourself
- Extremely reliable (technology proven for centuries)
- Multi-purpose (heat, cooking, water heating, ambiance)
Limitations:
- Labor-intensive (cutting, splitting, hauling)
- Storage space requirements
- Smoke and air quality concerns
- Requires chimney and proper installation
Recommended Combination:
Heating: Wood stove primary, propane backup
Cooking: Propane primary (convenience), wood backup
Hot Water: Propane on-demand or wood-stove heat exchanger
Power: Solar + battery with propane generator backup
Related topics: Backup Power & Energy Solutions | Disaster-Specific Preparedness
Explore: EcoFlow Home Power | Solar Power Guide
Q7: What homesteading equipment is worth buying new versus salvaging or building yourself?
Smart homesteaders balance new purchases with salvage and DIY to maximize value while ensuring reliability for critical systems.
Buy New (Worth the Investment):
Safety-Critical Items:
- Chainsaw (safety features, warranty, reliability)
- Fire extinguishers
- First aid supplies
- Propane system components (safety critical)
Complex Technology:
- Solar panels and charge controllers
- Battery systems
- Water pumps
- Power tools with motors
High-Use Hand Tools:
- Primary chainsaw
- Daily-use hand tools (quality multi-tools)
- Knives and cutting tools
Worth Salvaging:
Building Materials:
- Lumber and timber (check for rot/insects)
- Windows and doors
- Hardware and fasteners
- Metal roofing
Basic Tools:
- Hand tools (axes, shovels, rakes)
- Garden tools
- Workshop equipment
- Storage containers
Infrastructure:
- Tanks and barrels
- Fencing materials
- Posts and poles
- Stones and landscaping materials
Build Yourself:
If You Have Skills:
- Raised garden beds
- Animal enclosures
- Storage buildings
- Furniture
Start Simple:
- Compost bins
- Firewood racks
- Tool storage
- Garden infrastructure
Avoid Salvaging:
- Gas lines and propane equipment
- Electrical components
- Safety equipment
- Anything you can't verify condition of
Related topics: Tools, Repair & Field Utility Equipment | Essential Survival Gear for Beginners
Explore: Tools | SOG Knives & Tools
Q8: What are the biggest equipment failures or regrets people have when transitioning to off-grid living?
Learning from others' mistakes prevents expensive lessons. Common failures and regrets provide valuable guidance.
Power System Failures:
Undersized Systems:
Most common regret. People underestimate power needs, then can't run essential equipment. Solution: Calculate actual loads (not estimates), then add 50% capacity buffer.
Poor Battery Management:
Discharging batteries too deeply shortens lifespan dramatically. Quality battery management systems prevent this.
Insufficient Solar for Location:
Northern climates, shaded properties, and cloudy regions need more panel capacity than calculations suggest. Plan for worst-case weather, not average.
Water System Failures:
Pump Failures Without Backup:
Electric pumps fail; without backup (manual pump, gravity backup, spare pump) you're without water. Redundancy matters.
Insufficient Filtration:
People get sick from inadequate water treatment. Don't assume water sources are clean—test and treat appropriately.
Storage Capacity Too Small:
Underestimating dry seasons leaves people without water. Oversize storage rather than undersizing.
Equipment Quality Regrets:
Buying Cheap Initially:
Cheap tools and equipment fail faster, costing more in replacements and frustration. Buy quality once versus cheap multiple times.
Wrong Tool for Job:
Buying based on marketing rather than actual needs. Example: huge tractor for small property when ATV would suffice.
Lifestyle Regrets:
Underestimating Labor:
Off-grid living requires constant work. Water systems need maintenance, firewood needs processing, gardens need tending. Some people aren't prepared for the workload.
Isolation:
Off-grid properties are often remote. Social isolation affects mental health. Plan for community connection.
Skills Gap:
Equipment without skills is useless. Many fail because they can't maintain, repair, or properly operate their systems.
Read More: Essential Survival Skills Society Has Forgotten.
Related topics: Backup Power & Energy Solutions | Water Storage & Purification
Explore: Top Brands | Off-Grid Living Guide
🛡️ Personal Security, Defense & Situational Awareness Gear
🛡️ Personal Security, Defense & Situational Awareness Gear
Q1: What non-lethal self-defense tools are most effective and legal to carry for personal protection?
Non-lethal self-defense options vary significantly in effectiveness and legality. Understanding both helps you choose appropriate protection.
Most Effective Non-Lethal Options:
Pepper Spray/OC Spray:
Effectiveness: Very high. Causes immediate pain, temporary blindness, and disorientation. Works on attackers regardless of pain tolerance.
Legality: Legal in all 50 states with some restrictions (concentration limits, purchase age, some location restrictions).
Considerations: Wind can blow spray back; need practice for accurate deployment; has expiration date.
Tactical Flashlight:
Effectiveness: Moderate. Temporarily blinds attackers (especially at night), provides awareness, and can serve as striking tool.
Legality: Legal everywhere; unrestricted.
Quality options provide 500-1000+ lumens for effective disorientation.
Personal Alarm:
Effectiveness: Moderate as deterrent. 120+ decibel alarms attract attention and may deter opportunistic attackers.
Legality: Legal everywhere; unrestricted.
Limitations: Won't stop determined attacker; depends on bystanders responding.
Stun Guns/TASERs:
Effectiveness: High when contact made (stun guns) or very high (TASERs with projectile capability).
Legality: Varies significantly by state and locality. Prohibited in some areas; restricted in others.
Considerations: Requires close contact (stun guns) or accurate aim (TASERs); can be taken and used against you.
Less Effective Options:
Tactical Pens:
Marketed as self-defense tools but require significant training to be effective. Primary value is as writing implement with secondary defensive capability.
Kubotans:
Small impact weapons requiring training and close-range contact. Limited practical effectiveness without practice.
Legal Considerations:
Laws vary dramatically by state and locality. Research your specific area before carrying any self-defense tool. What's legal in one city may be prohibited in the next.
Training Matters:
Any tool requires practice. Untrained users may hesitate, miss, or have the tool used against them. Regular practice with your chosen tools is essential.
Related topics: Everyday Carry (EDC) Tools | Family Emergency Readiness Solutions
Explore: Safety & Security | Flashlights
Q2: How do I improve my situational awareness and personal security without becoming paranoid or antisocial?
Situational awareness is a skill, not a personality trait. Developing it appropriately enhances safety without consuming mental energy or damaging relationships.
Practical Situational Awareness:
Baseline Awareness (Default State):
Know what's normal in your environment so abnormalities stand out. Notice usual traffic patterns, regular people, typical activity levels. When something breaks pattern, you notice automatically.
Periodic Scans:
Brief 360-degree awareness checks every few minutes in public. Who's nearby? What are they doing? Where are exits? This takes 2-3 seconds and becomes automatic with practice.
Trust Instincts:
Your subconscious processes more information than your conscious mind. If something feels wrong, take it seriously even if you can't articulate why. Leave, change position, or increase alertness.
Position Awareness:
In public spaces, choose positions offering visibility and exit access. Restaurant seats facing doors, theater seats near aisles, parking spots near exits.
What This Is NOT:
Not Paranoia: Awareness is calm observation, not fearful hypervigilance. Paranoid people exhaust themselves seeing threats everywhere. Aware people notice their environment without emotional investment.
Not Antisocial: Awareness happens in background. You can engage in conversation, enjoy activities, and maintain normal social interaction while remaining aware.
Not Constant Vigilance: You don't maintain high alertness constantly—that's exhausting and unsustainable. Normal baseline awareness with elevation when circumstances warrant.
Developing the Skill:
Practice Observation: In safe environments, practice describing what you see. How many people? What are they wearing? Where are exits? This builds observation habits.
Review Afterward: After visiting a place, mentally review what you noticed. This trains your brain to pay attention.
Scale to Circumstances: Higher awareness in unfamiliar areas, late at night, in crowds, or in locations with higher risk. Lower baseline in familiar, safe environments.
Read More: Pillar 6: Security.
Related topics: Everyday Carry (EDC) Tools | Family Emergency Readiness Solutions
Explore: Security Pillar Guide
Q3: What personal security equipment should I have at home for family protection during civil unrest or break-ins?
Home security combines physical barriers, detection systems, and prepared responses. Layered security provides multiple opportunities to prevent or respond to threats.
Physical Security (First Line):
Door Reinforcement:
Standard doors fail quickly under force. Reinforce with:
- Deadbolt with 3"+ screws into frame (not 1" screws typical of installation)
- Strike plate reinforcement (metal plate spanning door frame)
- Door frame reinforcement kit
- Security bar or brace for interior
Window Security:
Windows are common entry points. Options:
- Window locks (prevent opening)
- Window bars (controversial but effective)
- Security film (slows but doesn't prevent entry)
- Thorny landscaping beneath windows
Lighting:
Motion-activated exterior lighting deters opportunistic criminals. Well-lit exteriors make homes less attractive targets.
Detection Systems (Second Line):
Alarm Systems:
Professional monitoring provides response but has monthly costs. Self-monitored systems alert you but require your response.
Cameras:
Deterrent value plus evidence collection. Position to cover entry points. Ensure recording capability (cloud or local storage).
Dogs:
Natural alert system and deterrent. Barking dogs discourage many criminals from attempting entry.
Response Capability (Third Line):
Communication:
Ability to call for help (phone, radio). Know your local emergency response times—they may be longer than expected.
Flashlights:
High-lumen tactical flashlights temporarily blind intruders and illuminate threats.
Safe Room:
Interior room with solid door, phone, flashlight, and defensive tools. Place for family to gather while awaiting help.
First Aid:
Medical supplies for potential injuries during incidents.
Related topics: Disaster-Specific Preparedness | Emergency Communication
Explore: Safety & Security | Tactical Flashlight Guide
Q4: Are pepper spray, tactical pens, and personal alarms actually effective for self-defense?
Each tool has legitimate uses and limitations. Understanding realistic effectiveness helps set appropriate expectations.
Pepper Spray Assessment:
Effectiveness: HIGH
Quality pepper spray (OC/oleoresin capsicum) causes immediate intense pain, temporary blindness (15-45 minutes), and difficulty breathing. Effects are involuntary—doesn't depend on attacker's pain tolerance.
Realistic Limitations:
- Wind can blow spray back toward you
- Enclosed spaces concentrate spray (affects you too)
- Some individuals less affected (rare but possible)
- Requires accurate deployment under stress
- Has expiration date (typically 2-4 years)
Verdict: Highly effective when used properly. Practice deployment regularly.
Tactical Pens Assessment:
Effectiveness: LOW-MODERATE
Tactical pens are writing implements that can be used as improvised striking weapons.
Realistic Limitations:
- Require close-range physical confrontation
- Require training to use effectively
- Without training, unlikely to stop determined attacker
- May escalate confrontation
- Legal in most places (primary function is writing)
Verdict: Better than nothing, but primary value is as writing instrument with secondary defensive option. Not substitute for distance-creating tools like pepper spray.
Personal Alarms Assessment:
Effectiveness: MODERATE (Deterrent)
120+ decibel alarms attract attention and may deter opportunistic attackers who rely on victim isolation.
Realistic Limitations:
- Won't physically stop an attacker
- Effectiveness depends on bystanders responding
- Attackers may not care about noise
- Battery-dependent
Verdict: Excellent supplement to other tools. May deter opportunistic crime; attracts attention during incidents. Inexpensive and legal everywhere.
Combined Approach:
Most effective personal security combines:
- Situational awareness (prevention)
- High-lumen flashlight (distance disruption)
- Pepper spray (effective deterrent/incapacitation)
- Personal alarm (attention/deterrent)
- Communication device (calling for help)
Related topics: Everyday Carry (EDC) Tools | Personal Security & Situational Awareness
Explore: Safety & Security | Flashlights
Q5: What security gear and practices should I implement to protect my home and family during widespread emergencies?
Widespread emergencies create security challenges beyond normal circumstances. Preparation addresses increased vulnerability during disaster scenarios.
During-Emergency Security Risks:
Why Emergencies Increase Risk:
- Reduced police availability/response
- Desperation driving normally law-abiding people
- Opportunistic criminals exploiting chaos
- Breakdown of normal social order
- Resource scarcity creating conflict
Pre-Emergency Preparation:
- Reinforce doors and locks
- Secure windows (locks, film, bars if appropriate)
- Establish safe room with supplies
- Install battery-backup security systems
Community Connections:
- Know neighbors who will cooperate during emergencies
- Establish communication protocols
- Identify households with medical training, tools, skills
- Plan mutual support arrangements
Resource Management:
- Stockpile supplies to reduce need to leave during emergencies
- Store supplies discreetly to avoid becoming target
- Plan for sharing with trusted neighbors (builds reciprocal relationships)
During-Emergency Practices:
Low Profile:
- Don't advertise your preparedness
- Maintain similar lighting levels to neighbors
- Avoid obvious generator noise if possible
- Don't display unusual prosperity during shortages
Controlled Access:
- Know who approaches before opening door
- Establish protocols for visitor verification
- Have family communication signals for danger
Information Management:
- Don't share supply levels with strangers
- Be vague about your situation
- Avoid social media posts revealing your status
- Family radios for coordination
- Check-in schedules
- Code words for danger situations
Read More: Pillar 6: Security and Bug-In Guide.
Related topics: Disaster-Specific Preparedness | Family Emergency Readiness Solutions
Explore: Security Pillar | Bug-In Guide
Q6: How do I train my family on personal security awareness without frightening them about potential dangers?
Security awareness training should empower, not frighten. Frame discussions around capability and preparedness rather than threats and dangers.
Age-Appropriate Approaches:
Young Children (4-8):
- Focus on basic safety rules (don't go with strangers, tell parents about uncomfortable situations)
- Practice "what if" scenarios as games
- Teach home address, phone numbers, trusted adults
- Make security checks routine, not scary
Pre-Teens (9-12):
- Introduce situational awareness concepts
- Practice identifying exits and safe spaces
- Discuss appropriate responses to various situations
- Include them in family emergency planning
Teenagers (13+):
- Adult-level discussions about realistic threats
- Teach risk assessment and decision-making
- Include in family security planning
- Practice skills together
Framing Techniques:
Empowerment Language:
Instead of: "Bad people might try to hurt you"
Use: "We're learning skills that help us stay safe and help others"
Everyday Context:
Instead of: "During a disaster..."
Use: "If the power goes out..." or "If we get separated at the mall..."
Capability Focus:
Instead of: "You need to be afraid of..."
Use: "Here's what you can do if..."
Practical Activities:
Observation Games:
After leaving a restaurant, ask kids what they noticed: how many people, what they were wearing, where exits were. Make it fun, not stressful.
Family Drills:
Practice meeting points, evacuation routes, and communication protocols. Treat as team exercises, not fear responses.
Skill Building:
First aid training, basic tool use, and emergency procedures build confidence and capability.
Read More: Complete Family Emergency Plan.
Related topics: Family Emergency Readiness Solutions | Essential Survival Gear for Beginners
Explore: Family Emergency Plan Guide
Q7: What door reinforcement and home security equipment works during power outages when electronic systems fail?
Power-dependent security systems fail when you need them most. Physical security and non-electronic solutions provide reliable protection regardless of power status.
Physical Door Reinforcement (Power-Independent):
Strike Plate Reinforcement:
Replace standard strike plates with reinforced versions using 3"+ screws into wall studs, not just door frame. These resist kick-ins that defeat standard installations.
Door Frame Reinforcement:
Metal reinforcement plates spanning the entire lock area distribute force and prevent frame splitting.
Deadbolts:
Quality deadbolts with 1"+ throw into reinforced strike plates resist forced entry. Consider double-cylinder for doors with windows (key required from inside—fire safety consideration).
Security Bars:
Horizontal bars bracing against floor prevent door opening even if locks fail. Can be stored nearby and quickly installed.
Hinge Reinforcement:
Security hinges with non-removable pins prevent hinge-side attack.
Window Security (Power-Independent):
Window Locks:
Physical locks preventing window opening beyond set point.
Security Film:
Holds glass together when broken, significantly delaying entry. Doesn't prevent breaking, but slows attackers.
Window Bars:
Highly effective but aesthetically challenging. Quick-release versions allow emergency exit.
Non-Electronic Detection:
Dogs:
Natural alert system working 24/7 regardless of power.
Gravel Pathways:
Crunchy surfaces alert you to approaching footsteps.
Strategic Landscaping:
Thorny plants beneath windows, clear sightlines to approach areas.
Battery-Backup Systems:
For those wanting electronic backup:
- Battery-backup alarm systems
- Solar-charged cameras with local storage
- Battery-powered motion sensors
Flashlights:
High-quality tactical flashlights ready for power-outage response scenarios.
Related topics: Backup Power & Energy Solutions | Disaster-Specific Preparedness
Explore: Safety & Security | Lights
Q8: What personal defense tools does Mountain Ready recommend for families focused on preparedness and safety?
Mountain Ready emphasizes civilian-appropriate preparedness focused on safety, awareness, and practical protection rather than tactical or military approaches.
Our Security Philosophy:
As a veteran-owned company, we understand both the value and limits of security equipment. Effective family security prioritizes awareness, preparation, and appropriate tools over tactical gear or aggressive posturing.
Recommended Security Equipment:
Lighting:
High-quality flashlights serve multiple purposes: everyday utility, emergency lighting, and security applications. Streamlight and SureFire products provide professional-grade reliability.
Communication:
Two-way radios enable family coordination during emergencies without depending on cell networks.
First Aid:
Comprehensive medical supplies address injuries regardless of cause. Trauma kits with proper training save lives.
Storage Security:
Proper storage for valuables, important documents, and any items requiring secure access.
Safety Equipment:
Fire extinguishers, smoke detectors, and carbon monoxide detectors protect against common household dangers.
Optics for Situational Awareness:
Quality binoculars allow observation without approach—useful for property security and general awareness.
Educational Resources:
Our blog provides guidance on security practices, community building, and comprehensive preparedness that addresses security as part of overall readiness.
Related topics: Everyday Carry (EDC) Tools | Emergency Medical & First Aid Supplies
Explore: Safety & Security | Security Pillar Guide
🌪️ Disaster-Specific Preparedness
🌪️ Disaster-Specific Preparedness
Q1: How do I prepare specifically for extended power outages lasting weeks or months?
Extended power outages (weeks to months) require fundamentally different preparation than short-term outages. After 72 hours, municipal water systems fail, supply chains break down, and psychological stress increases dramatically. This preparation level demands redundancy, community coordination, and realistic expectations.
Tier 1: Critical Survival (First 72 Hours)
Standard emergency kits address the first three days adequately if stocked properly. Ensure you have:
- 1 gallon water per person per day (store minimum 21 gallons for family of 4)
- Non-perishable food for 21 meals per person
- Medications in original containers (30-day supply minimum)
- First aid supplies and hygiene items
- Battery-powered flashlights and radio
- Cash ($500-1,000 per family)
Tier 2: Extended Outage Preparation (Weeks 2-4)
Water Resupply Systems: You can't store months of water. Implement multiple water procurement options: rain collection system, well access, natural water sources, and purification capability.
Food Production vs. Storage: Storing enough food for a month per family is expensive. Develop hybrid approach: 2-week emergency supplies + basic gardening capability + food preservation knowledge.
Heat Management: Fireplace or wood stove, propane space heater, backup kerosene heater (with ventilation), heavy blankets and sleeping bags.
Sanitation Systems: Composting toilet or camping toilet, gray water disposal plan, hand sanitizer and wet wipes.
Power Systems: Solar panels with battery storage, backup generator with stored fuel.
Read More: Grid Failure Survival Guide and Living Without Electricity.
Related topics: Backup Power & Energy Solutions | Water Storage & Purification | Off-Grid Living
Explore: EcoFlow Home Power | Grid Failure Guide
Q2: What supplies and plans do I need for wildfire evacuation with only 30 minutes warning?
Wildfire evacuation requires pre-positioned supplies and practiced procedures. When evacuation orders come, you won't have time to gather supplies—everything must be ready to grab and go.
Pre-Positioned Go-Bag Essentials:
Each family member needs a go-bag packed and ready:
- 3-day water and food supply
- First aid kit with medications
- Change of clothes (long pants, long sleeves, closed-toe shoes)
- N95 masks for smoke protection
- Flashlight and radio
- Phone chargers and power bank
- Cash and important documents
- Pet supplies if applicable
Document Preparation:
Keep copies (digital and physical) ready to grab:
- Insurance policies and agent contact
- Property documentation with photos
- Medical records and prescriptions
- Financial account information
- Identification documents
- Inventory of valuables (for insurance claims)
Vehicle Preparation:
Keep vehicle evacuation-ready during fire season:
- Fuel tank at least half full always
- Evacuation route maps (don't rely on GPS—cell service may fail)
- Vehicle emergency kit
- Space for pets and carriers
- Blankets and water in trunk
30-Minute Checklist:
When warning received:
- Everyone dresses in long clothes, closed shoes
- Grab pre-packed go-bags
- Grab document box
- Load pets and carriers
- Close all windows and doors (slows fire spread into home)
- Turn off gas if time permits
- Leave
Read More: Building the Ultimate Wildfire Go-Bag and Wildfire Go-Bag Gear Guide.
Related topics: Vehicle, Travel & Bug-Out Preparedness | Emergency Shelter & Protection Gear
Explore: Wildfire Go-Bag Guide | Bug-Out Bags
Q3: How should I prepare differently for hurricanes versus tornadoes versus winter storms?
Each disaster type has unique characteristics requiring specific preparation adjustments while sharing core preparedness foundations.
Hurricane Preparation:
Lead Time: Days to weeks of warning
Duration: Hours to days of impact, weeks of recovery
Primary Threats: Wind, flooding, storm surge, extended power outage
Specific Preparations:
- Water storage for 2+ weeks (municipal systems often fail)
- Window protection (plywood, shutters)
- Elevation or protection of valuables from flooding
- Evacuation routes planned and practiced
- Extended food storage
- Generator or power backup for extended outages
Read More: Hurricane Preparedness Guide and 72-Hour Hurricane Checklist
Tornado Preparation:
Lead Time: Minutes to hours
Duration: Seconds to minutes of impact, hours to weeks of recovery
Primary Threats: Extreme wind, debris, structural collapse
Specific Preparations:
- Identified shelter location (basement, interior room, lowest floor)
- Helmet protection for head injuries (leading cause of tornado deaths)
- Shoes accessible (debris cuts feet during/after)
- Emergency radio with NOAA alerts
- Go-bag accessible in shelter location
- Practice getting to shelter within 2 minutes
Winter Storm Preparation:
Lead Time: Days typically
Duration: Hours to days of impact, days to weeks of recovery
Primary Threats: Cold exposure, power outage, travel impossibility
Specific Preparations:
- Heating backup (fireplace/wood stove, propane heater with ventilation)
- Cold weather sleeping gear
- Pipes protected from freezing
- Vehicle winter kit
- Food and water for 2+ weeks (may not be able to travel)
- Snow removal equipment
Related topics: Emergency Shelter & Protection Gear | Backup Power & Energy Solutions
Explore: Hurricane Guide | Winter Emergency Guide
Q4: What gear and supplies are most critical for surviving civil unrest or social breakdown in urban areas?
Urban civil unrest creates unique challenges: potential violence, supply disruptions, restricted movement, and breakdown of normal services. Preparation focuses on shelter-in-place capability with evacuation readiness.
Shelter-in-Place Priority:
Supply Independence:
During unrest, leaving home becomes dangerous and stores may be closed/looted. Stock supplies for 2-4 weeks minimum:
- Food requiring no shopping trips
- Water storage and purification
- First aid supplies (hospitals may be overwhelmed)
- Medications for extended period
Home Security:
- Physical door reinforcement
- Window protection capability
- Fire extinguishers (arson risk increases)
- Communication equipment that doesn't depend on cell networks
Low Profile:
- Don't advertise preparedness
- Maintain similar appearance to neighbors
- Avoid confrontation
- Stay inside during active unrest
Information:
- Emergency radio for situational awareness
- Multiple news sources
- Local community communication networks
Evacuation Capability:
If shelter-in-place becomes untenable:
- Go-bags packed and accessible
- Multiple evacuation routes planned (avoid major thoroughfares)
- Destination identified (family, friends outside area)
- Vehicle ready with fuel
- Cash (ATMs may not work)
Community Connections:
Know neighbors willing to cooperate:
- Shared security awareness
- Resource sharing if needed
- Communication network
- Mutual support
Read More: Urban Survival Guide and Bug-In Guide.
Related topics: Personal Security & Situational Awareness | Emergency Communication
Explore: Urban Survival Guide | Security Pillar
Q5: How do I prepare for cascading failures where multiple disasters happen simultaneously?
Cascading failures—where one disaster triggers others or multiple events coincide—require robust, redundant preparation that doesn't depend on single systems or assumptions.
Understanding Cascading Failures:
Examples:
- Hurricane damages nuclear plant (Fukushima-style scenario)
- Earthquake causes dam failure causing flooding
- Pandemic plus economic collapse plus civil unrest
- Winter storm causes power outage causes frozen pipes causes flooding
Preparation Philosophy:
System Redundancy:
Never depend on single systems. For every critical need, have multiple solutions:
- Water: Storage + filtration + purification + multiple sources
- Power: Grid + solar + battery + generator
- Food: Storage + gardening + foraging knowledge
- Communication: Phone + radio + physical meeting points
Skill Over Gear:
Equipment fails. Skills don't. Prioritize learning:
- Water procurement and purification
- Fire starting
- First aid
- Food preservation
- Basic repair and improvisation
Geographic Diversity:
If possible, have supplies or retreat options in different locations. Single-location preparation fails if that location is destroyed.
Community Networks:
Individual preparation has limits. Community connections provide resource sharing, skill diversity, and mutual support impossible for individuals.
Scenario Planning:
Mentally walk through compound scenarios:
- "What if the power goes out AND we can't leave home?"
- "What if water supply fails AND stores are closed?"
- "What if communications are down AND family is separated?"
Each combination reveals preparation gaps to address.
Related topics: Emergency Preparedness Kits & Bundles | Off-Grid Living
Explore: 12 Pillars of Preparedness | Building Survival Communities
Q6: What's the most important equipment for staying safe during wildfire season in high-risk areas?
Living in wildfire country requires year-round preparation and specific equipment for rapid response.
Respiratory Protection:
Smoke exposure is the most common wildfire health threat, even for those not directly impacted by flames:
- N95/N100 masks: Essential for smoke protection. Stock minimum 10 per family member per fire season.
- Air filtration: HEPA air purifiers for indoor air quality during smoke events.
- Respirators: P100 respirators for higher protection during evacuation through smoke.
Evacuation Equipment:
Pre-positioned and ready to grab:
- Go-bags for each family member
- Document box with insurance, property records, identification
- Pet carriers and pet supplies
- Vehicle with fuel (keep tank at least half full)
- Alternative route maps (primary routes may be blocked)
Property Protection:
While personal safety comes first, property preparation helps:
- Defensible space: Clear vegetation 100+ feet from structures
- Fire-resistant materials: Where feasible for roofing, siding
- Exterior sprinklers: Can be activated before evacuation
- Water storage: For firefighting if trapped
Communication:
- Emergency radio with NOAA alerts
- Multiple information sources (reverse 911, local fire department alerts)
- Family radios for coordination if separated
Read More: Building the Ultimate Wildfire Go-Bag.
Related topics: Environmental & Respiratory Protection | Vehicle, Travel & Bug-Out Preparedness
Explore: Gas Masks & Respiratory | Wildfire Go-Bag Guide
Q7: How do I prepare for regional disasters that disrupt supply chains and make resupply impossible for months?
Supply chain disruptions extending months require transitioning from consumption to production and establishing true self-sufficiency.
Extended Self-Sufficiency Framework:
Food Independence:
Storage Foundation:
- 3-6 month food storage for immediate bridge
- Bulk staples (rice, beans, wheat) for extended duration
- Seeds for food production
- Preservation equipment (canning supplies, dehydrator)
Production Capability:
- Garden space and knowledge
- Foraging knowledge for supplementation
- Hunting/fishing equipment and skills (where appropriate)
- Seed saving for sustainable food supply
Water Independence:
Storage alone won't cover months. You need sustainable sources:
- Well or spring development
- Rain collection systems
- Robust filtration for surface water use
- Knowledge of local water sources
Power Independence:
Grid-independent power for extended duration:
- Substantial solar + battery system
- Generator with stored fuel (and fuel rotation plan)
- Reduction of power needs to essential only
- Manual alternatives for many tasks
Medical Independence:
- Extended prescription medication supply (work with doctor for larger prescriptions)
- Comprehensive medical supplies
- Medical knowledge for common issues
- Herbal and natural alternatives knowledge
Community Resilience:
No individual or family can be fully independent for months. Community networks provide skill sharing, resource pooling, and mutual support.
Related topics: Long-Term Food Storage | Off-Grid Living
Explore: Community Building Guide | Self-Reliance Skills
Q8: What disaster-specific preparations are most overlooked by people who think they're already prepared?
Even experienced preppers often have blind spots. These commonly overlooked areas cause problems during actual emergencies.
Physical Fitness:
Emergency situations demand physical capability. Evacuations require walking miles with heavy packs. Home repairs require strength and stamina. Many preppers invest in gear but neglect the physical conditioning to use it.
Mental Preparedness:
Emergencies are psychologically devastating. Depression, anxiety, and decision paralysis affect even prepared people. Mental preparation—stress management, coping strategies, and realistic expectations—is often completely ignored. Read about mental preparedness.
Sanitation:
Toilets don't flush without water pressure or electricity. Many preppers have weeks of food but no plan for human waste disposal. Sanitation failures cause disease outbreaks.
Cash:
Electronic payment systems fail during power outages. ATMs don't work. Many preppers have supplies but no cash to purchase what they don't have or pay for services.
Prescription Medication Rotation:
Many preppers stockpile OTC medications but don't address prescription needs. Getting 90-day supplies, rotating properly, and having backup sources for critical medications is often overlooked. Read about prescription medication planning.
Skill Practice:
Equipment without practiced skills fails under stress. Many preppers have first aid kits they've never opened, water filters they've never used, and fire-starting gear they've never practiced with.
Community Relationships:
Individual/family preparedness has limits. Establishing mutual support relationships with neighbors, developing community emergency networks, and knowing who has what skills and resources extends capability beyond what any individual can achieve.
Pet Preparation:
Many preppers plan for family but forget pet food, medications, carriers, and documentation. Pets complicate evacuations if not planned for.
Read More: Essential Items You Might Have Overlooked.
Related topics: Emergency Preparedness Kits & Bundles | Essential Survival Gear for Beginners
Explore: Mental Preparedness Pillar | Overlooked Supplies Guide
🚗 Vehicle, Travel & Bug-Out Preparedness Gear
🚗 Vehicle, Travel & Bug-Out Preparedness Gear
Q1: What should I keep in my vehicle emergency kit for year-round preparedness in changing weather conditions?
A comprehensive vehicle kit addresses both common roadside issues and unexpected extended delays or disasters. Adjust contents seasonally for your climate.
Core Vehicle Kit (Year-Round):
- Comprehensive first aid kit
- Personal medications (rotate quarterly)
- Prescription copies
- Jumper cables or jump starter
- Basic tool kit (screwdrivers, pliers, adjustable wrench)
- Tire repair kit
- Duct tape
- Zip ties
- Fuses for your vehicle
Lighting & Signaling:
- Quality flashlight with extra batteries
- Road flares or LED emergency lights
- Reflective vest
- Reflective triangles
Sustenance:
- Water (minimum 1 gallon)
- Non-perishable food (energy bars, nuts)
- Water filter or purification
Communication:
- Phone charger (car and battery backup)
- Paper maps of your region
- Emergency contact list (written)
Seasonal Additions:
Winter (Cold Climates):
- Sleeping bag or heavy blankets
- Extra warm clothing, hat, gloves
- Hand/body warmers
- Snow shovel
- Ice scraper
- Cat litter or traction mats
- Tire chains (if appropriate)
Summer (Hot Climates):
- Extra water (2+ gallons)
- Sunscreen
- Hat and sun protection
- Light blanket (for shade)
- Umbrella for shade
Read More: Emergency Car Kit Essentials.
Related topics: Essential Survival Gear for Beginners | Disaster-Specific Preparedness
Explore: Get-Home Bags | Car Kit Guide
Q2: How do I build a proper bug-out bag that I can actually carry for miles without collapsing?
A bug-out bag is only effective if you can actually carry it. Overloaded bags lead to exhaustion, injury, and abandoned gear. Balance capability with realistic weight limits.
Weight Guidelines:
Target Weight: 15-25% of your body weight maximum
- 150 lb person: 22-38 lb bag maximum
- 180 lb person: 27-45 lb bag maximum
- 200 lb person: 30-50 lb bag maximum
Reality Check: Start at 15% and test. Most people overestimate their carrying capability. Build up to higher percentages through practice.
Critical (Carry Even if Abandoning Other Gear):
- Water and water purification (3-4 lbs)
- First aid kit with medications (1-2 lbs)
- Fire starting (under 1 lb)
- Shelter (emergency bivvy: 4 oz; tarp: 1-2 lbs)
- Knife/multi-tool (under 1 lb)
- Flashlight (under 1 lb)
- Cash and documents (minimal weight)
Important (Carry if Possible):
- Food (3 days) (3-5 lbs)
- Extra clothing layer (1-2 lbs)
- Sleeping bag (2-4 lbs)
- Communication (under 1 lb)
Nice to Have (Space Permitting):
- Camp stove and fuel
- Additional tools
- Comfort items
Choose a bag with:
- Hip belt (transfers weight to hips, not shoulders)
- Adjustable torso length
- Comfortable padding
- Quality construction
- Appropriate capacity (40-60L for most users)
Testing:
Load your bag and walk 5 miles. Adjust based on what hurt, what you didn't use, and what you wished you had.
Read More: How to Build the Perfect Go-Bag and Bug-Out Bag Essentials Checklist.
Related topics: Essential Survival Gear for Beginners | Emergency Shelter & Protection Gear
Explore: Bug-Out Bags | Bug-Out Bag Guide
Q3: What's the difference between a get-home bag, bug-out bag, and vehicle emergency kit?
Each serves a different purpose and scenario. Understanding the distinctions helps you build appropriate solutions for each need.
Vehicle Emergency Kit:
Purpose: Handle common roadside emergencies and short-term delays
Location: Permanently stored in vehicle
Scenario: Flat tire, breakdown, minor accident, short delay
Contents Focus:
- Vehicle repair tools
- First aid
- Basic sustenance
- Signaling equipment
- Seasonal gear
Purpose: Get you from wherever you are back to your home
Location: Workplace, vehicle, or wherever you spend time away from home
Scenario: Disaster occurs while at work; you need to walk home (potentially 10-30 miles)
Contents Focus:
- Lightweight—you need to walk with this
- Water and compact filtration
- High-calorie compact food
- Comfortable walking shoes (if not already wearing)
- Navigation (maps of route home)
- First aid basics
- Light source
- Weather-appropriate layer
- Cash and ID
- Self-defense considerations
Purpose: Leave home with supplies to sustain you for 72+ hours while evacuating
Location: Home, ready to grab
Scenario: Evacuation order, home becomes uninhabitable, disaster requires leaving
Contents Focus:
- More comprehensive than get-home bag
- Full shelter capability
- 72-hour food and water plus purification
- Complete first aid
- Fire starting
- Tools and repair
- Communication
- Important documents
- Seasonal and regional additions
Recommended Setup:
Most prepared individuals have all three:
- Vehicle kit in each family vehicle
- Get-home bag at workplace
- Bug-out bag at home ready to grab
Related topics: Essential Survival Gear for Beginners | Family Emergency Readiness Solutions
Explore: Bug-Out Bags | Get-Home Bags | Go Bags
Q4: What gear should I pack for emergency evacuation if I only have 15 minutes to leave my house?
Fifteen minutes isn't enough to pack—it's only enough to grab pre-positioned items. This requires advance preparation with everything ready to go.
Pre-Positioned Items (Grab and Go):
Priority 1: Life Safety (First 5 Minutes)
- Go-bags for each family member (by door, packed and ready)
- Medications (prescription bag ready to grab)
- Pet carriers and pet supplies
- Keys and phone
Priority 2: Important Documents (Next 5 Minutes)
- Document box or fireproof bag with:
Insurance policies
Property documents
Identification copies
Medical records
Financial information
Photo inventory of valuables
Priority 3: Additional Supplies (Final 5 Minutes)
- Additional water containers
- Extra food supplies
- Additional clothing
- Laptop with backup data
- Irreplaceable personal items (photos, heirlooms)
Pre-Evacuation Setup:
Document Box Location: Single location, clearly labeled, known to all adults
Go-Bags: Packed, inspected quarterly, located by exit doors
Vehicle Prep: During warning periods:
- Fuel tank full
- Vehicle kit loaded
- Route maps accessible
- Pets accessible for quick loading
Family Responsibilities:
Assign specific tasks:
- Adult 1: Grab document box, additional supplies
- Adult 2: Load pets, secure house
- Children: Grab personal go-bags, get to vehicle
Practice this procedure so everyone knows their role without discussion during actual emergency.
Read More: Complete Family Emergency Plan.
Related topics: Family Emergency Readiness Solutions | Disaster-Specific Preparedness
Explore: Go Bags | Family Emergency Plan Guide
Q5: How do I prepare my vehicle for emergency evacuations including fuel, tools, and survival supplies?
Vehicle preparedness is critical since most evacuations involve driving. A properly equipped vehicle extends your range of options significantly.
Fuel Management:
Keep Tank Above Half: During emergency-prone seasons or situations, maintain at least half tank at all times. Empty tanks during evacuations mean stranded vehicles.
Extra Fuel Storage: Safe fuel cans (5-gallon maximum per vehicle), properly stored and rotated quarterly. Extends range 100+ miles.
Know Fuel Locations: Map fuel stations along evacuation routes. Know which stations have backup generators (often near highways/interstates).
Essential Vehicle Tools:
- Jack and lug wrench (test that they work with your vehicle)
- Jumper cables or jump starter
- Tire repair kit
- Basic tool kit (screwdrivers, pliers, wrenches)
- Duct tape, zip ties
- Fuses specific to your vehicle
- Tire pressure gauge and portable inflator
Vehicle Documentation:
- Registration and insurance
- Owner's manual
- Roadside assistance contact
- Mechanic contact
Survival Supplies:
Permanent Vehicle Kit:
- First aid kit
- Water (minimum 1 gallon)
- Non-perishable food
- Flashlight and emergency lighting
- Blankets or sleeping bag
- Phone chargers
- Road maps
Evacuation Additions:
- Go-bags for family
- Extended food and water
- Pet supplies
- Important documents
- Additional power
Read More: Emergency Car Kit Essentials.
Related topics: Essential Survival Gear for Beginners | Disaster-Specific Preparedness
Explore: Tools | Car Kit Guide
Q6: What are the most important items for a car emergency kit if I get stranded in remote areas?
Remote stranding presents unique challenges: extended wait times for help, limited communication, and environmental exposure. Your kit must sustain you until rescue or self-rescue.
Communication Priority:
Signaling:
- Bright emergency blanket (reflective for air visibility)
- Signal mirror
- Whistle (three blasts = distress)
- Brightly colored cloth for antenna
Electronic:
- Satellite communicator (Garmin inReach, Zoleo) if you travel remote areas regularly
- Charged power bank for phone
- Emergency radio
Extended Sustenance:
Water:
- 2+ gallons stored water
- Water filter (for natural water sources)
- Container for collection
Food:
- High-calorie, compact food (3-5 days worth)
- Requires no preparation in worst case
Shelter & Warmth:
Vehicle is Primary Shelter: Stay with your vehicle unless certain of nearby help. Vehicles are visible to searchers and provide protection.
Supplemental:
- Sleeping bag rated for your climate
- Emergency blankets
- Extra clothing layers
- Tarp (for shade or additional protection)
Fire Capability:
Fire starting gear provides warmth, signaling, water purification, and morale:
- Multiple ignition sources (lighters, matches, ferrocerium rod)
- Tinder (cotton balls with petroleum jelly work well)
- Knowledge of fire safety away from vehicle (fuel danger)
First Aid:
Comprehensive kit with:
- Standard first aid supplies
- Personal medications
- Sunscreen and lip balm
- Insect repellent (depending on region)
Related topics: Essential Survival Gear for Beginners | Emergency Shelter & Protection Gear
Explore: Camping & Survival | Water Filtration
Q7: Should my bug-out bag be designed for urban escape, wilderness survival, or something in between?
Your bug-out bag should be designed for your realistic evacuation scenarios, which usually aren't pure wilderness survival despite prepper mythology.
Reality Check:
Most evacuations involve:
- Driving (roads may be congested but exist)
- Moving toward civilization (shelters, family, hotels)
- Access to some infrastructure (gas stations, stores)
- Days, not weeks of displacement
True wilderness survival situations—where you're living off the land indefinitely—are extremely rare in real-world emergencies.
Urban Escape Focus:
If your realistic scenarios involve urban/suburban evacuation:
- Navigation through developed areas
- Cash and payment methods
- Compact, gray-man appearance
- Documentation and identification
- Communication devices
- Comfort items for hotel/shelter stay
Wilderness Supplement:
If your routes might involve extended hiking or camping:
- Serious shelter capability
- Extended food supply
- Water procurement (not just storage)
- Fire capability
- Navigation tools
- More robust first aid
Hybrid Approach (Recommended):
Build for your primary scenario (usually urban/suburban) with wilderness capability additions:
Primary Layer: Urban evacuation kit
- Documents, cash, communication
- Basic first aid
- Food and water for 72 hours
- Weather-appropriate clothing
- Compact shelter
Supplemental Layer: Wilderness capability
- Water purification
- Fire starting
- Navigation
- Extended shelter options
Read More: Bug-Out Bag Guide.
Related topics: Essential Survival Gear for Beginners | Emergency Shelter & Protection Gear
Explore: Bug-Out Bags | Bug-Out Bag Guide
Q8: What travel preparedness gear does mountainready.online recommend for frequent travelers or commuters?
Mountain Ready offers gear specifically suited for travel and commuting scenarios, balancing preparedness with portability and professional appearance.
Compact items that travel easily and are appropriate in professional settings:
- Compact flashlights (Streamlight offers many travel-friendly options)
- Multi-tools (check TSA regulations for carry-on)
- Compact first aid
- Power banks
For commuters who need capability to get home if stranded:
- Designed for walking 10-30 miles
- Professional appearance appropriate for workplace storage
- Lightweight but comprehensive
My Medic offers compact, TSA-compliant kits designed for travelers:
- MYFAK Mini series for personal carry
- EDC-specific medical kits
Compact filter bottles from LifeStraw and Grayl provide clean water anywhere—valuable for international travel and domestic emergencies.
EcoFlow offers portable power banks suitable for travel, keeping devices charged during delays and emergencies.
Read More: Beginner's Guide to Travel Preparedness.
Related topics: Everyday Carry (EDC) Tools | Emergency Medical & First Aid Supplies
Explore: EDC Bags | Travel Preparedness Guide
🔧 Tools, Repair & Field Utility Equipment
🔧 Tools, Repair & Field Utility Equipment
Q1: What basic tools should I have for emergency repairs when professional help isn't available?
When tradespeople aren't available—whether due to disaster, remote location, or urgency—basic tool capability enables essential repairs.
Core Tool Kit:
Hand Tools:
- Hammer (16 oz claw hammer)
- Screwdrivers (Phillips and flat-head, multiple sizes)
- Pliers (needle-nose, channel-lock, and lineman's)
- Adjustable wrench (8" and 12")
- Quality multi-tool
- Utility knife with extra blades
- Pry bar
- Tape measure
- Level
Cutting Tools:
- Hand saw (crosscut or Japanese pull saw)
- Hacksaw for metal
- Quality fixed-blade knife
- Wire cutters/strippers
Fastening & Repair Supplies:
- Duct tape (multiple rolls)
- Electrical tape
- Assorted screws, nails, bolts
- Wire (various gauges)
- Zip ties (various sizes)
- Rope/cordage
Power Tools (If Power Available):
- Cordless drill with bit set
- Circular saw
- Reciprocating saw
- Angle grinder
Specialized Emergency Tools:
Plumbing:
- Pipe wrench
- Plunger
- Teflon tape
- Basic pipe repair supplies
Electrical:
- Voltage tester
- Wire connectors
- Replacement outlets/switches
- Fuses/breakers for your panel
Structural:
- Tarps (various sizes)
- Plastic sheeting
- Plywood (pre-cut sheets for windows)
- Construction adhesive
Related topics: Off-Grid Living & Homesteading | Essential Survival Gear for Beginners
Explore: Tools | SOG Multi-Tools
Q2: How do I build a tool kit that works for home repairs, vehicle maintenance, and field improvisation?
A versatile tool kit serves multiple purposes without duplication. Focus on quality items that work across applications.
Multi-Purpose Foundation:
Quality Multi-Tool:
SOG and similar brands combine pliers, knife, screwdrivers, and specialty tools. One quality multi-tool replaces multiple single-purpose items.
Adjustable Tools:
- Adjustable wrench (fits many bolt sizes)
- Adjustable pliers (channel-lock style)
- Multi-bit screwdriver set
Universal Fasteners:
- Duct tape (fixes almost anything temporarily)
- Zip ties (various sizes)
- Wire
- Paracord
Home Repair Additions:
Electrical:
- Voltage tester
- Wire stripper/crimper
- Electrical tape
Plumbing:
- Pipe wrench
- Teflon tape
- Plunger
Vehicle Maintenance Additions:
Specific Tools:
- Socket set (metric and standard)
- Oil filter wrench
- Spark plug socket
- Tire iron
- Jump starter or cables
Fluids:
- Oil (correct weight for your vehicle)
- Coolant
- Brake fluid
- Windshield washer fluid
Field/Emergency Additions:
Cutting:
- Hatchet or small axe
- Folding saw
- Quality knife
Improvisation:
- Baling wire
- Hose clamps
- Duct tape (always more)
- Spare hardware assortment
Organization:
Keep tools organized in:
- Home workshop (comprehensive selection)
- Vehicle kit (vehicle-specific plus basics)
- Go-bag (compact multi-tool plus essentials)
Related topics: Vehicle, Travel & Bug-Out Preparedness | Off-Grid Living & Homesteading
Q3: What are the most versatile multi-purpose tools worth investing in for emergency preparedness?
Multi-purpose tools reduce weight, cost, and complexity while maintaining capability. These items justify their cost through genuine versatility.
Top Multi-Purpose Tools:
Quality Multi-Tool (SOG, Leatherman):
Combines knife, pliers, screwdrivers, wire cutters, file, can opener, and more. The single most versatile tool for emergency preparedness. Invest $80-150 for quality that lasts decades.
Paracord:
550 paracord has thousands of uses: shelter construction, gear repair, fishing line (inner strands), shoelaces, tourniquets (emergency), clothesline, securing, and hundreds more. Carry 50-100 feet minimum.
Duct Tape:
Temporary repairs of almost anything: tents, clothing, vehicles, wounds (short-term), water containers, insulation, and countless more. Wrap some around water bottle or lighter for compact carry.
Hatchet/Axe:
Wood processing, shelter building, hunting tool, self-defense, hammer, and pry bar. Quality SOG hatchets serve multiple purposes well.
Bandana/Shemagh:
Pre-filter water, dust mask, pot holder, bandage, sling, sun protection, signaling, improvised bag, and many more uses. Weight: ounces. Utility: enormous.
Large Fixed-Blade Knife:
Food preparation, shelter building, wood processing, self-defense, first aid (cutting bandages/clothing), fire preparation, and general cutting. A 4-6" blade handles most tasks.
Metal Water Bottle:
Water storage, boiling water for purification, cooking vessel, signaling device, digging tool. Stainless steel without plastic components.
Items to Avoid:
Credit Card Multi-Tools: Too small for practical use. Novelty, not utility.
Survival Bracelets: Insufficient paracord for real use. Buy actual cordage instead.
15-in-1 Gadgets: Do many things poorly. Better to have fewer tools that work well.
Related topics: Everyday Carry (EDC) Tools | Essential Survival Gear for Beginners
Explore: SOG Multi-Tools | SOG Knives
Q4: Should I prioritize manual tools over power tools for emergency situations without electricity?
During extended power outages, manual tools become essential while power tools sit useless. A balanced approach provides capability across scenarios.
Manual Tools Priority:
Why Manual Tools Matter:
- Work regardless of power availability
- No batteries to discharge or charge
- Simpler mechanisms, fewer failure points
- Quieter operation (security consideration)
- Indefinite lifespan with maintenance
Essential Manual Tools:
- Hand saws (crosscut for wood, hacksaw for metal)
- Hand drill or brace and bits
- Chisels and wood carving tools
- Axes and hatchets
- Hand planes
- Quality knives
- Drawknife and spokeshave
When Power Tools Still Work:
If you have backup power:
- Cordless tools with charged batteries
- Tools with solar charging capability
- Generator-powered tools (fuel dependent)
Power Tool Advantages:
- Dramatically faster for large projects
- Less physical effort
- More precise for some operations
Recommended Balance:
Manual Tools as Primary:
Own manual equivalents of critical power tools. You may not use them often, but they're essential when needed.
Power Tools with Backup:
If relying on power tools, ensure:
- Multiple charged batteries
- Solar charging capability
- Generator backup for extended use
Skills Development:
Practice with manual tools regularly. Power tool proficiency doesn't transfer automatically to hand tool use.
Read More: Hand-Powered Tools Guide.
Related topics: Off-Grid Living & Homesteading | Backup Power & Energy Solutions
Explore: Tools | Hand-Powered Tools Guide
Q5: What repair supplies and tools are most commonly needed during extended emergencies or disasters?
Post-disaster repair needs follow predictable patterns. Preparing for these common scenarios prevents prolonged vulnerability.
Most Common Repair Needs:
Water Damage/Exclusion:
- Tarps (multiple sizes—8x10, 12x16, 20x30)
- Plastic sheeting (6 mil minimum)
- Plywood sheets (pre-cut for window sizes)
- Sandbags (empty, fill when needed)
- Caulk and sealant
- Roofing cement
- Staple gun and heavy-duty staples
Structural Repairs:
- Lumber (2x4s, plywood)
- Screws (various sizes, especially 3" deck screws)
- Nails (8d, 16d common)
- Construction adhesive
- Ratchet straps
- Come-along winch
Plumbing:
- Pipe repair supplies (various sizes)
- Shut-off valve knowledge and tools
- Teflon tape
- Flexible coupling fittings
- Pipe clamps
- Water containers for temporary storage
Electrical:
- Fuses/breakers for your panel
- Wire and connectors
- Electrical tape
- Flashlights and batteries
- Extension cords
- Backup power capability
General Repairs:
- Duct tape (lots)
- Zip ties (various sizes)
- Wire (various gauges)
- Rope and cordage
- Bungee cords
- Hardware assortment
Tools for These Repairs:
- Hammer and pry bar
- Screwdrivers and drill
- Saw (hand and power if available)
- Utility knife
- Measuring tape
- Level
- Work gloves and safety glasses
Related topics: Disaster-Specific Preparedness | Emergency Shelter & Protection Gear
Explore: Tools | Emergency Gear
Q6: How do I maintain and organize emergency tools so they're actually functional when I need them years later?
Tools stored improperly may not work when needed. Simple maintenance and organization ensures readiness.
Storage Best Practices:
Environmental Control:
- Store in climate-controlled space if possible
- Avoid extreme temperature swings
- Control humidity (dehumidifier in damp areas)
- Keep off concrete floors (draws moisture)
Rust Prevention:
- Light oil coating on metal surfaces
- Silica gel packets in tool boxes
- VCI (vapor corrosion inhibitor) paper for long-term storage
- Store cutting edges protected
Organization Systems:
By Function:
- Electrical tools together
- Plumbing tools together
- Woodworking tools together
- Emergency/grab-and-go kit separate
By Location:
- Workshop (comprehensive collection)
- Vehicle (vehicle-specific plus basics)
- Emergency kit (compact, multi-purpose)
Accessibility:
- Emergency tools accessible without moving other items
- Labels and inventory lists
- Flashlight with tool storage
Maintenance Schedule:
Quarterly:
- Visual inspection of all tools
- Test operation of mechanical tools
- Check battery-powered tool batteries
- Verify supplies inventory
Annually:
- Deep cleaning and rust removal
- Sharpening cutting tools
- Lubrication of moving parts
- Replacement of worn items
- Battery replacement/refresh
Documentation:
- Inventory list of all tools
- Location map if stored in multiple places
- Instruction manuals for complex tools
- Calibration records if applicable
Related topics: Essential Survival Gear for Beginners | Off-Grid Living & Homesteading
Q7: What specialized tools should I learn to use now before emergencies make learning impossible?
Emergency situations demand competence, not experimentation. Learning to use specialized tools before you need them builds genuine capability.
Priority Skills to Develop:
Fire Starting:
Using ferrocerium rods, fire pistons, and friction methods requires practice. Don't wait for an emergency to learn. Build fires in various conditions—wet, windy, with limited materials.
Water Filtration:
Practice with your filter system. Understand cleaning, backflushing, and maintenance. Know signs of filter failure.
Chainsaw Operation:
Chainsaws are dangerous. Take a safety course, practice felling and bucking in controlled conditions, learn maintenance and sharpening.
Trauma Response:
First aid equipment without skills is useless. Take Stop the Bleed training. Practice tourniquet application. Learn wound packing.
Navigation:
Use map and compass without GPS. Practice in familiar areas before you need to navigate unfamiliar terrain.
Secondary Skills:
Vehicle Repair:
Change tires, jump start, basic repairs. Practice before roadside emergency requires it.
Radio Operation:
If you have two-way radios, practice family communication. If pursuing ham radio, study and get licensed.
Shelter Construction:
Set up your tent in daylight before nighttime emergency. Practice tarp configurations. Build debris shelters for practice.
Food Preservation:
Learn canning, dehydrating, smoking before you must preserve food. Mistakes during learning are wasteful; mistakes during crisis are dangerous.
Training Resources:
- Community classes (Red Cross first aid, chainsaw safety)
- YouTube tutorials (visual learning for techniques)
- Practice with family (builds shared competence)
- Mountain Ready blog guides
Related topics: Essential Survival Gear for Beginners | Emergency Medical & First Aid Supplies
Explore: Fire Making | Navigation Tools
Q8: What quality level should I target for emergency tools - professional grade, homeowner grade, or budget options?
Quality matters most for tools you depend on. A tiered approach allocates investment appropriately.
Professional Grade (Worth the Investment):
Primary Emergency Tools:
- Main multi-tool (carried daily or primary emergency use)
- Primary flashlight
- Main knife
- Chainsaw (if you'll use one)
- Trauma medical supplies
Why Professional Grade:
- Reliability when lives depend on it
- Longer lifespan (often lifetime)
- Better performance under stress
- Warranty and service
Homeowner Grade (Good Balance):
Regular Use Tools:
- General hand tools (hammers, screwdrivers, pliers)
- Power tools for occasional use
- General repair supplies
- Most workshop tools
Why Homeowner Grade:
- Adequate quality for periodic use
- Reasonable cost
- Sufficient durability for non-professional use
- Widely available and replaceable
Budget Options (Acceptable For):
Backup and Spare Items:
- Secondary flashlights
- Backup supplies
- Rarely used specialty tools
- Consumable items
High-Volume Items:
- Zip ties, tape, fasteners
- Basic hand tools for kit distribution
- Training and practice equipment
Brands Mountain Ready Recommends:
Professional Grade:
- SOG (knives, multi-tools, axes)
- Streamlight (flashlights)
- My Medic (first aid)
- North American Rescue (trauma supplies)
Quality Consumer:
Related topics: Essential Survival Gear for Beginners | Everyday Carry (EDC) Tools
Explore: Top Brands | SOG Knives & Tools
😷 Environmental, Respiratory & CBRN Protection Gear
😷 Environmental, Respiratory & CBRN Protection Gear
Q1: What respiratory protection do I need for wildfire smoke, pandemic situations, and chemical hazards?
Different threats require different protection levels. Understanding the hierarchy of respiratory protection helps you prepare appropriately.
Wildfire Smoke:
Threat: Particulate matter (PM2.5, PM10), carbon monoxide, various combustion products
Protection Required:
- Minimum: N95 masks (filter 95% of particles 0.3 microns and larger)
- Better: P100 respirators (filter 99.97% of particles)
- Air filtration: HEPA air purifiers for indoor spaces
Stock Recommendation: Minimum 10 N95 masks per family member per fire season, plus P100 respirator with replacement filters.
Pandemic/Biological:
Threat: Airborne pathogens (viruses, bacteria)
Protection Required:
- Minimum: N95/KN95 masks (properly fitted)
- Better: P100 respirators
- Best: Full-face respirators with appropriate filters
- Considerations: Eye protection (goggles or face shield) for complete protection
Stock Recommendation: 20+ N95/KN95 per family member, plus P100 respirator system.
Chemical Hazards:
Threat: Industrial accidents, tear gas, hazardous material spills
Protection Required:
- N95/P100 inadequate for chemical vapors
- Requires chemical-rated gas mask with appropriate filters
- Filter type must match specific threat
Stock Recommendation: MIRA Safety or equivalent civilian gas mask with multi-threat filters.
Read More: Best Chemical Filters for Maximum Protection and Choosing the Right Gas Mask Filter.
Related topics: Disaster-Specific Preparedness | Emergency Preparedness Kits & Bundles
Explore: Gas Masks | Gas Mask Filters | MIRA Safety
Q2: Are N95 masks sufficient for emergency preparedness or should I invest in P100 respirators or gas masks?
Each protection level has appropriate use cases. Building a layered approach provides flexibility without over-investing.
N95 Masks:
Protection Level: Filter 95% of airborne particles (0.3 microns and larger)
Appropriate For:
- Wildfire smoke (basic protection)
- Pandemic situations
- Dust and construction debris
- Basic respiratory protection
Limitations:
- No chemical/gas protection
- Not oil-resistant (N rating)
- Single-use disposable
- Fit matters significantly (facial hair, shape)
Cost: $1-3 per mask
P100 Respirators:
Protection Level: Filter 99.97% of airborne particles (same as HEPA)
Appropriate For:
- Extended wildfire smoke exposure
- Serious biological protection
- Asbestos, lead, mold remediation
- Oil-based particles (P rating)
Advantages Over N95:
- Higher filtration efficiency
- Replaceable filters (reusable body)
- Better seal and fit
- Oil-resistant option
Cost: $30-80 for respirator, $10-25 per filter pair
Protection Level: Depends on filter—can protect against chemical, biological, radiological, and nuclear threats
Appropriate For:
- Chemical exposure (industrial accidents, tear gas)
- Serious biological threats
- Radiological contamination
- CBRN scenarios
Advantages:
- Chemical vapor protection (N95/P100 cannot provide)
- Full-face protection (eyes included)
- Long-term use with filter changes
Cost: $150-400 for quality mask, $30-80 per filter
- N95 stockpile for everyday threats and disposable use
- P100 respirator for each family member for extended exposure
- Gas mask (MIRA Safety or equivalent) for chemical/CBRN scenarios
Related topics: Disaster-Specific Preparedness | Essential Survival Gear for Beginners
Explore: Gas Masks | MIRA Safety
Q3: What's the difference between dust masks, respirators, and CBRN-rated gas masks for civilian emergency use?
Understanding protection categories prevents dangerous misapplication. Each type serves specific purposes with distinct limitations.
Dust Masks (Filtering Facepieces):
Examples: Basic paper masks, surgical masks, N95/N99/N100 masks
Protection:
- Particles only (no gas/vapor protection)
- N95: 95% of particles ≥0.3 microns
- N99: 99% of particles
- N100: 99.97% of particles
Not Protected Against:
- Chemical vapors
- Gases
- Oil-based particles (unless P-rated)
- Poor fit areas leak
Cost: $0.50-$5 each
Respirators (Half-Face and Full-Face):
Examples: 3M half-face respirators, P100 cartridge respirators
Protection:
- Higher filtration efficiency than disposables
- Replaceable filters/cartridges
- Better face seal
- Various cartridges for different threats
Types:
- APR (Air Purifying Respirator): Filters ambient air
- PAPR (Powered Air Purifying): Fan-assisted airflow
Cost: $30-$200+ for respirator, filters additional
Examples: MIRA Safety CM-6M, Israeli civilian masks
Protection:
- Full-face coverage (eyes protected)
- Chemical vapor protection (with appropriate filter)
- Biological agent protection
- Radiological particle protection
- Nuclear fallout protection (particles)
Filter Types:
- Particulate filters (P100 equivalent)
- Chemical filters (organic vapors, acid gases)
- CBRN filters (comprehensive protection)
Limitations:
- Cannot protect against oxygen-deficient environments
- Filter capacity limited (exposure time)
- Requires proper fit and donning procedure
Cost: $150-$400+ for mask, $30-$80+ per filter
Read More: Filtering the Options Guide.
Related topics: Disaster-Specific Preparedness | Emergency Preparedness Kits & Bundles
Explore: Gas Masks | Gas Mask Filters
Q4: How do I prepare for air quality emergencies from wildfires, industrial accidents, or civil unrest tear gas?
Different air quality threats require different responses. Understanding each threat enables appropriate preparation.
Wildfire Smoke:
Primary Protection:
- N95/P100 masks when outdoors
- HEPA air filtration indoors
- Seal home (close windows, doors, fireplace dampers)
- Monitor air quality index (AQI)
Preparation:
- Stock 20+ masks per person for fire season
- HEPA air purifier (sized for primary room)
- Furnace filter upgrade to MERV 13+
- Door and window sealing materials
Industrial Accidents:
Chemical Spill/Release:
Standard masks don't protect against chemical vapors. You need:
- Gas mask with chemical-rated filters
- Shelter-in-place capability (seal room)
- Evacuation route away from contamination zone
Preparation:
- CBRN-rated gas mask for each family member
- Multiple filter sets
- Plastic sheeting and tape for room sealing
- Knowledge of local industrial hazard sources
Tear Gas (Civil Unrest):
Protection:
- Standard N95 masks provide minimal protection
- Gas mask with chemical filters needed for serious exposure
- Goggles for eye protection (swim goggles work)
Response:
- Move upwind and away from source
- Don't rub eyes (spreads irritant)
- Fresh air exposure dissipates effects
- Water rinse for skin (no oils/lotions which trap agent)
Preparation:
- Gas mask with riot/CS filter capability
- Sealed goggles
- Change of clothes (contaminated clothing continues exposure)
Read More: Best Chemical Filters for Protection.
Related topics: Personal Security & Situational Awareness | Disaster-Specific Preparedness
Explore: Gas Masks | MIRA Safety
Q5: What protective equipment should I stockpile for nuclear, biological, or chemical threats?
CBRN (Chemical, Biological, Radiological, Nuclear) preparation requires specialized equipment and knowledge. Most civilians can achieve reasonable protection with appropriate investment.
Respiratory Protection:
Gas Masks:
Quality CBRN-rated gas mask for each family member. MIRA Safety offers civilian-appropriate options meeting NATO specifications.
Filters:
CBRN filters provide comprehensive protection. Stock 3-6 filters per mask (each has limited exposure duration). Rotate stock as filters have shelf life even sealed (typically 10-20 years).
Backup: P100 respirators for particulate-only threats (biological, radiological fallout).
Body Protection:
HAZMAT Suits:
Tyvek suits provide basic protection against particles and light liquid splash. Not true CBRN protection but adequate for evacuation through contaminated areas.
Gloves: Nitrile gloves for basic protection. Butyl rubber gloves for serious chemical protection.
Boots/Overboots: Waterproof boots or disposable overboots to prevent foot contamination.
Tape: Duct tape for sealing suit edges to boots/gloves.
Shelter Protection:
Shelter-in-Place Supplies:
- Plastic sheeting (6 mil minimum)
- Duct tape
- Pre-selected interior room (above ground for chemical, below for nuclear)
- Water supply for sheltering period
- Food supplies
Detection:
Potassium Iodide (KI): Thyroid protection against radioactive iodine. Follow dosing instructions carefully.
Radiation Detector: Dosimeter or Geiger counter for nuclear scenarios.
Training:
Equipment without knowledge is dangerous. Learn:
- Proper mask donning and fit testing
- Decontamination procedures
- Shelter-in-place vs. evacuation decision-making
Related topics: Disaster-Specific Preparedness | Emergency Shelter & Protection Gear
Explore: HAZMAT Suits & Gear | MIRA Safety
Q6: Are civilian gas masks and filters actually effective or just security theater for worried preppers?
Quality civilian gas masks are genuinely effective when properly selected, fitted, and used. However, limitations exist that must be understood.
What Civilian Gas Masks CAN Do:
Chemical Protection:
CBRN-rated masks with appropriate filters protect against chemical warfare agents, industrial chemicals, and riot control agents. Military and professional first responders use essentially identical technology.
Biological Protection:
Properly fitted masks with P100 or CBRN filters effectively block biological agents. This is proven technology used in healthcare and biological research settings.
Radiological/Nuclear:
Masks protect against inhaling radioactive particles. They don't protect against radiation itself (gamma rays pass through), but preventing inhalation is the primary protection need for fallout scenarios.
What Civilian Gas Masks CANNOT Do:
Oxygen-Deficient Environments:
Air-purifying respirators only filter air—they don't provide oxygen. In confined spaces with depleted oxygen, masks won't save you.
Unlimited Duration:
Filters have capacity limits. Once saturated, protection fails. Know your filter's rated duration and have spares.
Universal Protection:
No single filter protects against everything. Match filter to threat. Using the wrong filter provides false confidence without protection.
Poor Fit:
Gaps in seal allow contaminated air to bypass the filter entirely. Facial hair, improper size, and damaged masks compromise protection completely.
Quality vs. Junk:
Difference between effective equipment and security theater is quality:
Effective (MIRA Safety, Avon, MSA):
- Meets military/professional standards (NATO, NIOSH)
- Proper materials and construction
- Tested and certified
- Appropriate filter options
Security Theater:
- Unknown manufacturers
- No certifications
- Cheap materials
- May not seal properly
Bottom Line: Quality civilian gas masks are real protection, not theater. Cheap knockoffs are security theater. Invest in quality or don't bother.
Related topics: Essential Survival Gear for Beginners | Disaster-Specific Preparedness
Explore: MIRA Safety | Gas Masks
Q7: How long do gas mask filters last in storage and how many should I stockpile per family member?
Understanding filter shelf life and usage duration enables appropriate stockpiling without waste.
Sealed Storage Life:
Quality CBRN Filters:
- Typically 10-20 years sealed (check manufacturer specifications)
- MIRA Safety filters rated for 20 years sealed storage
- Store in original packaging in cool, dry location
- Avoid physical damage to filter housing
Standard Chemical Cartridges:
- 5-10 years typical sealed shelf life
- More sensitive to storage conditions
- Organic vapor cartridges particularly sensitive
Usage Duration (Once Opened):
CBRN Filters:
- Rated for specific exposure times (typically 6-24 hours continuous use)
- Chemical exposure depletes activated carbon
- Biological/particulate loading reduces airflow
- Replace when breathing becomes difficult
Standard Filters:
- Organic vapor cartridges: 8-40 hours depending on concentration
- Particulate filters: Until breathing resistance increases
- Combination cartridges: Limited by component with shortest life
Stockpile Recommendations:
Per Family Member:
- Minimum: Gas mask + 3 filters
- Recommended: Gas mask + 6 filters
- Extended Preparedness: Gas mask + 12 filters
Rationale:
- Multiple filters for extended scenarios
- Backup if filter damaged or contaminated
- Different filter types for different threats (if applicable)
- Buffer for filter failures
Rotation Strategy:
For 20-year shelf life filters, minimal rotation needed. Check:
- Packaging integrity annually
- Replace damaged seals immediately
- Track purchase dates
- Replace approaching expiration
N95/P100 Stockpile:
More turnover expected for disposable masks:
- Stock 20+ N95 per person for general emergencies
- Rotate through normal use if applicable
- Check elastic integrity annually
Related topics: Emergency Preparedness Kits & Bundles | Disaster-Specific Preparedness
Explore: Gas Mask Filters | MIRA Safety
Q8: What environmental protection gear is realistic and practical for civilians versus military-grade CBRN equipment?
Civilians can achieve meaningful protection without military-grade equipment. Understanding the practical tier of protection helps focus investment appropriately.
Realistic Civilian Protection:
Respiratory (Available at Mountain Ready):
- MIRA Safety CM-6M or equivalent civilian gas mask
- NATO-standard CBRN filters
- N95/P100 masks for lesser threats
This provides genuine protection against chemical, biological, and radiological inhalation threats—the same technology used by military and professional first responders.
Body Protection:
- Tyvek suits for particle and light liquid protection
- Nitrile gloves (doubled for chemical protection)
- Rubber boots or disposable overboots
- Tape for seal completion
This prevents skin contact and contamination—adequate for evacuation through contaminated areas or short-term exposure.
Shelter:
- Plastic sheeting and tape for room sealing
- Pre-identified shelter-in-place room
- Water and supplies for sheltering period
Effective for most civilian CBRN scenarios where evacuation isn't immediate.
Military-Grade Beyond Civilian Need:
Full Encapsulating Suits:
Level A HAZMAT suits provide complete environmental isolation but require training, support equipment, and are impractical for civilian storage/use.
Self-Contained Breathing Apparatus:
SCBA provides independent air supply but is expensive, requires maintenance, and has limited duration. Civilian scenarios rarely require this level.
Collective Protection:
Military-grade CBRN filtered shelters and vehicles are beyond civilian scope.
Practical Investment Hierarchy:
- N95/P100 masks for common threats (smoke, pandemic)
- Gas mask with filters for chemical/serious biological
- Basic protective clothing for contamination prevention
- Shelter-in-place supplies for environmental protection
- Potassium iodide for nuclear scenarios
- Detection equipment if budget allows
Read More: MIRA Safety Emergency Accessories.
Related topics: Disaster-Specific Preparedness | Emergency Preparedness Kits & Bundles
Explore: HAZMAT Suits & Gear | MIRA Safety | Emergency Gear & PPE